“Where’s (Baby) Waldo?”
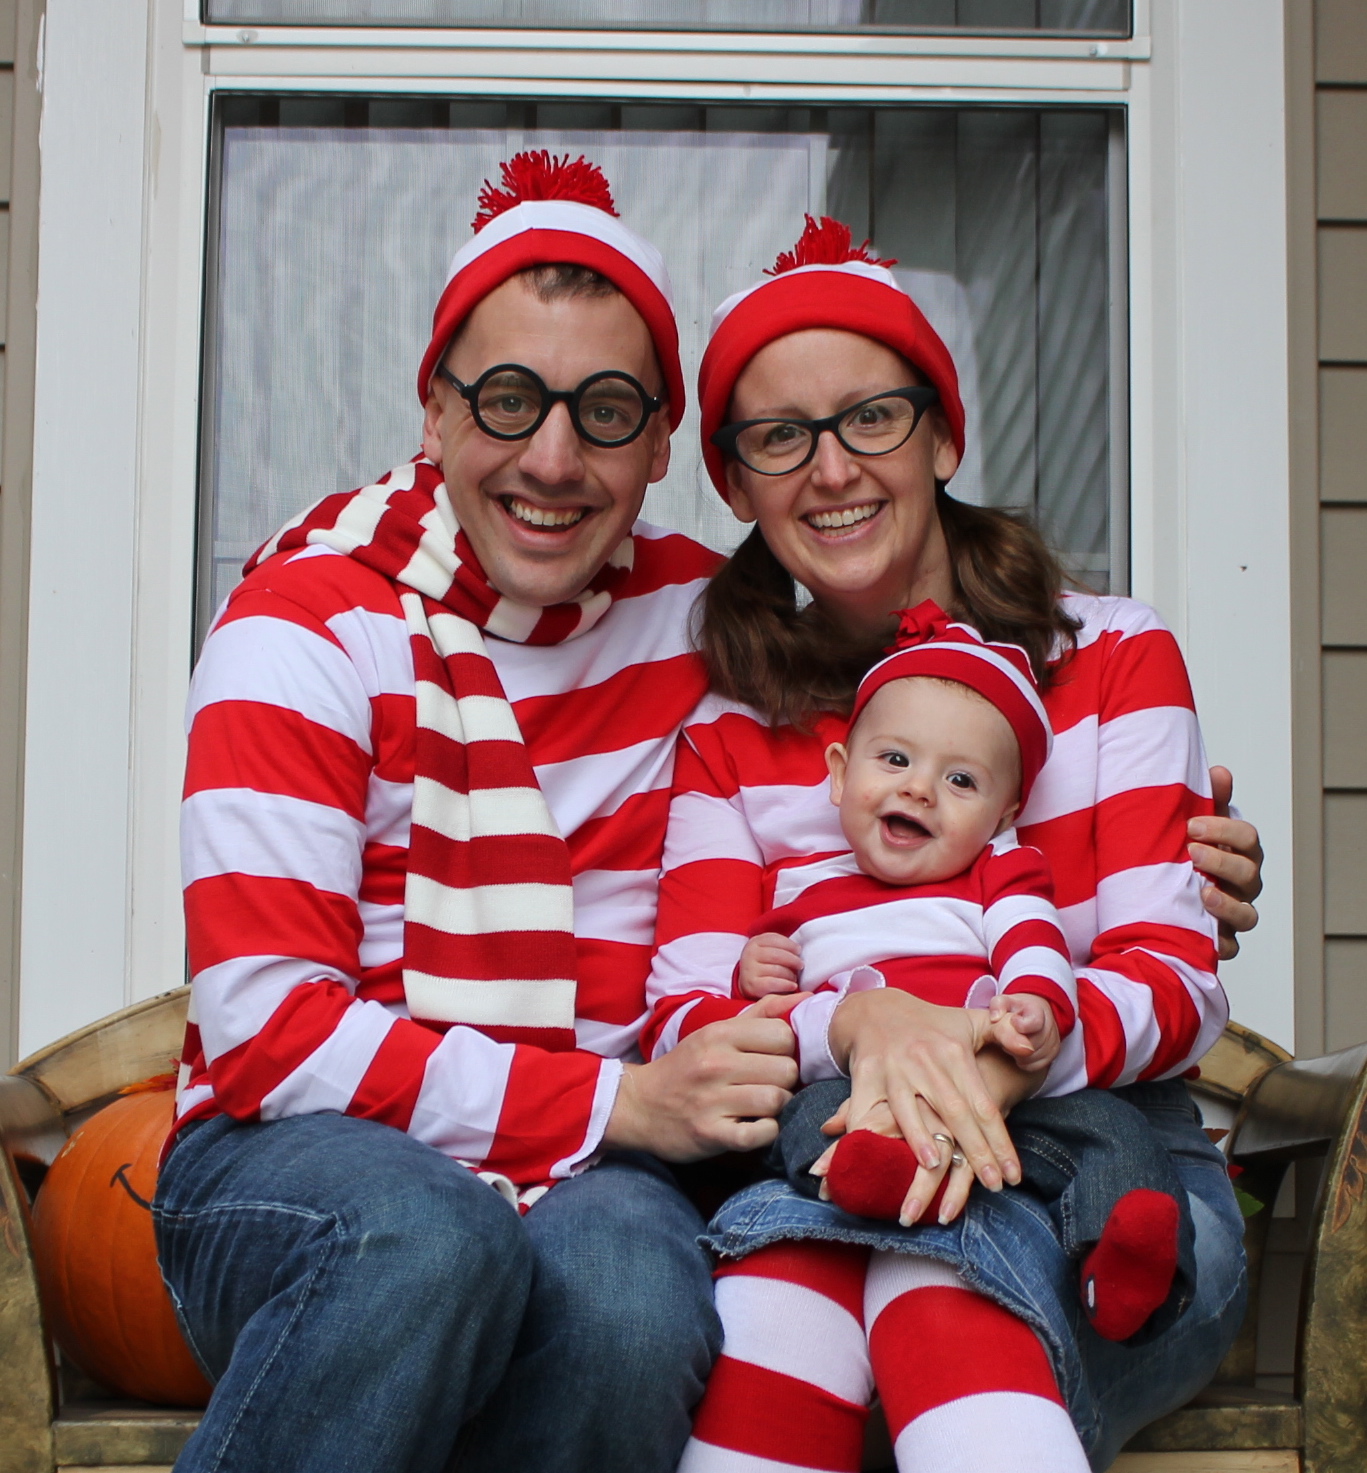
My husband and I had to got to go Halloween Party last week. Since I’m not overly confident in my abilities to sew clothing (I’ll make a curtain or slipcover any day, but ask me to do a shirt…no way!), we decided the quicker and easier solution was to order costumes. My husband has an uncanny similarity to Waldo (yes, that Waldo) and wanted to be Waldo and Wenda together (by the way, did you know there was a Wenda? Really…she’s not just made up for Halloween…Look!!)

I very reluctantly went along with it (besides, I had other crafts occupying my nap times), but who knew we’d end up looking SO darn cute!

Since I had more ideas than actual progress on our baby’s Halloween costume, I thought it would be cute if we had a matching Baby Waldo to complete our set! Surely a Baby Waldo would be easy enough to make! I was originally going to simply sew red stripes onto a white onesie, but decided I was up for a greater challenge.
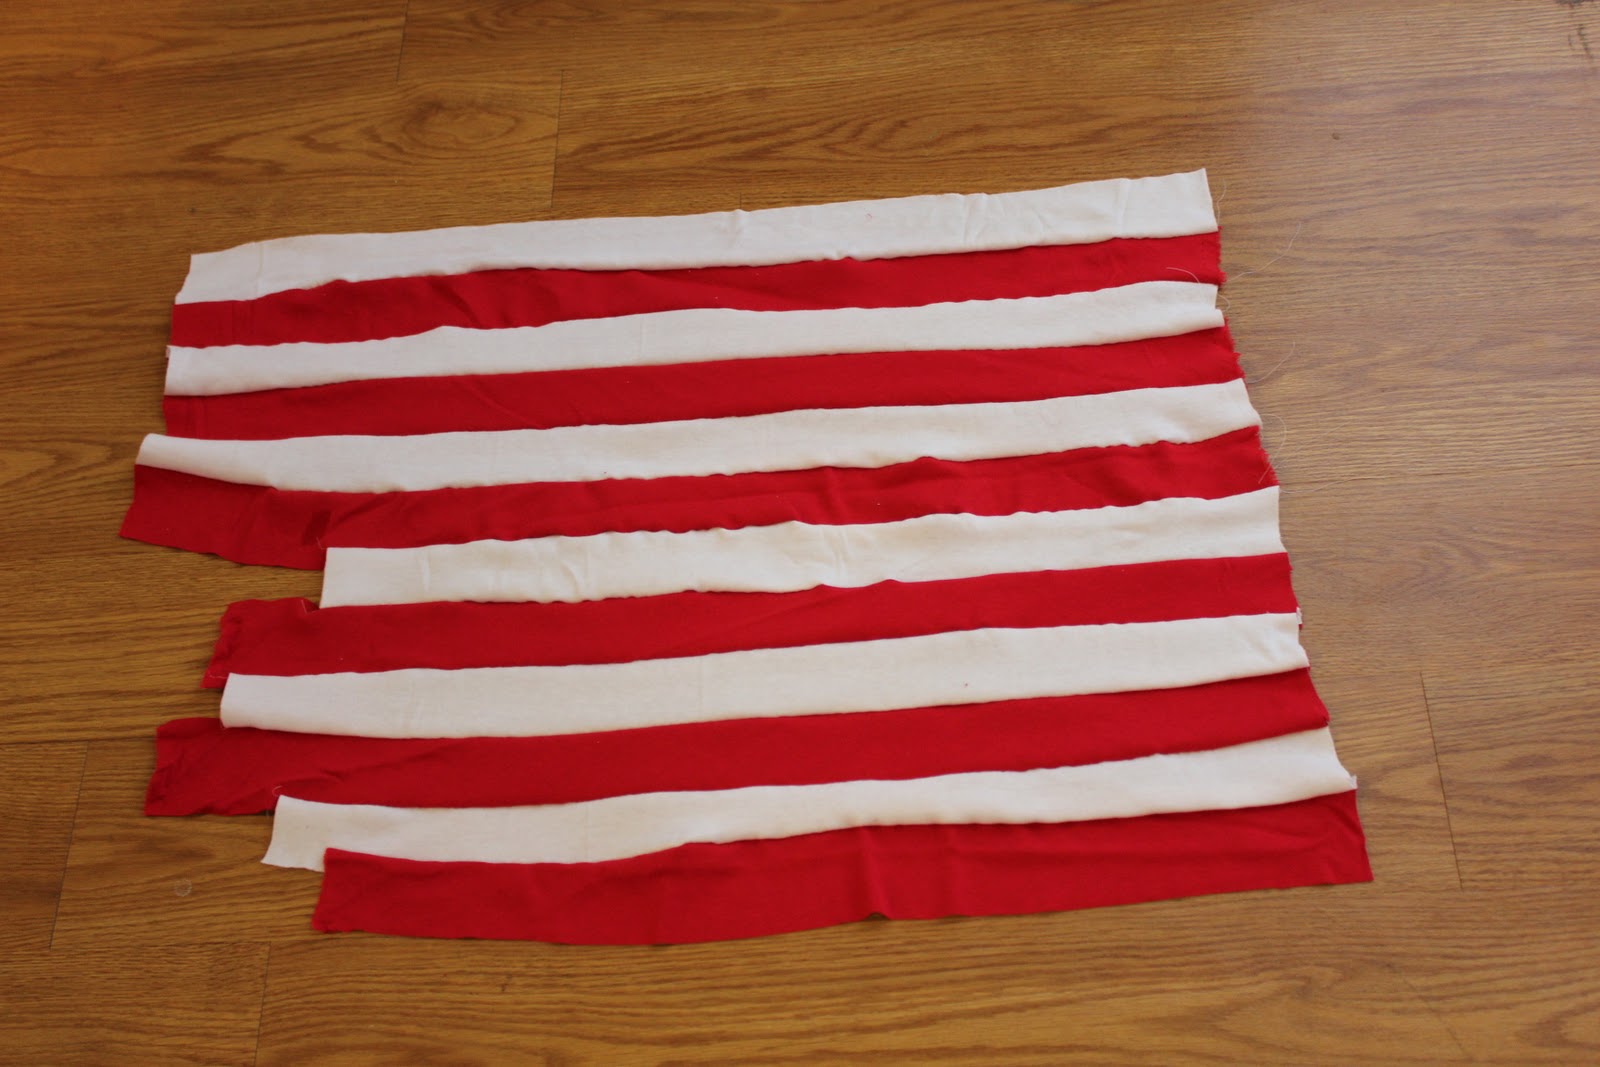
I started here, with 3″ stripes of red and white knit.

I sewed them together to make my own “striped fabric.”
I then used the free onsie pattern from here. I ironed out my fabric to shrink it back up, and then cut out all the pieces. I also used one of my son’s hats as a pattern for his waldo hat and used this tutorial to assemble it.
Want to save this post?

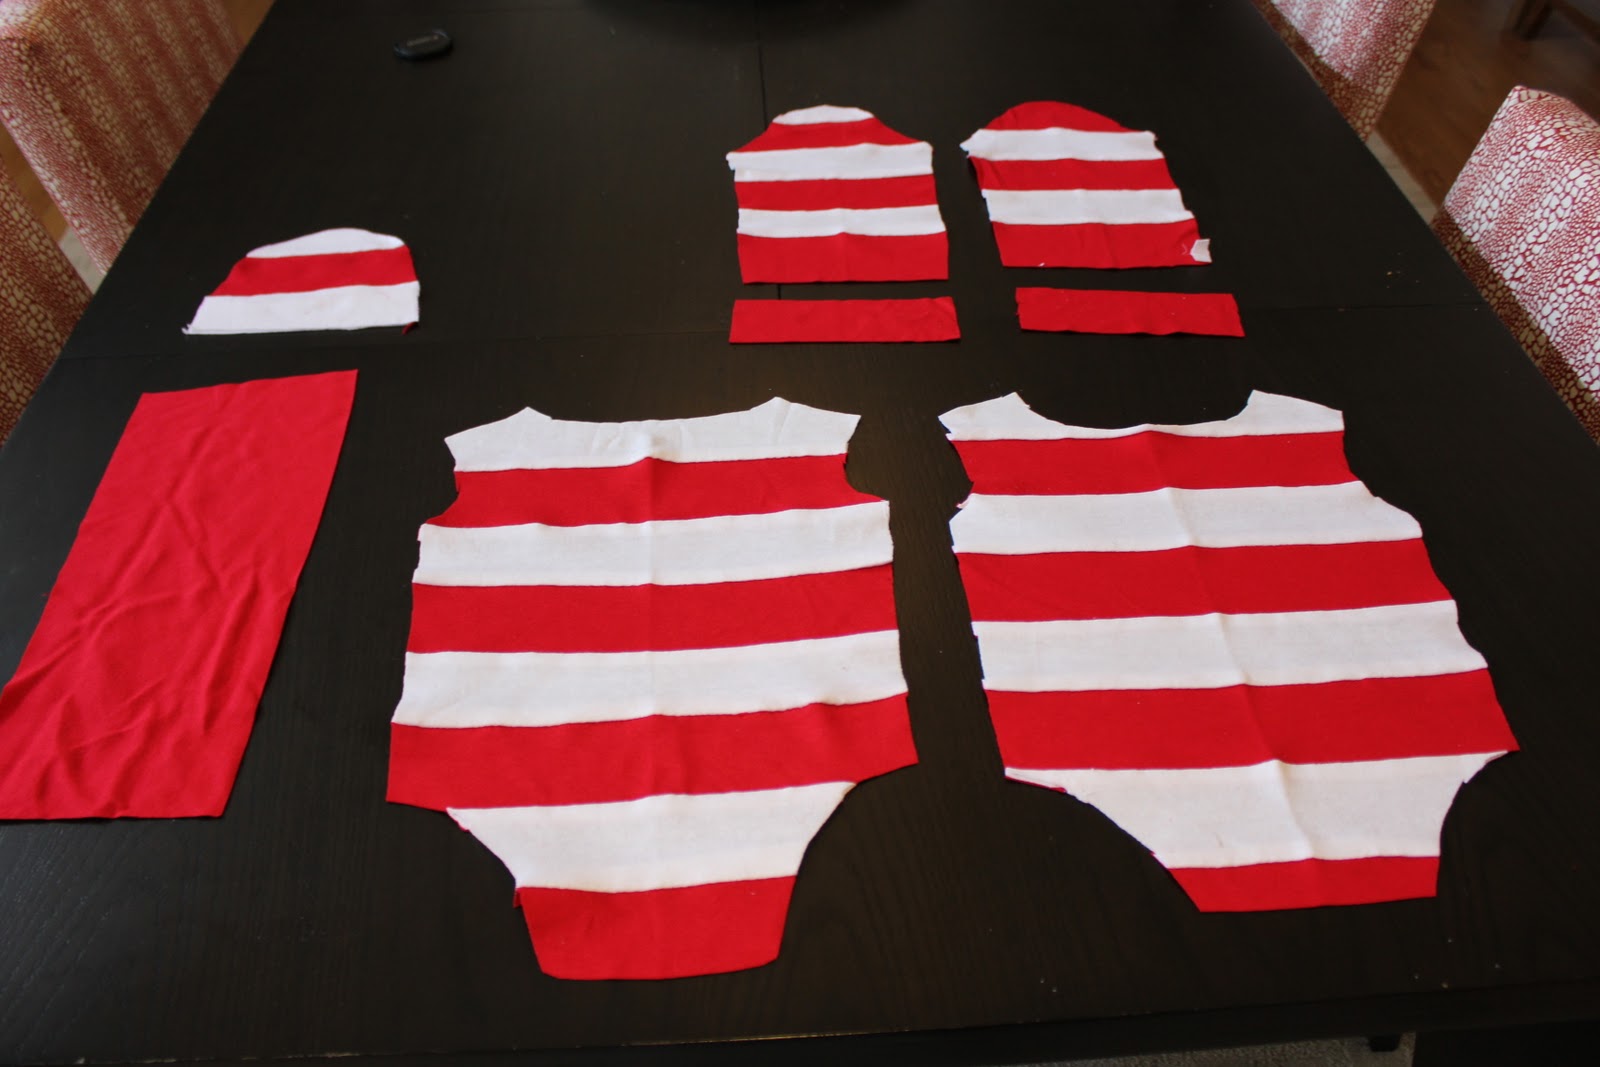
Then I had a problem…I had never assembled a shirt before, much less a onesie. I pulled out an old Simplicity pattern I had that contained detailed instructions on how to assemble a onesie. I had to figure out the neck and leg edging on my own, BUT, I figured it out…and ended up here:

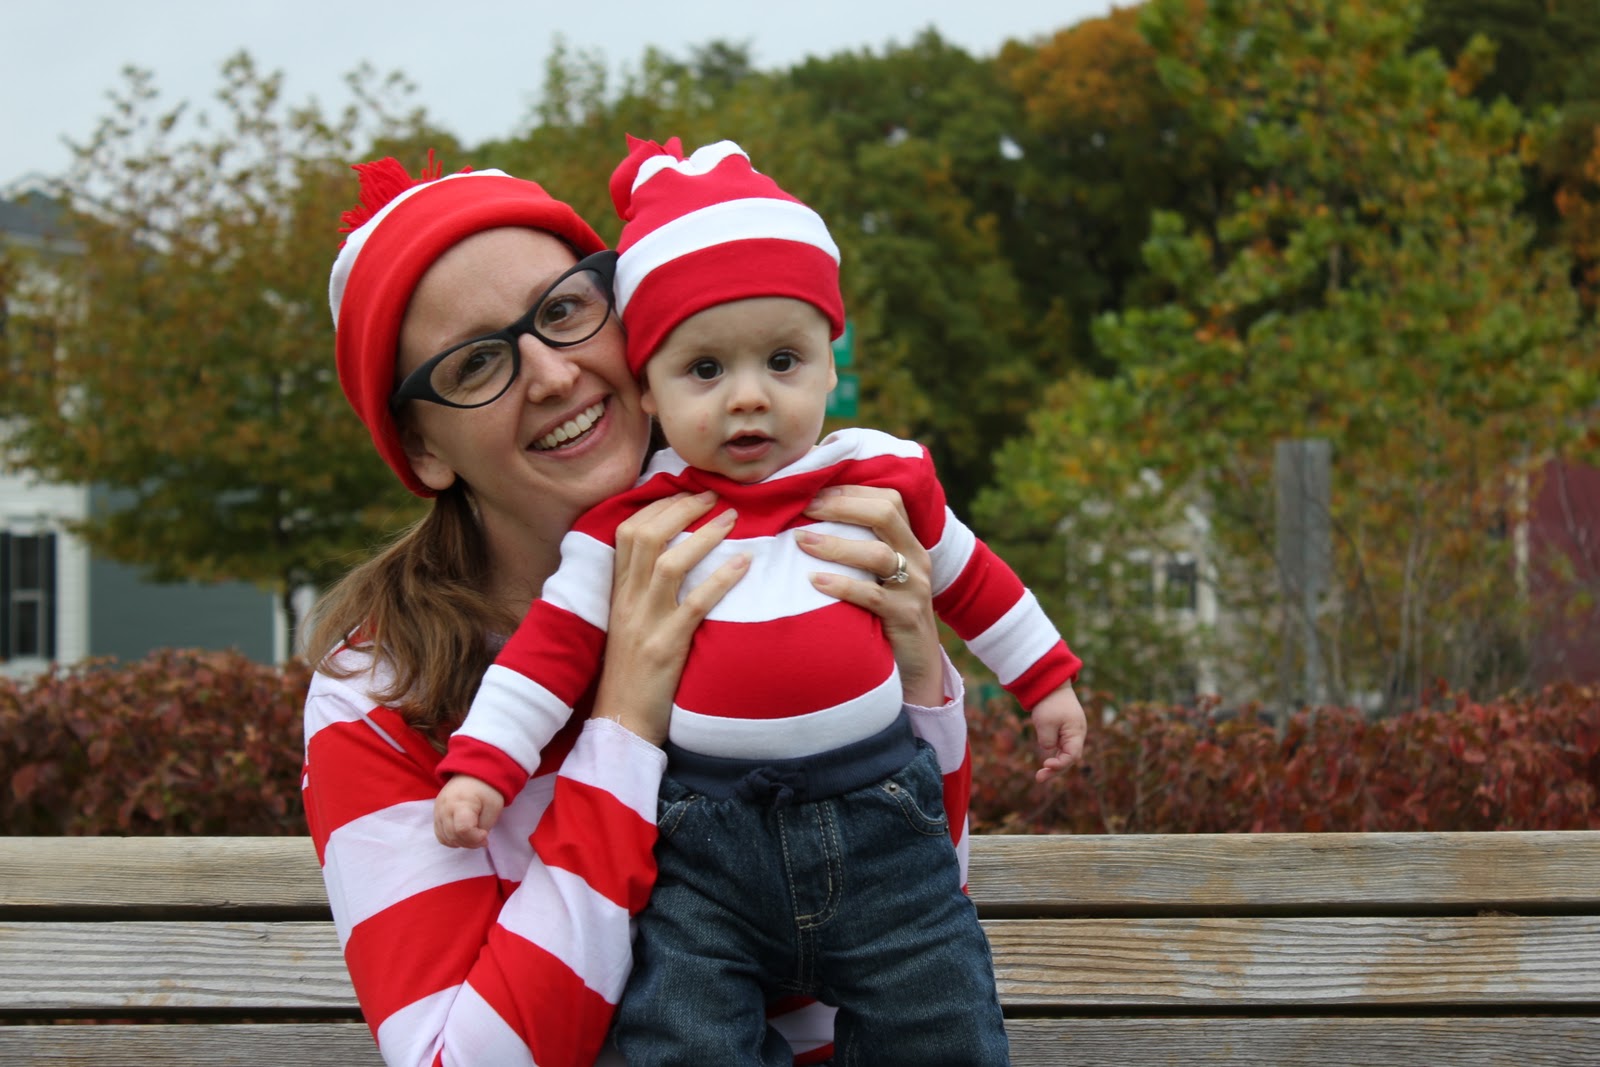
Eeeeekk! And what’s even cuter than an adorable Waldo onsie? An adorable baby in the adorable onesie! Here’s our Baby Waldo to complete our set!

Isn’t he just the cutest little Waldo you ever did see?
Happy Halloween from the Waldos!
Megan


18 Comments on ““Where’s (Baby) Waldo?””
I love it! I found you from Tater tots.
Ohhh..so cute! Like your blog concept. Found you via Tatertots and Jello.
I have a custom blog button giveaway going on now at my blog if you're interested in checking it out!
Melanie
http://bearrabbitbear.blogspot.com/2011/10/things-ive-done-thursday-and-blog.html
That Waldo guy looks pretty lost 🙂
so cute!! =) i love the family costume. and that little one especially!
i think i'll be stealing that onesie pattern! thanks for sharing.
How cute is that!?!?! And look at that big baby grin. Precious!
oh my gosh, you did a great job!!
Can you just sell me the baby Waldo shirt An hat?
Oh that is just the cutest thing! the best family costume ive seen. Well done!
I want a “Where’s Waldo” baby costume!! Sure wish I could sew!! 😉
Hi Debbie!
Baby Waldo is just the cutest, isn’t he? That little guy is now 4 years old, what I’d give to squeeze him back into that cute onesie, lol!
If you don’t sew, maybe paint red stripes onto a white onesie or shirt with fabric paint?
Thanks for commenting!
Megan
Pingback: 23 Genius Family Costume Themes | Live Like You Are Rich
Pingback: Siete ideas de disfraces de Halloween para toda la familia: un noche temática del horror - Mi Mundo Philips
Pingback: Family Halloween costumes that win - Wably.com
Pingback: Amazing Family Halloween Costumes - Girl Loves Glam
I know this is old, but I am wondering if you made the adult shirts too or where you bought them. I have been looking all over. 🙂
Hi Jen!
Pretty sure we bought ours’ on Amazon; and by the look of it, the selection is pretty extensive: http://amzn.to/2xLs3wr
Good luck!
Megan
Pingback: 10 Halloween Costumes for Familes that are Freakily Fantastic! - Looks Like Happy
How cute is that!?!?! And look at that big baby grin. Precious!