Magnetic Menu Board – Part 1
Happy Monday Friends! I am pretty excited about what I have to share with you this week! Here’s a little fun fact about me: I am pretty “in to” meal planning. Geeky, I know! But not only does it keep my grocery list (and bill!) in check, but when dinner time rolls around, I like having a game plan ready for me. If I’m stuck facing a refrigerator or pantry saying “What should I make for dinner tonight?,” we usually end up calling for pizza!
Until now, I have been using a pretty basic, pretty functional system:

Each week, I pull out my “collection” of tried-and-true recipes, which are organized in clear-paged books into the categories of “Favorites,” “Classics,” “To Try,” and “Desserts.” I page through the books and identify what sounds good and/or what will work with items we have on hand! I then assign a meal to each day of the week on our little green wipe board, making an effort to vary our sources of protein and carbohydrates across the week. Once my meals are identified, I assemble our grocery list and set off for the store. I actually stick to my meal plan most of the time!
Then…a while back, I came across this picture on Pinterest:
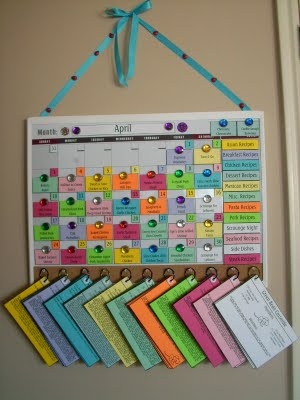
I was absolutely smitten with this menu board concept (and not just because I am allured by all things labeled and color-coded!) Although my meal-planning system was working, my recipes were in major need of updating and organizing…and despite having dozens of recipes, I was often making the same things over and over and over again. This menu board concept allowed me to plan a whole month at once (major time saver!), ensured that I made a different meal each night…AND it looked super pretty and organized with all the labels and colors (very important!)! Although RobbyGurl has a pretty awesome product here (and she even sells them!), I really wanted to give the menu board a go myself…yeah, I’m kinda stubborn and controlling that way! I really loved her concept, but there were a few things I wanted to customize in order make the final product more specific and functional for my needs!
I gave this project a lot of thought, and it took me a while to identify a system that would truly work for me. After a lot of thinking, organizing and sorting, putting it away for a while, pulling it back out, and thinking some more….here is how my menu board turned out!

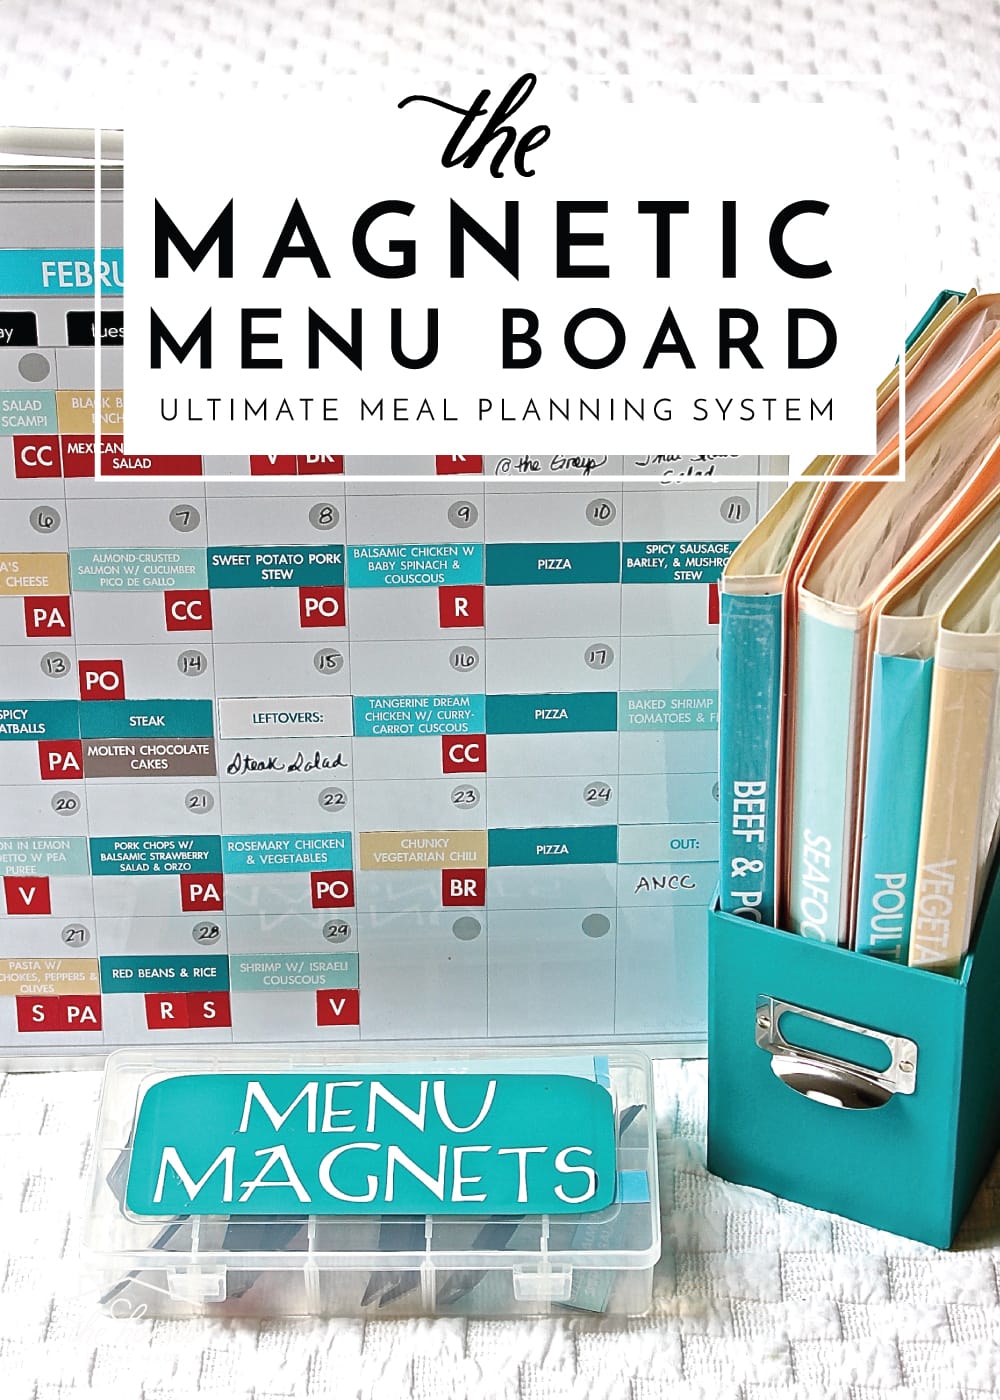
Today, I am going to show you how my menu board works. You can now also see how to make it yourself and get the editable/changeble templates!
Are you ready to see how this menu board works?
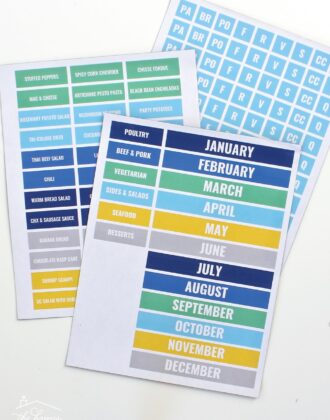
At the start of the month, I clear the magnetic calendar, put up the correct month at the top, and write in the dates with a dry-erase marker.

I start our monthly meal-planning by looking at our family calendar and identifying parties, outings, or other meal-related commitments we having coming up. I designate these days with the “OUT:” label. I specifically designed my labels to be slim enough that I can hand-write in where we will be going when we are eating “out.”

I then assign meals to the rest of the days we are home, using my “meal magnets.” As I said before, I make a specific point to vary our protein sources across the week, ensuring that we have at least 1 vegetarian and 1 seafood meal each week. (The color-coding system I employed here is organized by protein, so I simply make sure I have all my colors represented each week!).

Then, I add my red labels, which are all “sides and salads.” Some of my red labels are actually recipes, and I add those where appropriate. However, most of my red labels are a bunch of “code” letters!

Here are what my “code” letters stand for!
Want to save this post?

Like our protein, I also like to make sure we get a variety of whole grains through the week. I add my little red letters to each meal, so when I am both prepping my shopping list and the actual meal, I know exactly what I need!
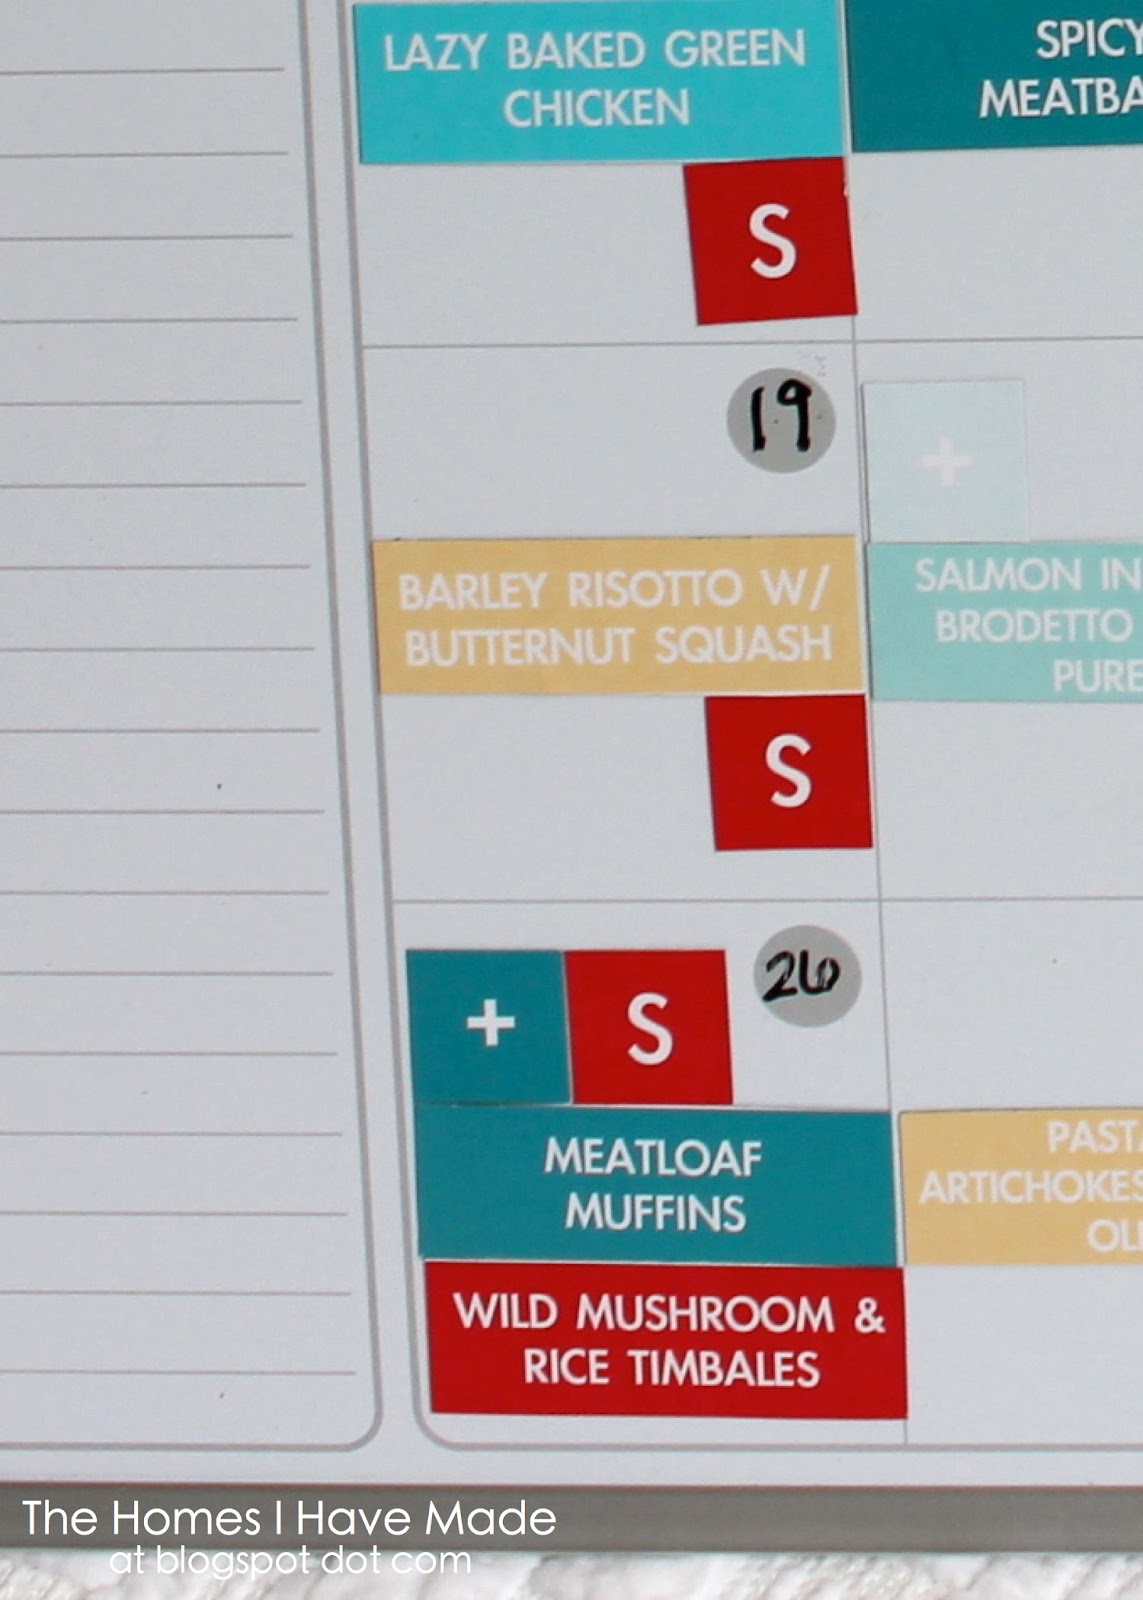
Are you still following me? In the picture above…on February 19th, we will be having Barley Risotto with Salad (S) and on February 26th, we’ll be having Meatloaf Muffins with both Wild Rice Timbales and Salad (S)! Just like with the color-coded protein labels, these red labels allow me to quickly assess if we are getting too much of one thing and not enough of another!
There are a few other fun features I added to my meal-planning system to really make this menu board versatile, flexible, and perfectly tailored to my needs!
First up, is this symbol!

I very often double recipes (whenever the recipe lends itself to freezing!) to save time cooking down the road. To remind myself to buy extra ingredients and/or make the full recipe, I add these + labels on the appropriate day.

Since I often cook extra and therefore have meals in the freezer, we eat “leftovers” at least once a week. So just like the “OUT:” label, I can add the “LEFTOVER:” label and hand-write in what that meal will be!

Lastly, I created the “NEW:” label. One of my concerns with this type of meal-planning system was that we would eat the same recipes over and over because they were the ones labeled and on the board. What about all those recipes on my Pin Boards, in my email, and in all those cookbooks on my shelves? To make sure we keep our rotation fresh, each month we have 1-2 “new” recipe nights. Like with the “OUT:” and “LEFTOVER:” labels, I write in what the actual recipe is below the label!
And what happens if we really love a recipe and want it to become part of the regular rotation? I printed a bunch of blank labels that I can hand-write on so I don’t have to run back to the computer every time we find a good new recipe!

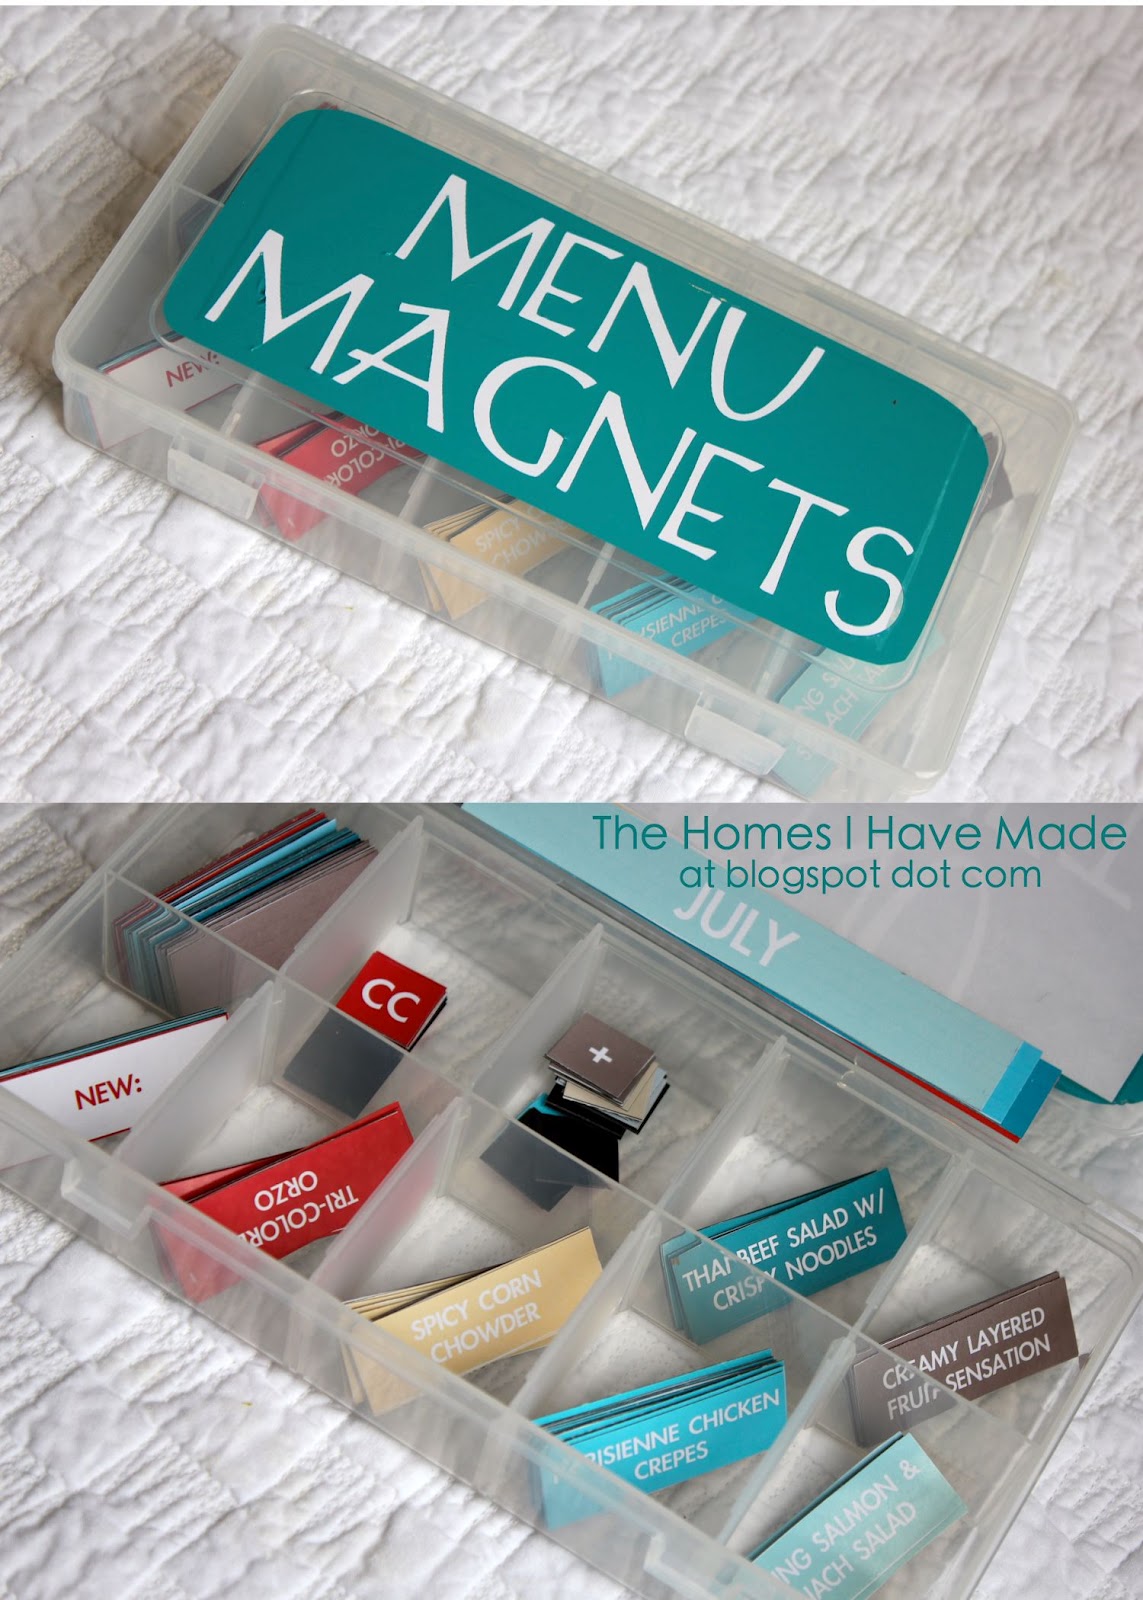
To organize and store all my magnets when they are not in use (because I have a lot more than 31 recipes!), I bought a simple craft box that can tuck in behind the menu board!
So…I’ve showed you how I plan my meals for the month and how my complicated creative label system works! But what about the actual recipes? Where are those?

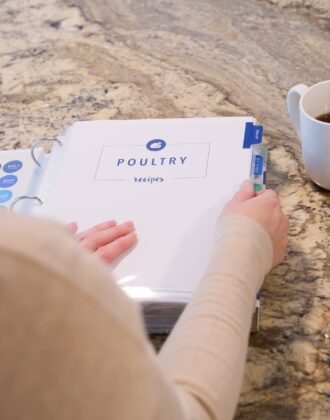
I really loved how RobbyGurl has all the recipes color coded with the menu labels and how streamlined and accessible they are right under the board. However, I was NOT up for re-formatting all my recipes – lol! My books with clear cellophane pages (from the Y100 Store in Okinawa!) were working really, really well for me…so I kept that system! I did sort, purge, and re-organize my recipes (more on that in my next post), and made corresponding spines to match my magnets. Now, when I see that there is a yellow recipe on the board….I reach for my yellow book of recipes. Easy!
I keep our recipe books contained in a magazine filer (some have to be stored backwards so they’ll fit!). The calendar, file box, and magnet box all fit nicely on my counter…in plain view, but out of the way!

I’ve been using my menu board for about a week or so now, and I have to say I am just thrilled with its functionality. It may seem complicated, but it has all the features that I need to make it truly usable for our family!
Megan

67 Comments on “Magnetic Menu Board – Part 1”
Featuring you tomorrow during Sticker Time! You did an amazing job!
This is amazing! I've been looking for something functional, but not to fluffy looking. (I'm just not a fluffy person) Thanks for sharing!
OMG!!! Thank you so much. I can't wait to start mine. My goal is to have it done by the end of the month:) Hoping to do one for our everyday things too:)
Amazing…gonna need to do this! would love for you to link up to our "Uncommonly Yours" link party! 🙂
http://www.uncommondesignsonline.com
This is amazing. I just pinned you on my Organization Board http://pinterest.com/jbwalker14/organization . Thanks so much for the inspiration. I love how clean it looks and you have inspired me to organize my recipes better!! Thanks again–hope the pin brings you new readers and followers.
This is so absolutely awesome!! I can't wait to copy you! I just featured your idea on my blog and I've become a follower of your awesome blog. Thanks!! 🙂
This is so great! Just pinned it!
This is amazing, such great organisation!
Wow I am so impressed….I'm going to check out how you made it right now……I'd like to invite you to share this@CountryMommaCooks Link & Greet party Friday@6 pm ct-Sunday midnight…have a great weekend:)
I am BEYOND impressed with this pretty, fun and practical meal planning system. Seriously, major high fives to you! I would love to feature this as an upcoming "reader space" over at iheartorganizing.blogspot.com.
If you are interested, shoot me an email with the photos attached and let me know. I think my readers would fall head over heals in love with your system just like I have.
[email protected]
xoxo!
Jen
Great ideas, thanks for sharing. I can see why you had to do it a bit at a time, that's a lot of work represented so neat and tidy. And I'll bet it would work well for other applications, like housework, etc.
This is an excellent system. You did a fabulous job explaining and love the tutorials. I definitely want to give your idea a try. Thank you so much!!!
This is excellent! I saw that other one too and thought it was great, but also thought I would want to change things too! I'm pinning your version for inspiration when i finally get to my own, but mine has to be worked into my current whole family calendar.
Wow! This is terrific! I've been thinking of trying to come up with one that I can use on my current magnetic calendar on the fridge and this would be great. Thanks so much for sharing!
I've seen tons of meal planning options and have never really been a big fan because they always seem like more work than they're worth… BUT, THIS ONE IS AMAZING! It's clean, sleek, and well executed… not to mention, easy to use! NICE JOB! Thanks for sharing at IHeart Organizing!!!
I found that same picture on Pinterest, but this looks a lot simpler to do! I pinned this, thanks for the great idea!
Megan
Thank you so much. I absolutely love your idea. I do a monthly menu calendar and this is so much more creative and cute. I can't wait to make this! THANK YOU!!!
This is AMAZING! I saw you featured on I♥Organizing and am totally blown away. I'll definitely be subscribing to your blog, because this is right up my alley. My only question is, how do you do a monthly meal plan NOT knowing what will be on sale from week to week?
YOU GO GIRL!
I will try to follow in your foot steps!
I've always thought menu planning sounded like a good idea but could never find a system that was for me. I think I've found it! I love that it's magnetized so I can easily change things around if the planned dinner doesn't get made (pizza night, etc.). I also love, love, LOVE your recipe binders!!! I've been wanting to do something with my recipes and I love the look of your binders! Can't wait to check out the tutorial & templates! Thank you SO much for sharing this on iheartorganizing!!!
I just found your blog through I heart organizing…I saw that you are military…we just moved to the DC area and I totally get what you mean about making a sterile place a home…working on that now…my fil retired from Quantico…:) my in-laws are in Fredericksburg now 🙂
Thia is so AWESOME!I love, love, love it! Than you for sharing your talents with us. I want to start right away. You totally inspired me! Where did you find the magnets?
this looks amazing I would love to try it I always seem to have such great plans and never seem to put them into action, hopefully this will be the first
Love the board but what caught my eye was dinner @ ANCC is that Army Navy Country Club? I'm a Navy wife and when we were at the Pentagon and on the hill and my son and I were there at the pool almost every day. I have such good memories of that place.
Yes, ANCC does stand for Army Navy CC 🙂 We aren't members but attend a few functions every now and then with family who live in the area!
I came to this via I Heart Organizing and must say that this is simply brillant! I am beginning my recipe purge tonight. Thank you for the motivation I was looking for to get started!
Melisa 🙂
Thanks so much for your post and directions! I made mine yesterday. You can see it here:
http://www.theflemingsnine.blogspot.com/2012/04/magnetic-menu-planner.html I just love how it turned out!!!
I found this through Pinterest and i <3 organizing. I've been busy thinking about how to pull together a magnetic system, but wanted it to be CUTE! This is so perfect—you have made my day!!! Thank you so much for streamlining the system and making it so do-able!! Love,love,love it!! Getting started on it right now!!!!
OMG!!!!!! SO glad I found this on Pinterest! I have been wanting to do this for a while and bought the magnet paper about a month ago, but I needed to wrap my head around it because my daughter has food intolerance's and we really have to watch what we eat and how often. This really helped with the small "V" and other letters under the main course. LOVE it! Thank you for posting!
~Angela
I am having an organizational orgasm! I have been struggling with coming up with a "system" for meal planning and for menu organization. Thank you! and Thank you Pinterest!
LOL! I think this is the best comment I have ever received! Glad you like it 😉
I LOVE IT. I am a grandmother, nanny, cook, cleaning lady, chauffeur, and manager of our household. I have the calendar you used for your project and was posting meals on it using daily Post-its This is so much more convenient, thank you for the templates… I love the magnet idea. (why didn't I think of that?) My recipes are more or less organized but I am going to put them in notebooks like you have done. Great idea…