Owl-Themed “Little Boy” Room {Bedroom Reveal}
I’m back today with another big room reveal that’s been a long, long time coming: Henry’s owl-themed “little boy” room!

Why a long time coming? Well, this room has actually been done for a while…I just felt a little silly posting owl stuff in the middle of the Halloween/Thanksgiving/Christmas decorating marathon.
And why “little boy” room and not a “big boy” room? We’re calling this a “little boy” room because it’s not quite a nursery, but it’s not quite a “big boy” room either. Because this room will likely get a full-on makeover if and when another baby joins our family (no, no news here), I forced challenged myself to use all of Henry’s owl stuff (from his nursery in our last house), but give it a slightly more grown up feel. The real kicker: I told myself I couldn’t spend any money giving this room a boost.
Well…I did spend some $$, but not much! Let me show you everything I did to update Henry’s owl nursery to this fun new space!
This is where we left off..way back in um, August (yikes!). I showed you how I updated the crib skirt so that it fit better…

…and how I turned his un-used crib bumpers into pleated window valences.

Behind the crib, I swapped out his adorable baby block quilt for this really fun and fresh display of wall decals. I did these all myself and will have the tutorial up for you soon so you can see how I did it! (All the vinyl was one of the few things I did buy for this “new” room!).

Next to the crib, I hung this really fun frame full of (fake) polaroid pictures made using all supplies I had on hand. I have a hard time putting pictures of the little guy in frames because he changes SO rapidly, and they always feel so out of date to me. With these simple photos, I can print and swap pretty frequently.

All together, these elements create a fun and fresh feel as you walk in the door!

His hutch didn’t get too many updates from his old nursery. Pretty much everything is exactly the same except the baskets up on top.

I swapped out the basket liners for some crisp navy polka dot ribbon attached around the rim. The ribbon nods to the navy dotted fabric used throughout the room!

Want to save this post?
Floor space is a precious commodity in this room (both because of its size and because of the daily dance parties we have here!), so using the coat rack to hang his laundry sack and towel wasn’t cutting it. I didn’t want to loose the function of the hooks, and since I was trying desperately not to buy anything for this room, the coat rack got dis-assembled and the hooks were screwed right to the wall!

I’ve saved the best for last! The main focal point of the room is the gallery wall that greets you as you walk in the door!
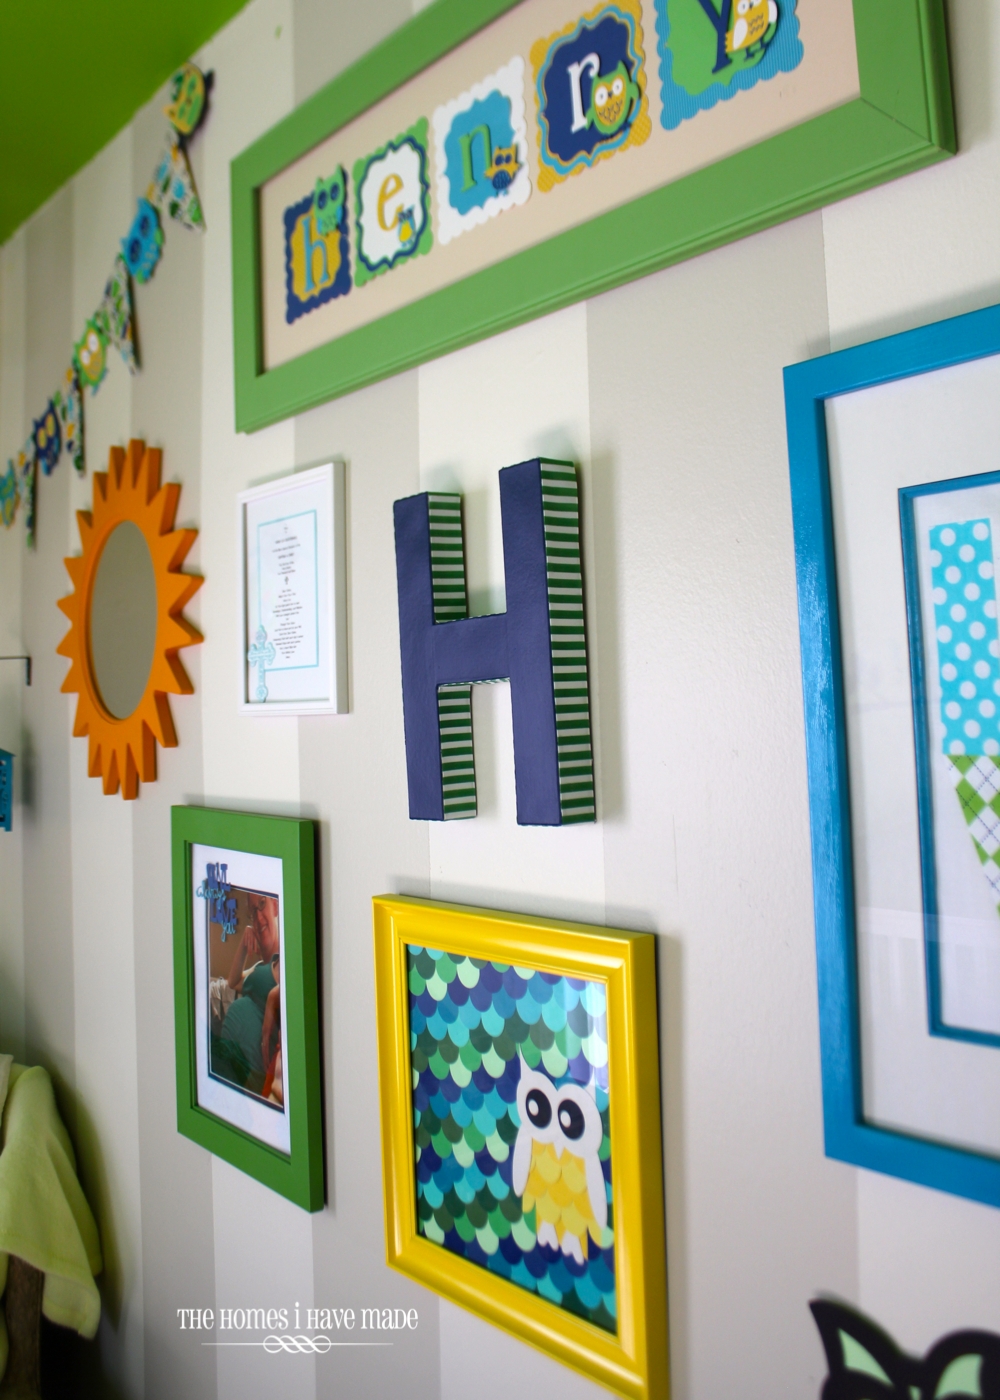
There are so so so many DIY goodies on this wall, including an owl paint-chip art (tutorial coming soon!), a jumbo monogram, and an appliqué LOVE sign using all the fabrics from the room.

Combined with some other elements from his old nursery and a few other new odds and ends (the iron owls and owl lantern were both new purchases for the wall), this display turned out to be the bright and happy spot I was striving for!

What’s that hanging in the corner? You know those hanging “activity gyms” babies play with when they are super little and just lay there? We bought this one and loved, loved, loved it. I was so sad to see it get packed away and thought “there must be a way to use all those cute owls in the room.”
Instead of making it a mobile above the crib (which would block the new owl decals), we created a bird “swing” of sorts. We drilled holes in a plank of wood (painted to match the room) and strung up the birds with fishing line. We then hung the “swing” from the ceiling using some leftover chain! It sits right above our storytime chair, and Henry loves to look up and point to the “birdies.”

Speaking of the reading chair, it’s exactly the same as before. I just added the quilt displayed on the back because I love it too much to put away. Henry pulls it down onto the floor and plays on it daily! I really want to paint the side table the same green as the ceiling – but until this room gets a broader re-do, it’s staying the way it is!

It’s really hard to get a good shot of this room because it’s a box, but here’s a few photos to give you a sense how everything came together!


There’s tons of things I could have and wanted to do in this room – but I really limited myself, both on time and on budget, because it will probably be the only room in this house that will get a full re-do while we are here. Including all the paint on the walls and ceiling, I spent about $50 transforming this old room to the room you see here. Not too bad!
Even though I did a lot of these projects a while ago, I was really, really good about snapping photos along the way so I have quite a few owl-themed tutorials coming up over the new few weeks. First one will be up for you on Monday! Until then, have a great weekend!!!!
Megan
6 Comments on “Owl-Themed “Little Boy” Room {Bedroom Reveal}”
This is really cute! I love the colors and I LOVE the green ceiling! I'd never have enough nerve to do that, but its great. My favorite thing in the room is the gallery wall. This is inspiring me to do one in my daughter's room…! (:
Such a wonderful room! I love owls & it's awesome that you used them everywhere! The swing is a great idea:)
Love! This room looks so wonderful! I am kind of bias to the colors. I just posted a bathroom makeover, for my little guy. I used the same colors. lol
Megan, you did a lovely job creating a fun room for your little one. 🙂
Julie
So cute! I love it!! The owl theme is so cute and I love the colors.
Very cute! We're in the process of setting up a nursery for our baby girl, and I love the open frame that you hang the Polaroids from. I've already got a lot of things I'm planning to put on the wall, I wonder if I can make room for one more! 🙂
It looks great, Megan! The paint colors are fab and I love the owl theme. The faux polaroids are a great idea! Babies/kids grow so fast!