Two-Toned Bookcase (from a dining room hutch!)
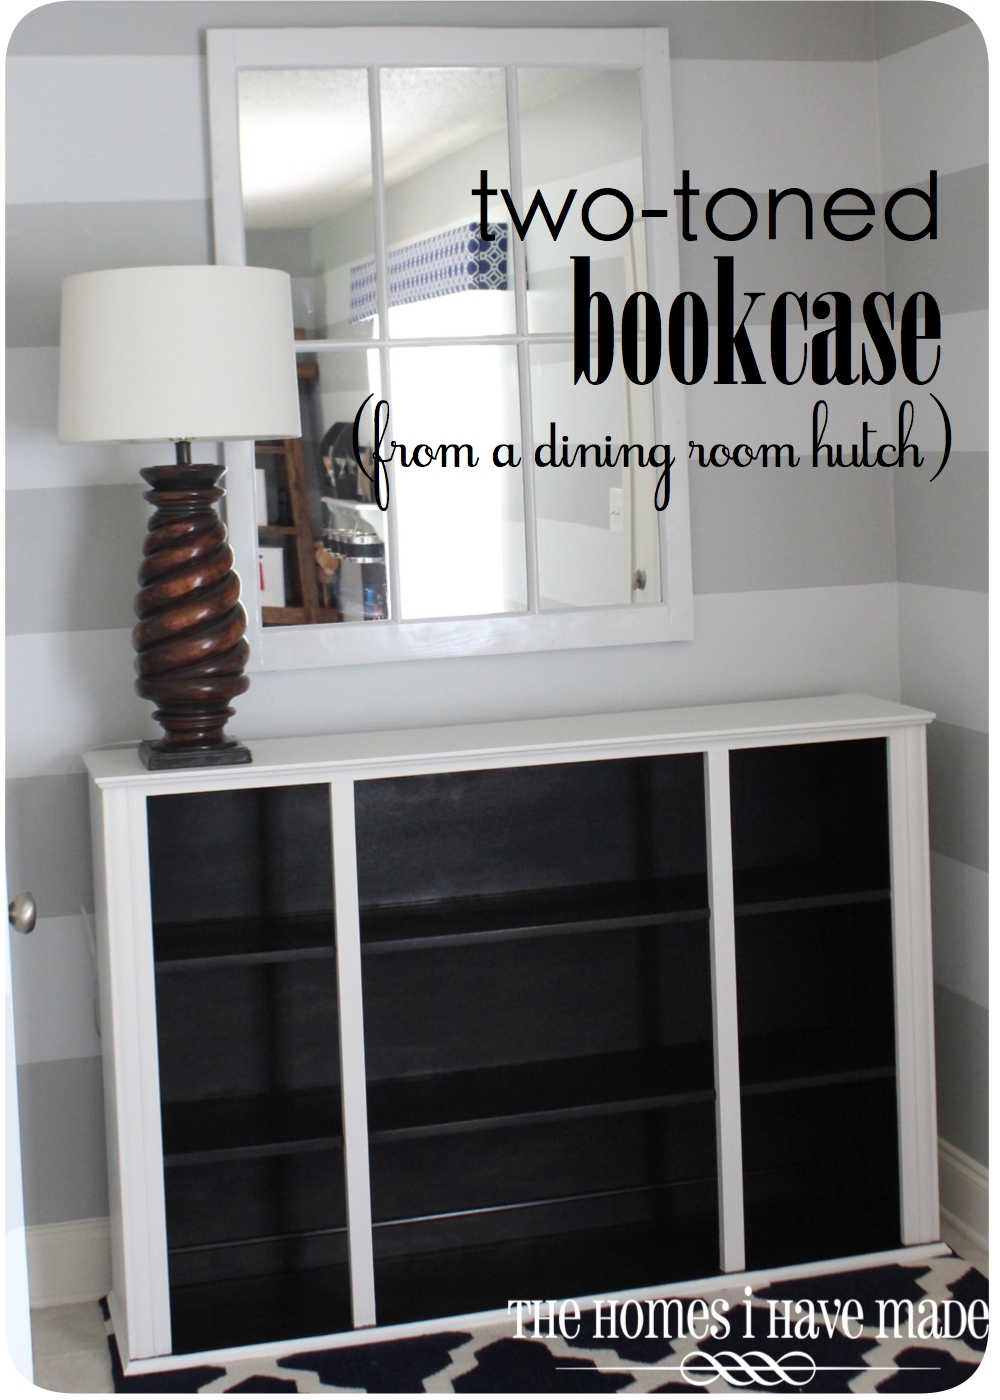
On Monday, I showed you our fall display. And while the decorations themselves didn’t take me more than an hour or so, the items in the background (the hutch and the mirror) have been makeover projects a LONG time in the making! As promised, today I am going to tell you all about that two-toned hutch, which serves as the foundation to our new entryway.
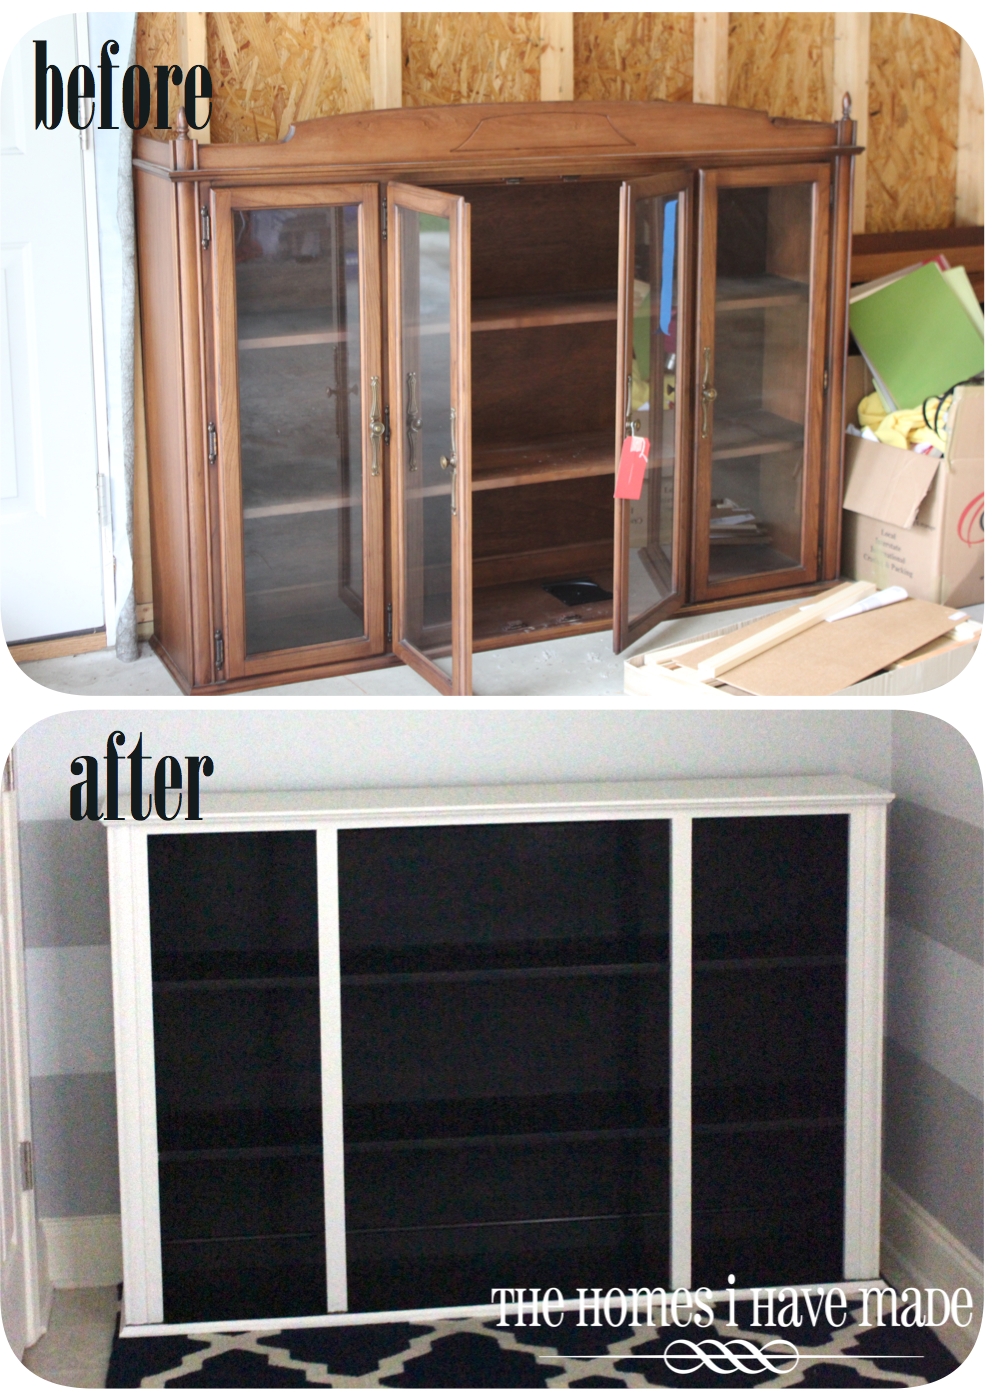
The story starts here with this dining room china hutch. You see…I had been on the hunt for a solid wood dresser to turn into a TV/media stand for our family room. The base to this china hutch (that we found in a local shop) was ideal for just that purpose! The size, shape, doors, hardware, and condition were all exactly what I was looking for; AND, at $250 for the entire solid wood china hutch, we were more than tempted.

The problem was, we didn’t want the top hutch, only the buffet underneath. Unfortunately (or perhaps fortunately), the store wouldn’t sell us just the base, so we took both units home. The hutch sat in the garage, ready to be sold on Craige’s List or at a yard sale for a few weeks…afterall, we had no place and no need for it (or so we thought!)
Fast forward a few weeks…after a while of looking around for the perfect console table to fit inside our front door, it occurred to us to give the china hutch a try. Sure enough, it was a perfect fit! With the furniture dilemma solved, it was time to give the hutch a much-needed makeover.
Here’s where we started:
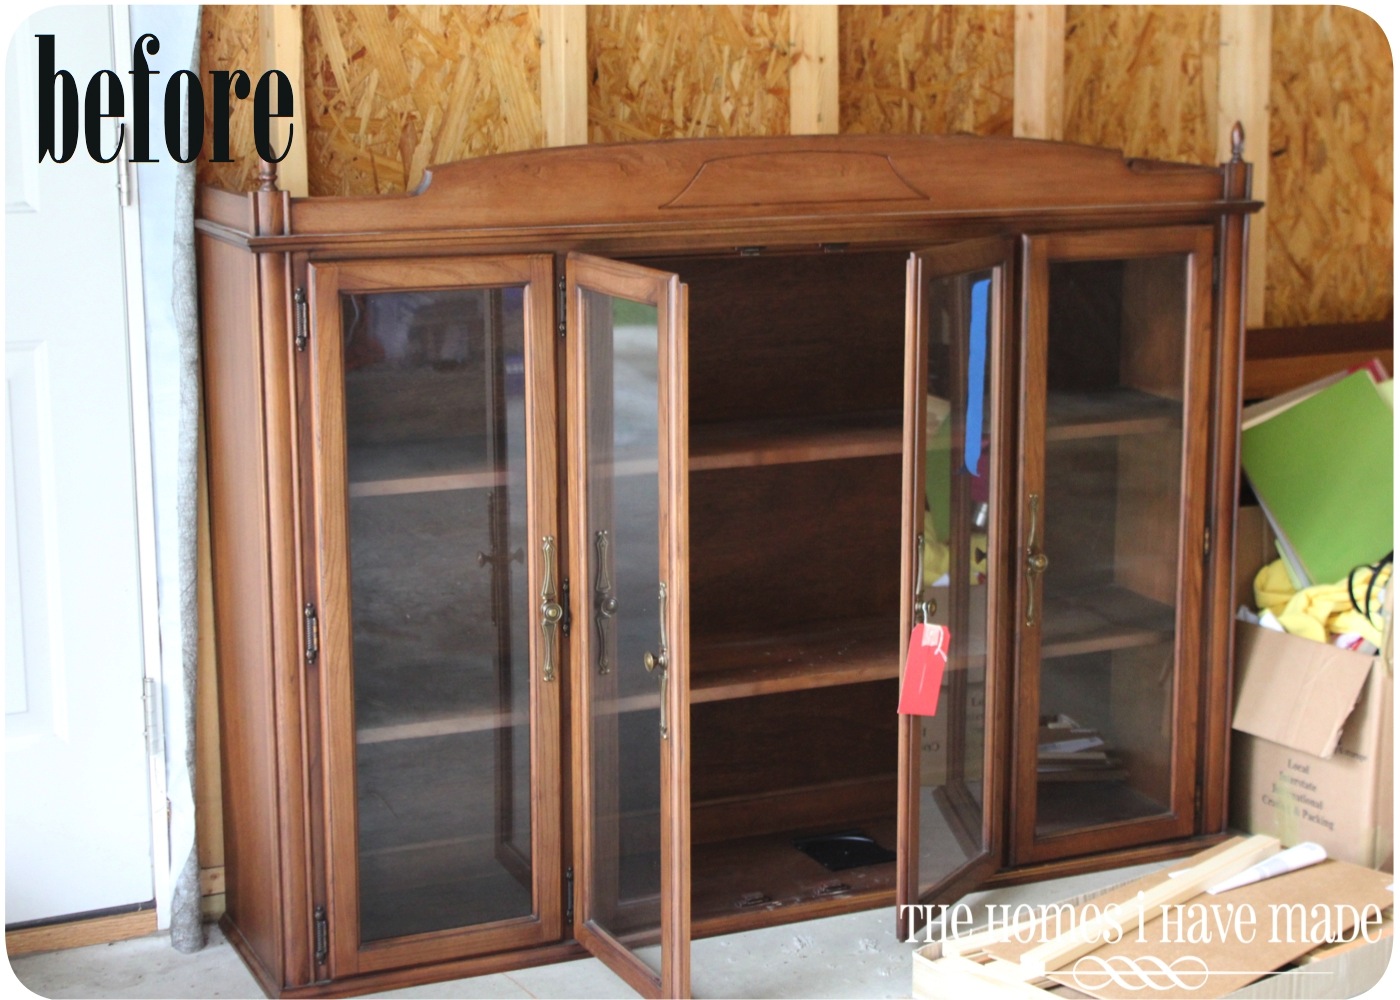
We started by taking off all the doors, all the hardware, and the moulding along the top.

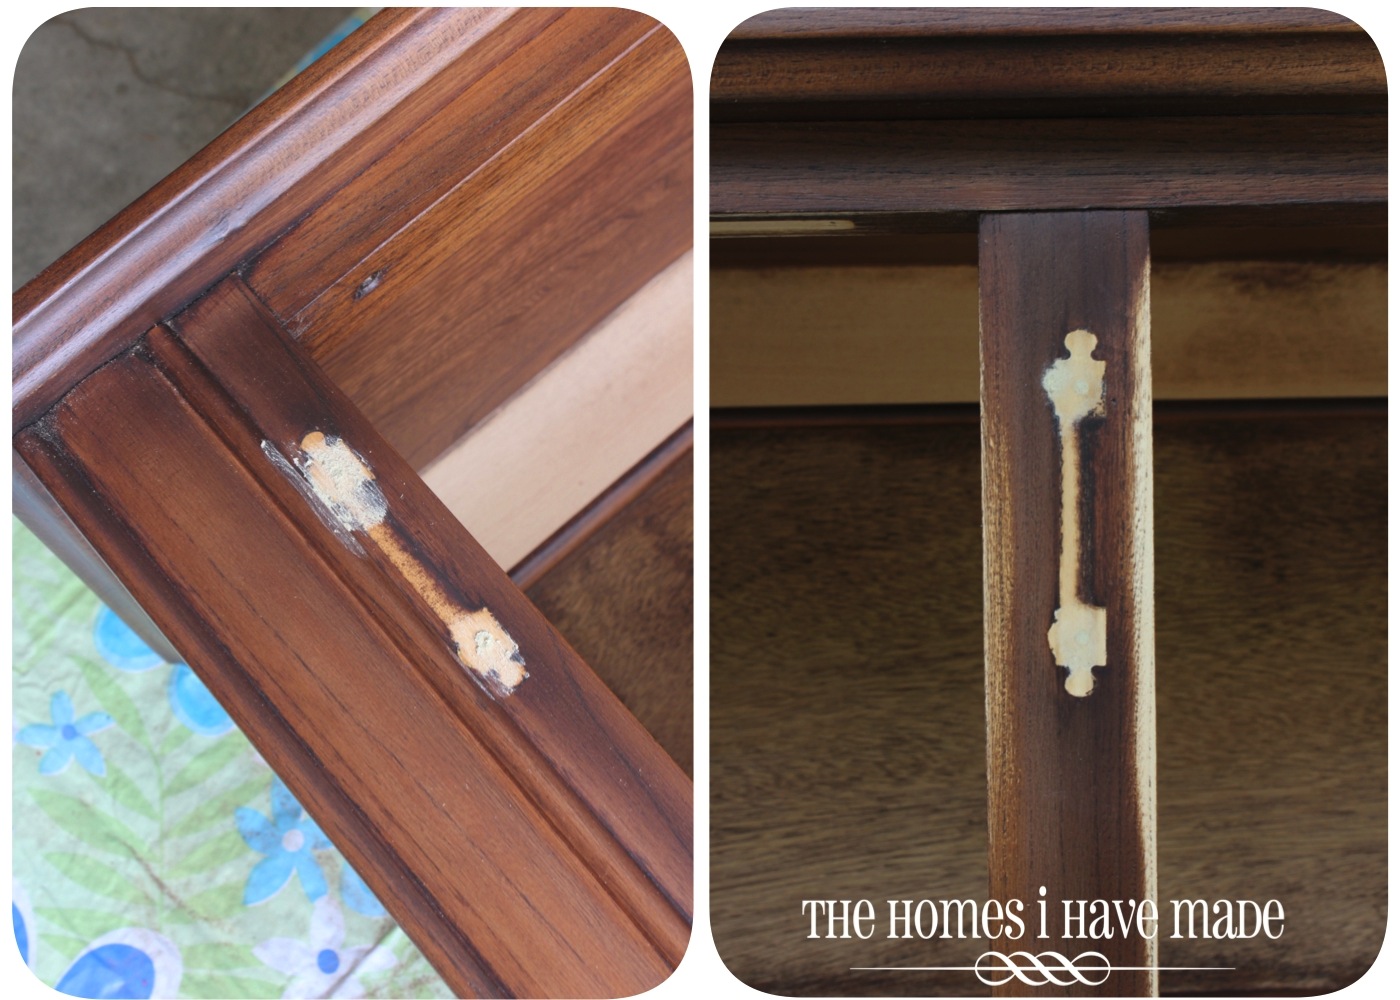
I then filled all the hardware holes with wood filler. After a few hours of drying time, I sanded them smooth.
I then set to work sanding the top (just because it was rough and uneven) and the insides of the hutch. I tried my hardest to get the inside sanded clean and even toned, but it was pretty tough getting into all the corners. Since I was going dark with my stain color, I knew a perfect sanding job wasn’t necessary.

I stained the inside of the hutch with Miniwax Wood Finish in Ebony. This was my first staining job, and I have to admit that I really enjoyed the process. I find stain very gratifying to apply and very forgiving when you mess up. So different from drippy paint!

I ended up adding a total of four coats of stain, which may have been one coat too many. I was trying really hard to keep the color uniform and had to add more to even out spotty coverage.
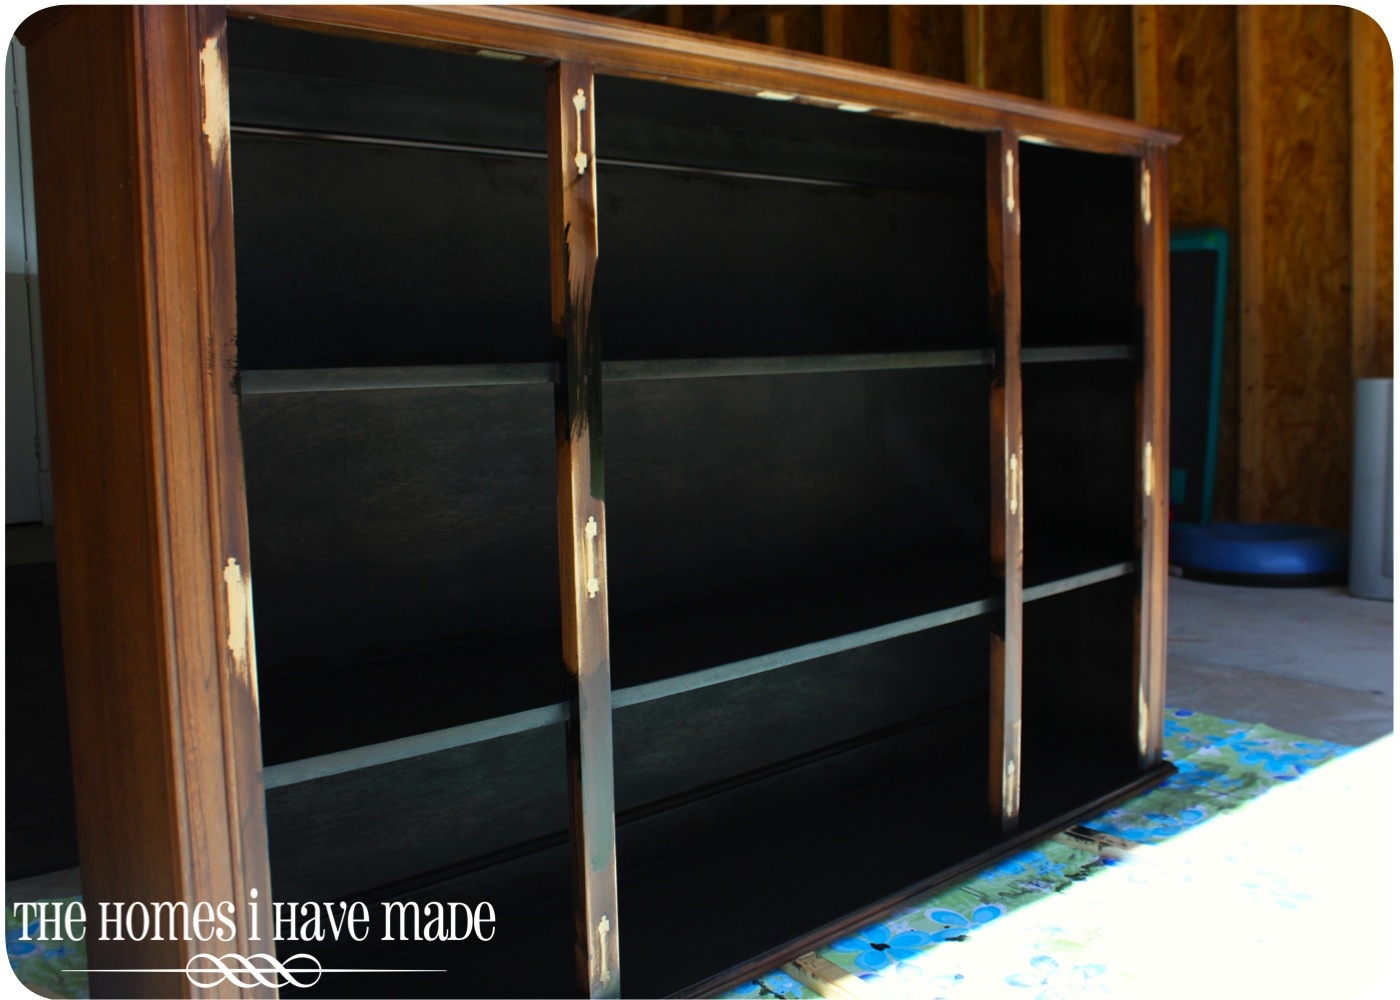
After a couple days of drying, I taped off the inside edges to protect the newly stained shelves from white paint! (FYI – it made sense at the time to stain first, paint second…but I really, really should have reversed the process. Even with being SUPER careful, I still had speckles of white paint end up on my newly stained shelves. This was the reason I ultimately added the fourth coat of stain…to cover up all those white spots 😉

Want to save this post?
Once it was all taped out, I primed the tops, sides, bottom, and vertical rails with Zinsser Cover Stain Primer…twice, sanding between each coat. I then gave it three coats of the Glidden Tailor’s Chalk by Martha Stewart (leftover from our walls). Another learning point here: the piece is holding up great so far, but for other high traffic projects, I need to use a harder enamel paint).
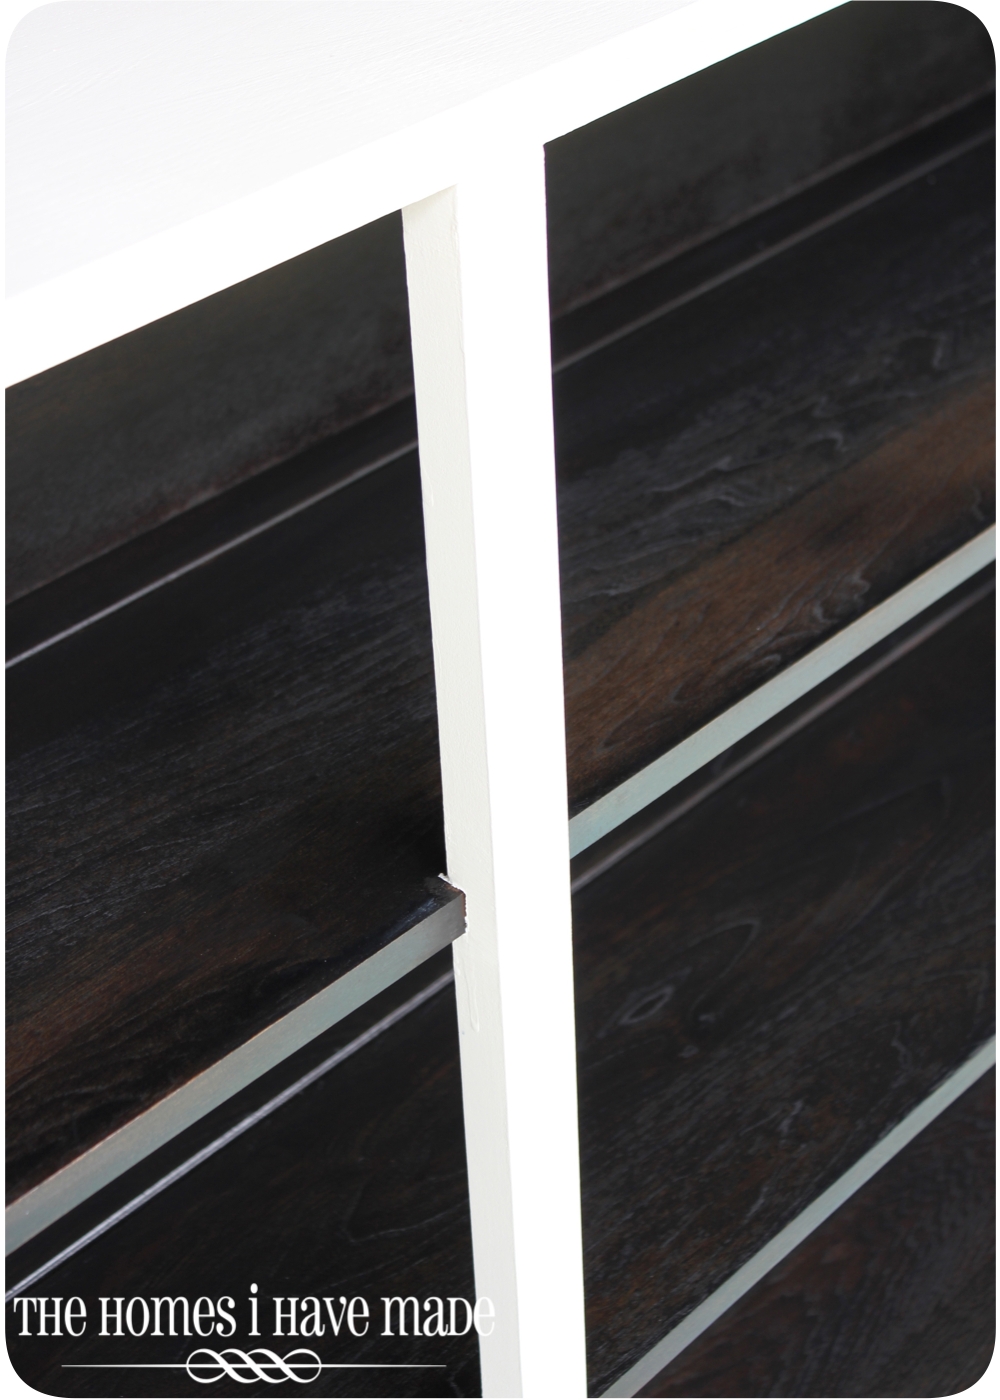
Once the painting was done, I peeled off the blue tape to reveal a gorgeous contrast in tones!

In the glaring sunlight, you can still see the different tones in stain along the backside. Fortunately, once inside, you can’t tell a thing 😉

Once it was all dry, I rubbed and buffed on three coats of furniture wax. Having had some bad experiences with brush-on poly (SO many brush marks!), I really, really liked the rub-on wax. I’ve also been amazed at the durability it provides. I guess I shouldn’t be…it is meant for floors after all!

Once the last coat of wax was buffed smooth, we moved the hutch into its little nook inside our front door. What a perfect fit!
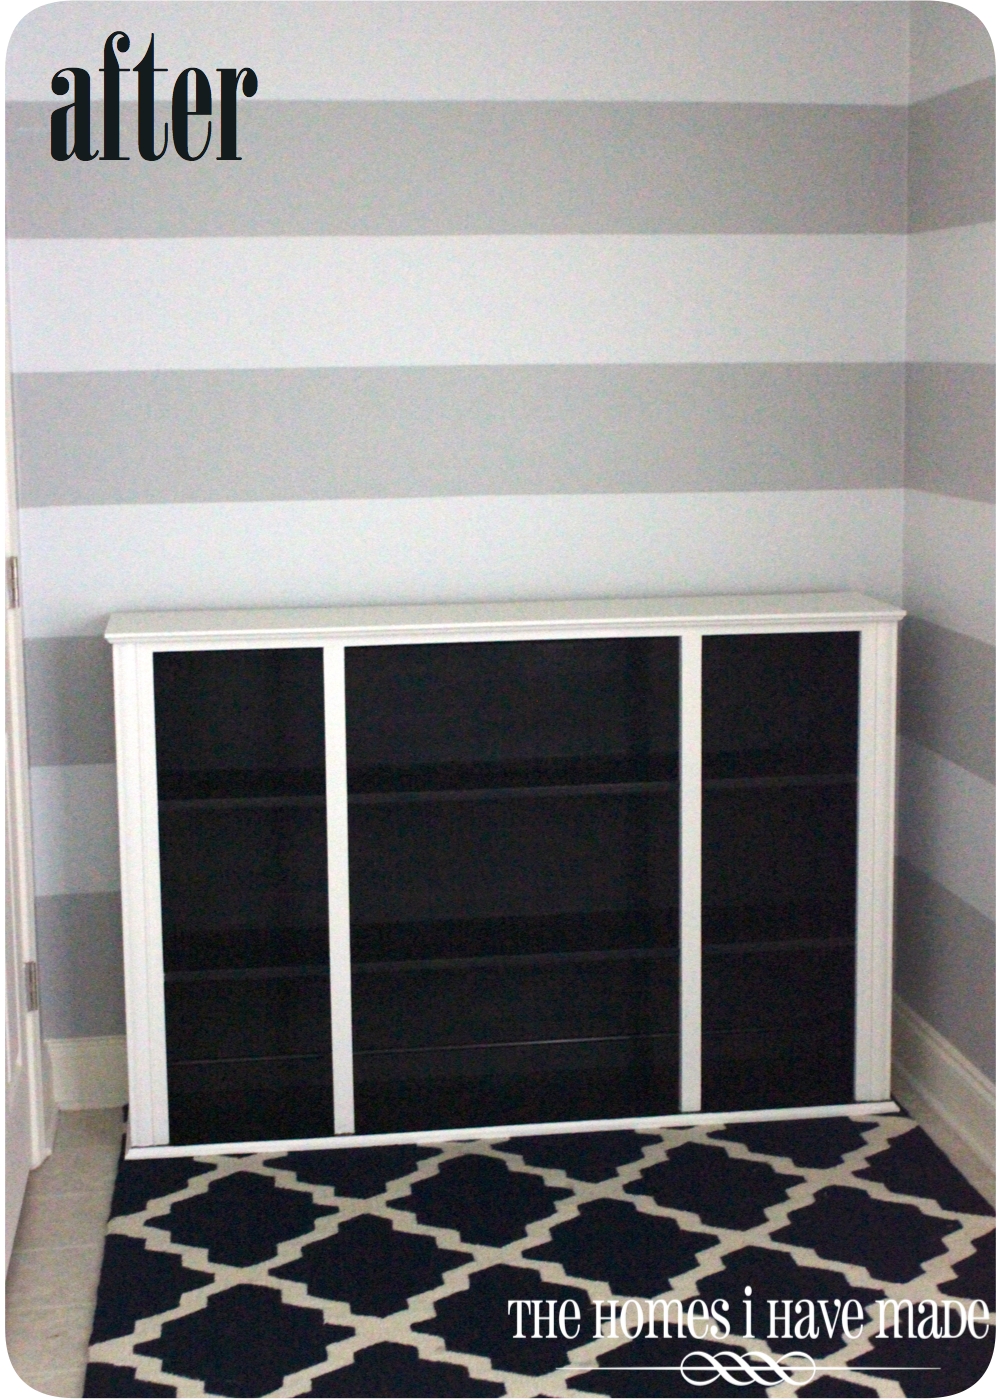
The goal for this space is to be a decorative display area (we enter/exit the house from another door). Since we don’t have a mantel, this nook will be the focal point for all my holiday and seasonal crafting. Since it will change a lot from month-to-month, I didn’t spend any much time adding a lot of accessories. However, two mainstay decor elements were added: this fantastic lamp I found at a local shop for $50 (it’s huge and just so fantastic!); and this new window mirror I JUST finished! (I’ll have all the mirror details up for you soon!). Even without a single accessory, we now have a cozy and cute entryway to our house, don’t you think?!?

Oh…and you know I love a good “before and after”…so let’s do it, shall we?
And a quick shot of our entry way right before we moved in….and after some paint, a rug, a new hutch, mirror and lamp!

The hutch took me a little over a week to finish. I have to say, it was one of the most gratifying projects I’ve taken on recently. It may not look like much…but we took something we were going to get rid of and turned it into something unique and spectacular that fits perfectly in our home. I really took my time and followed all the painting “rules,” so hopefully this makeover job will last us.
Oh…and what about the buffet that was part of the set? You know, the whole reason we bought the unit? Well…I’m actually starting it this week. Even though the dresser was our main priority, I worked on the hutch first, pretty much for practice! The hutch wasn’t as valuable to us (so if it didn’t turn out right it wasn’t a big deal) and I was able to test all my techniques, paints, and stains before I started on the item that will be the focal part of our family room. I am super ready to get going on it, so stay tuned!
So, what do you think? Were we right to hold on to the hutch and make it work?? I think so 🙂 I’ll be back at the end of the week to chat about that mirror!! Until then, have a great day!
Megan
7 Comments on “Two-Toned Bookcase (from a dining room hutch!)”
Best. Use. Of a china hutch. Ever.
Awwww..thank you so much!!!!
It looks wonderful. This is an amazing idea to reuse the hutch. I love how it turned out.
Ruth
Gorgeous! I'm a new follower. One of my readers suggested that I visit your blog since I posted something on my blog about it being difficult to decorate military housing.
Wow! That is awesome. I would never have thought to use the top of a hutch as a bookcase. Love the contrast between the white and dark colors. Looks great with that rug too. Thanks for sharing.
Yeah, you are right, it is so spectacular; also you have done a very trendy book case.
I must say, you are pretty amazing!!