Ideas for Lighting a Rental
Over the last week or so, I’ve been getting you all up-to-speed on our living room. I showed you our styled media stand, our new pillows, and even some easy coasters. One of the biggest challenges for this room, and one of the last things left to chat about (for now)…is lighting! We’ve had to do some pretty creative things to light this room, and had to do it all without investing too much time, money or hardware, as this home is (for all intents-and-purposes) a rental unit!

Let me remind you a bit about this room. It’s a huge room, and we’re very lucky in that. However, in this gigantic room that functions as our entryway, our playroom, and our living room, there is NOT ONE overhead light.

Grrr…no pot lights, no overhead ugly light fixtures (which I am and am not thankful for at the same time!), nada, nothing. In our teeny-tiny hallway, we have three overhead lights, and in this room – none. And besides this tiny window (below), we have a big front window that does let it some natural light during the day, but doesn’t help us out much at night!

For many, many months, this room always felt dark and cave-like. It felt like no matter what we did, there were dark corners everywhere. After a lot of discussions and brainstorming, we’ve finally gotten this room lit how I like it. Let me show you what we did!
Our first strategy was a no brainer: lamps. When you have no overhead options, the light’s gotta come from somewhere! Last week, I showed you the lamp we placed next to the TV (and into one of the darkest corners of the room). I don’t exactly love floor lamps, because toddlers pull them down and movers break them, but this one was just too perfect for my taste. With it tucked into a nook behind the chair and media stand, little hands hardly ever reach for it and it really does do wonders for lighting this side of the room.

In another obvious move, we placed lamps on our side tables on either end of the couch. A long, long time ago (when I first previewed our side tables), these were our living room lamps. Well…they were never quite right for me or this room. They were a splurge purchase, and although I loved the shape and modern-ness of them, they always bothered me in here. Thankfully, they work perfectly with our new Master Bedroom design and now live in there!

So to replace those lamps, I went on a long (and I mean a-dozen-stores-and-4-sets-of-lamps-long) marathon shopping spree. God forbid I wait to stumble upon the perfect lamps – when I decide it’s time to buy something, find it I shall!
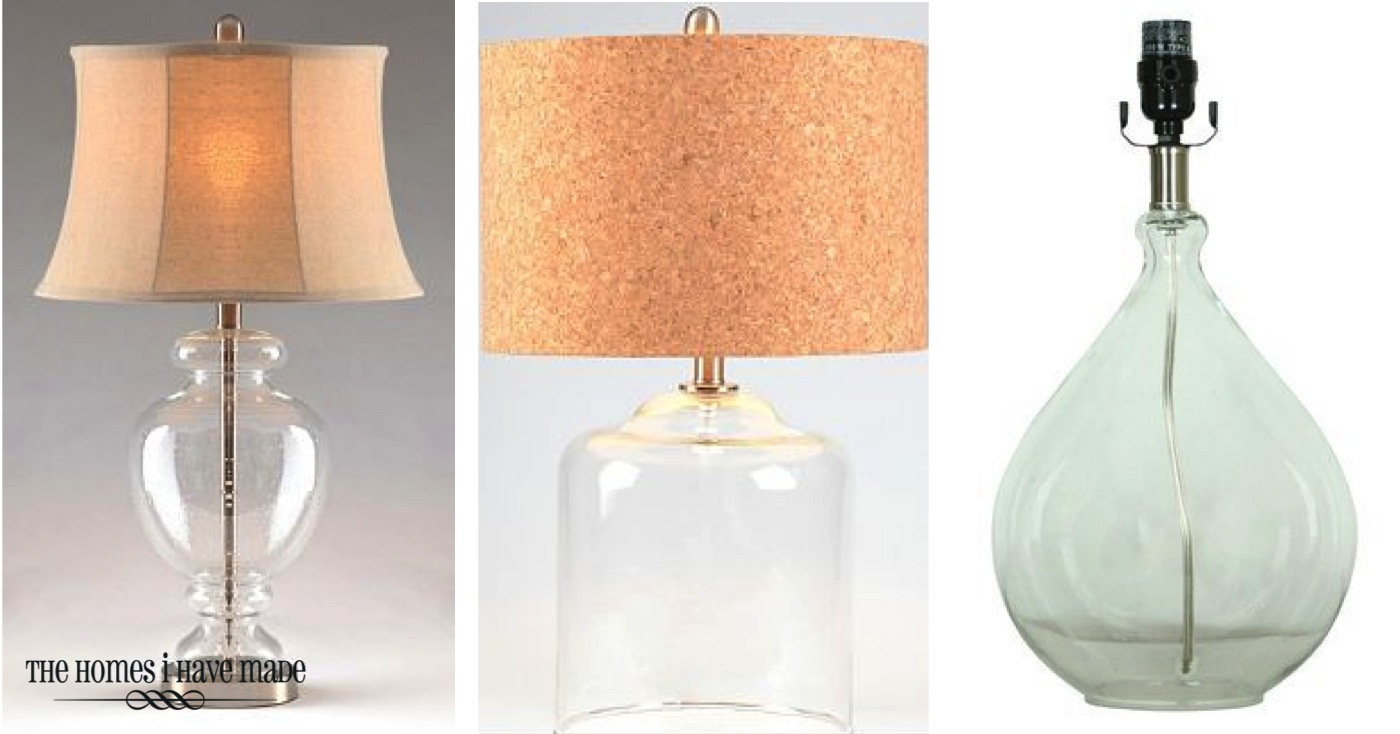
I had in my head, after oogling over Sarah’s lamps, that I really wanted round, orbish, chunky, glass-based lamps. After scouring Marshalls, HomeGoods, and the like. I ended up at Kirklands. I found the lamps on the left below and thought they were perfect – only to bring them home and everything from the size, the shape, the shades, etc were just wrong wrong wrong. Back to Kirklands I went, where I bought the middle ones. These too were not the right look or style I was going for. Back they went. Finally, I decided on the far right lamps from Target. Pricier than I wanted to pay and smaller than I needed, but it was just something I (foolishly) wanted done with.
Not a week or so later, I got this photo from the babysitter. Ummm…I guess glass lamps and toddlers don’t mix too well. Don’t worry, there was no contact between him and the glass…he was jumping on the couch (which we allow) and knocked it over. Boo. Off to find more lamps.

After more looking and more searching, I finally decided on these simple glass-columned lamps from Target. They have more solid, sturdier bases and I had the shades already, so in the end it was more cost effective than buying two more new matching lamps. I know these are fillable, but I like the clean simple look of them empty. The size and shape are actually much better than anything else I brought home, so this lamp saga had a happy ending. However, wouldn’t you know on my next trip to HomeGoods I found not one but two sets of lamps that would have been perfect instead – oh well. That’s how it goes. And I really am happy with these. Really 😉
Want to save this post?

Okay, table lamp drama story over, time to chat about the main point of this post: getting creative with lighting in a rental. Do you see them back there?

Yes, we “installed” pendant lights into our rental! The playroom side of this great room always felt so dark and I really wanted hanging lights instead of more lamps. I honestly never thought hanging lights in a rental was possible – I always thought that they required crazy, scary, expensive, electrical stuff…with lots of drilling…and removing parts of the ceiling. As it turns out, my husband is actually pretty savvy with electrical wiring (what luck!) AND we have an accessible, unfinished attic. With these two combined, we were able to hang some pretty snazzy lights in the playroom!
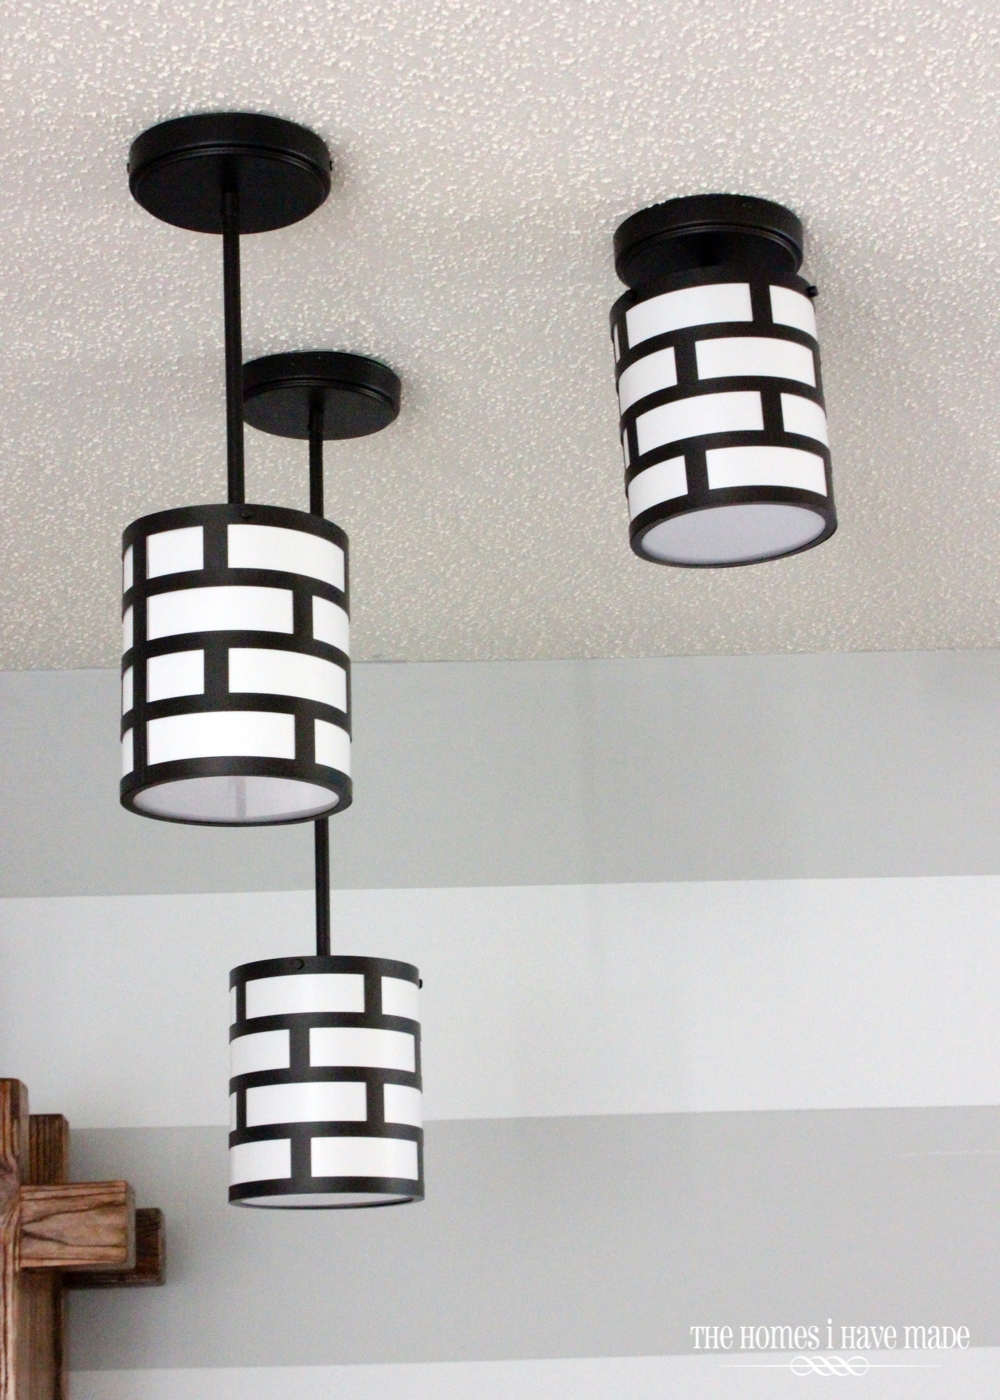
These were a fun find from the clearance shelf at Lowes. We were out for the day, looking at all sorts of pendant options, trying to figure out what would be the best (and most economical option). This project was going to be a bit trial-and-error, so we didn’t want to get some fancy light fixture that ultimately was too complicated to hang and wire. When we found these for $10.50/light, AND Greg was fairly confident he could wire them together and hang them pretty effortlessly, they came home with us. Even if we failed, we only sunk about $35 into the project.

They are LED lights, not my favorite, but they are the “warmest” in tone, so they actually work pretty well in the space. At first glance, I wasn’t sure about the black, but as the room has come together, they are perfect. We decided to hang them in varying heights just for fun. I can’t give you the specifics because I’m not sure exactly what all he did while tromping around the attic, but I know the general gist of it:
- First, he hung the lights (without wiring them) to get their placement right.
- He then took them back down and drilled a hole through the ceiling above each light to the attic to run the wires.
- He then ran the wires of each light up through those small holes.
- Once up in the attic, he somehow (magically) combined all the wires so that all three were on one power cord.
- Originally, he was going to run the power cord across the attic to an outlet, but we decided to run the power cord back into the room through a hole in the corner ceiling and plug it in an outlet we had easy access to (see photo below!)

This project was eye-opening to me. I thought that because this unit isn’t ours’, we were doomed to dark corners, awkward floor lamps and insufficient ambience. Now that I know my husband has this skill, we will be hanging lights again in the future! Now on cloudy days or at night, we can play in the playroom without feeling like we’re in a power outage!

So now you are completely up to date with this room! This picture below was taken just the other day (sorry for the hurriedly shot photo!), and I’m pretty sure you’ve seen everything in here. There are a few things still to do – some artwork for Henry’s area and something above the couch. Do you have any thoughts for me? Art, picture ledges, gallery wall, or keep it as it is? I am completely at a loss. Every time I think of something, I change my mind. I also feel like this room needs a punch of another color – it still seems a bit blah to me. I’m currently thinking turquoise, but keeping changing my mind on that one too. Sometimes I have a vision and everything comes together just right – this room hasn’t been that way. I love everything we’ve done so far, but something is just missing.

Can you help me? What do you think?
I’ve got a pretty special post planned for Friday – be sure to stop by and see me then!

Megan
5 Comments on “Ideas for Lighting a Rental”
I'm not sure exactly what items, but I can totally see some yellow looking great in this room. Maybe something like these medallion wall art in 8th pic down (hopefully the link works)?
http://babygreendesign.blogspot.com/2011/04/monday-color-yellow.html
BTW–we are LOVING our magnetic menu board. I can count on two hands the # of times we have gone out in over 3 months–THANK YOU!
Kara
I'm in love with your hanging lights!! I love the black/white design. It would go great in my kitchen area!! Love your table lamps too!!
As far as the missing item, I could see a sunburst mirror, collage of frames, big picture, etc. There are alot of possibilities, it is just finding the right one for you which is sometimes a daunting a task for us all to find the perfect piece.
I can't wait to see what you finally decided on. Happy Mother's Day early!!
Happy Belated Mother's Day to you too. If you saw my light situation, in my living room you'd laugh. It's awful!! We have several boob lamps that don't work (well one of them works and the bulb isn't made anymore but my husband refuses to buy a new lamp. In the meantime I put up (with his help) and inexpensive hanging lamp that I got from IKEA. Then I changed where my table is and it all looks crazy now.
Anyways, I'd put a big poster over the couch till you decide what you want and then get a smaller picture for over the play table. Another fun idea would be some cork squares so you could put up his art work. Is he starting to create art yet? I know he's young but growing up fast. I'm sure you'll think of something great. 🙂
Wow Really Awesome Idea Thank You I need Light For Rental After Read your idea Hope I found Cheapest Company
Pingback: Top 5 Quick Tenant Improvements to Increase the Value of Your Property | Fuhrmann Construction