A Doll-Sized China Hutch – A (Mini) Furniture Makeover!
Over the last few weeks, Henry and I have been spending time back home visiting family. While I was fully prepared to take the few weeks as a crafting vacation, it didn’t take long for my hands to start twitching and ideas to start festering! When my sister and niece (yep, the same niece I did the room makeover for!) casually mentioned they were looking for some sort of dish/stuff storage for their American Girl Doll House, I knew I could come up with something to fit the bill. Well, I sure did come up with something! Take a look at my niece’s new Doll-Sized China Hutch!
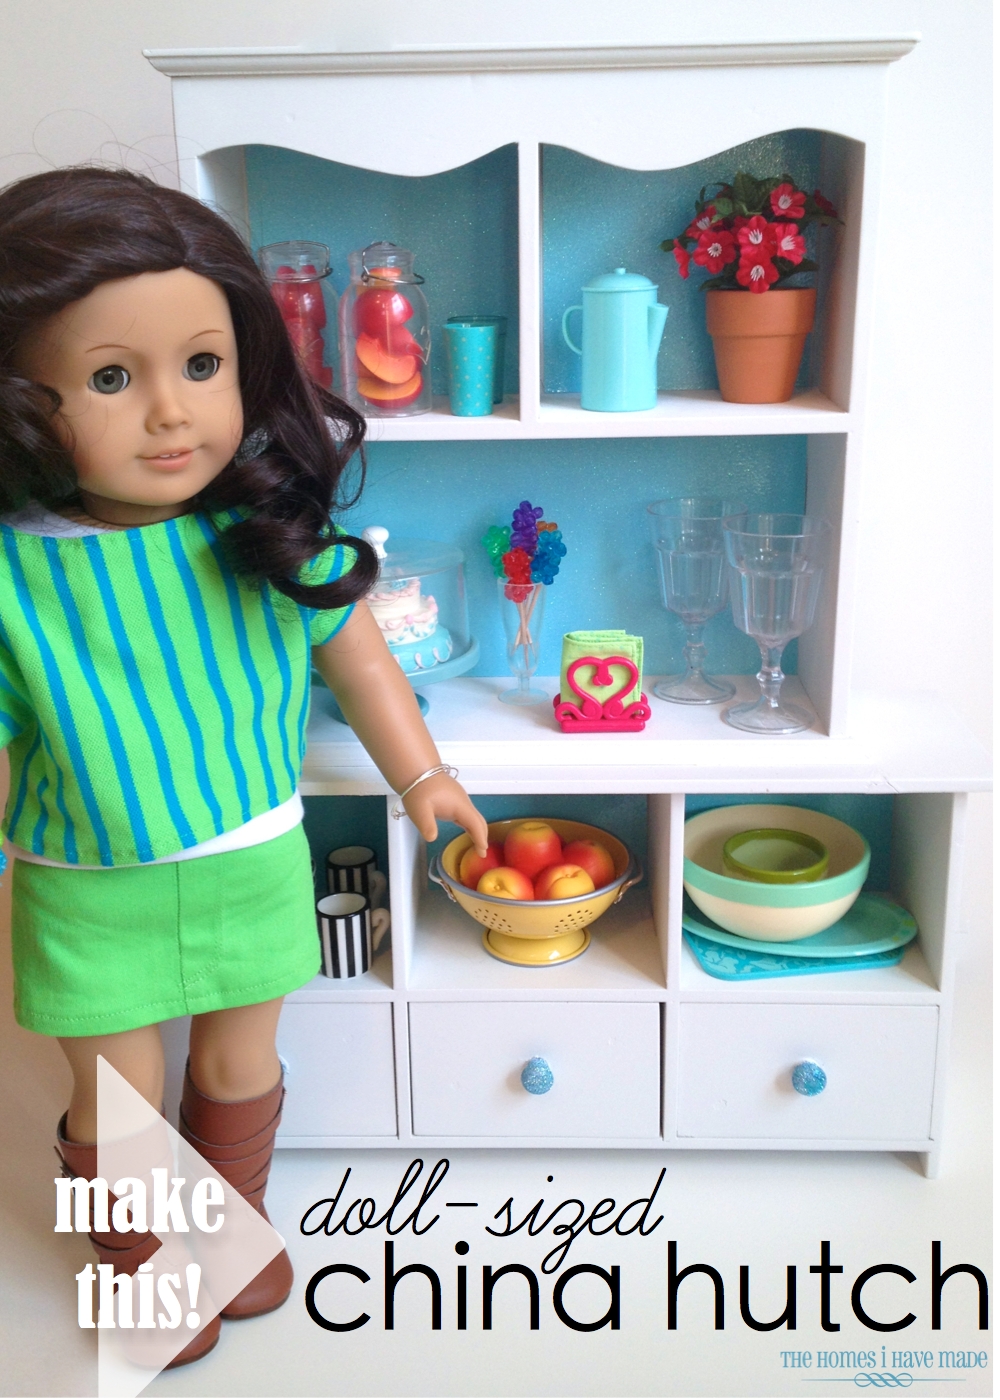
Eek! Isn’t it just the cutest thing ever? As the mom of a little boy, and now that I live a good distance from my niece, I don’t get to do fun, girly crafts all that often. This was so, so, so much fun to pull together, and I just can’t get over how darn cute the final product turned out!
…and in my true always-eager-to-up-cycle fashion, I started with some random junky finds from Ross! Both these items were on clearance (score!) but were in different areas of the store. Talk about lucky that I happened to stumble upon both without even really trying!

I don’t really know what they are exactly. I think they matched, but then again, I’m still not quite sure. Either way, the prices were spot on!


And so was the size! When I stacked one on top of the other, I KNEW they were the perfect two pieces to make a doll-sized china hutch. I already had a design plan in my head before I checked out of the store!

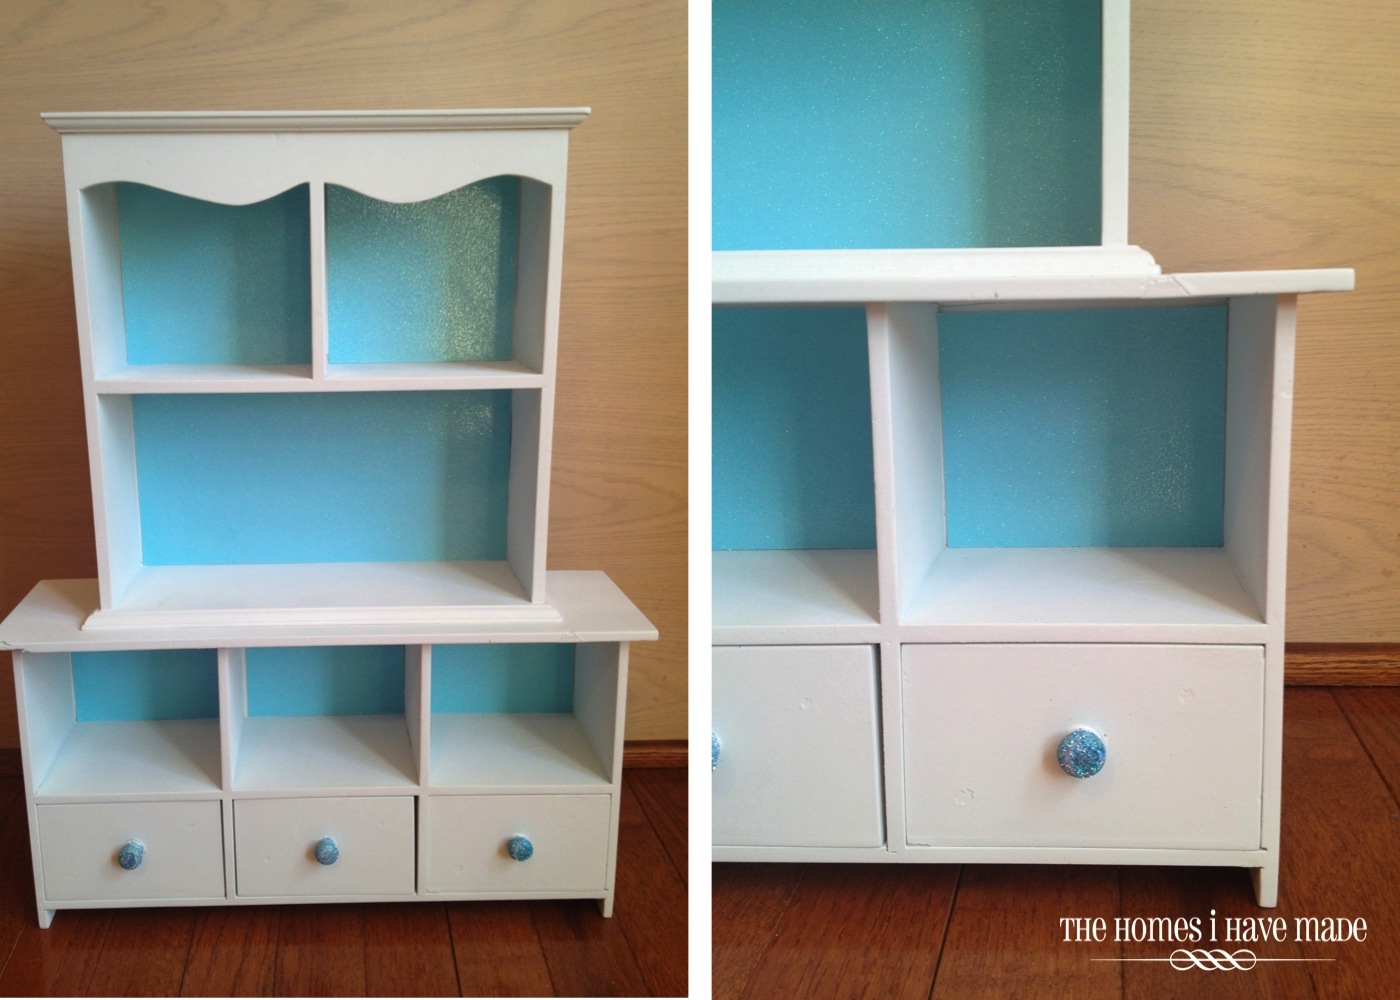
I started with my go-to spray paint choices: Zinsser 123 Primer (one coat) and Rust-oleum Protective Enamel in White (two light coats). (Pst – curious about my spray painting techniques? I have a full post on my tips and tricks coming up soon!)

Once the pieces were completely dry, I measured all the shelves and drawers so I could line them with paper. My niece’s paper of choice (with my heavy influence 😉 was a glittery light blue cardstock. We used a paper trimmer to cut all the paper to the right size and then attached them to the back of the cabinet with glue dots. This way, the paper can be changed out as frequently as my niece wants!

Here’s the cabinet coming together!

We thought the drawer knobs needed a little sparkle so we glittered each one using some craft glue and a combo of two turquoise glitters (for a close-to-perfect match with the cardstock!).

We decided to glue the top hutch to the bottom piece instead of trying to nail or screw it together. For one, the wood that these two pieces are made of are super thin and cheap. Second, my niece is a bit older and not so rough or clumsy with her dolls. Since we don’t expect it to be knocked down frequently, wood glue with clamps was the securing method of choice!

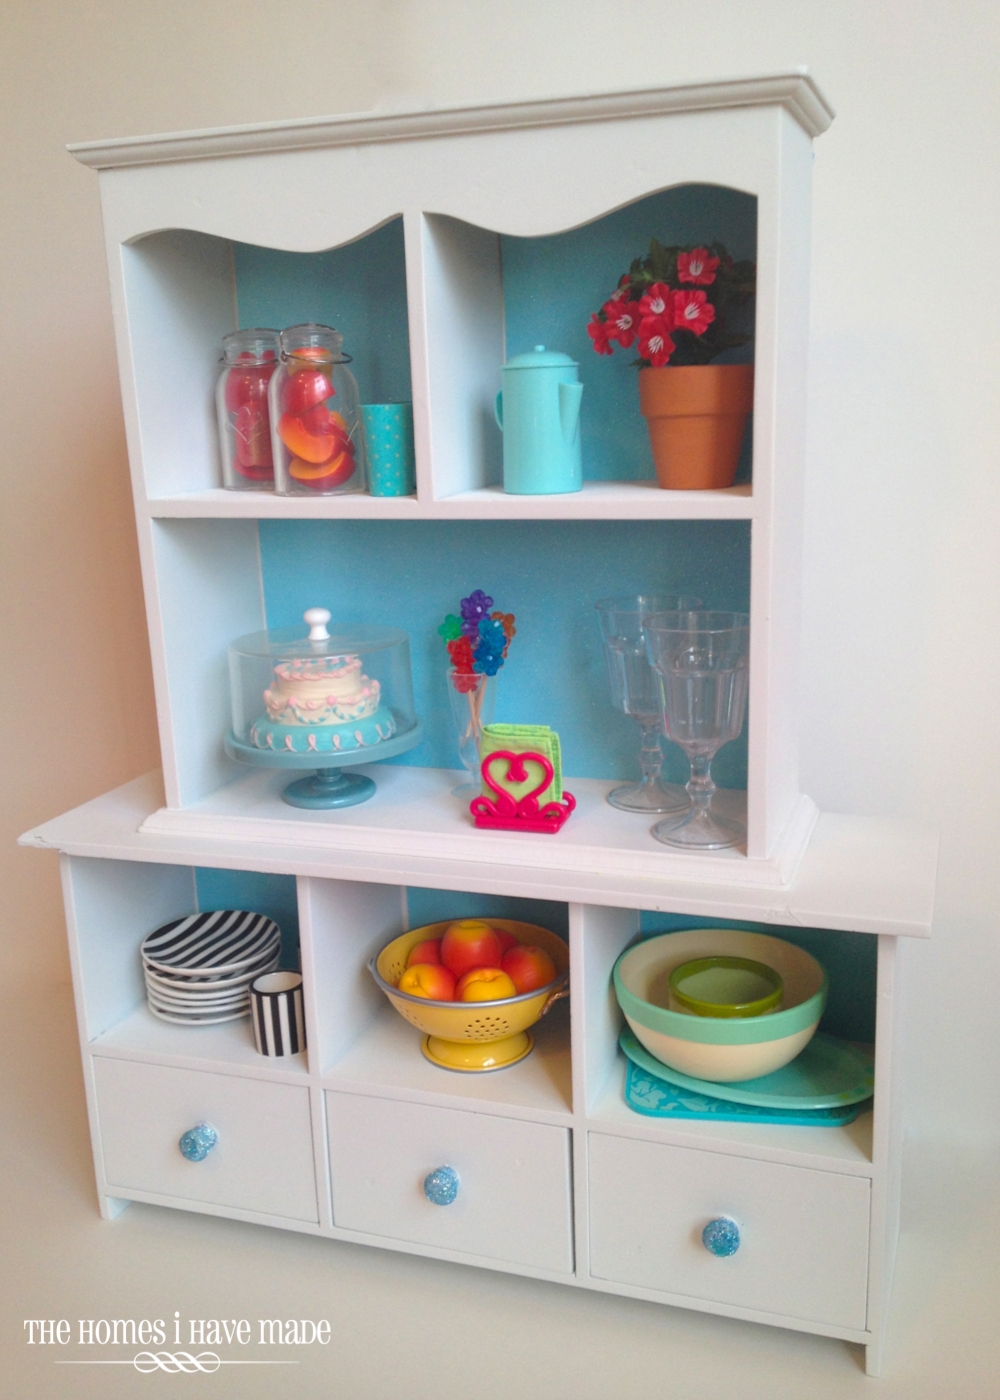
Here’s how the hutch turned out. Ain’t she sweet?
Once everything was dry and secure, it was time to accessorize! This was my favorite part!
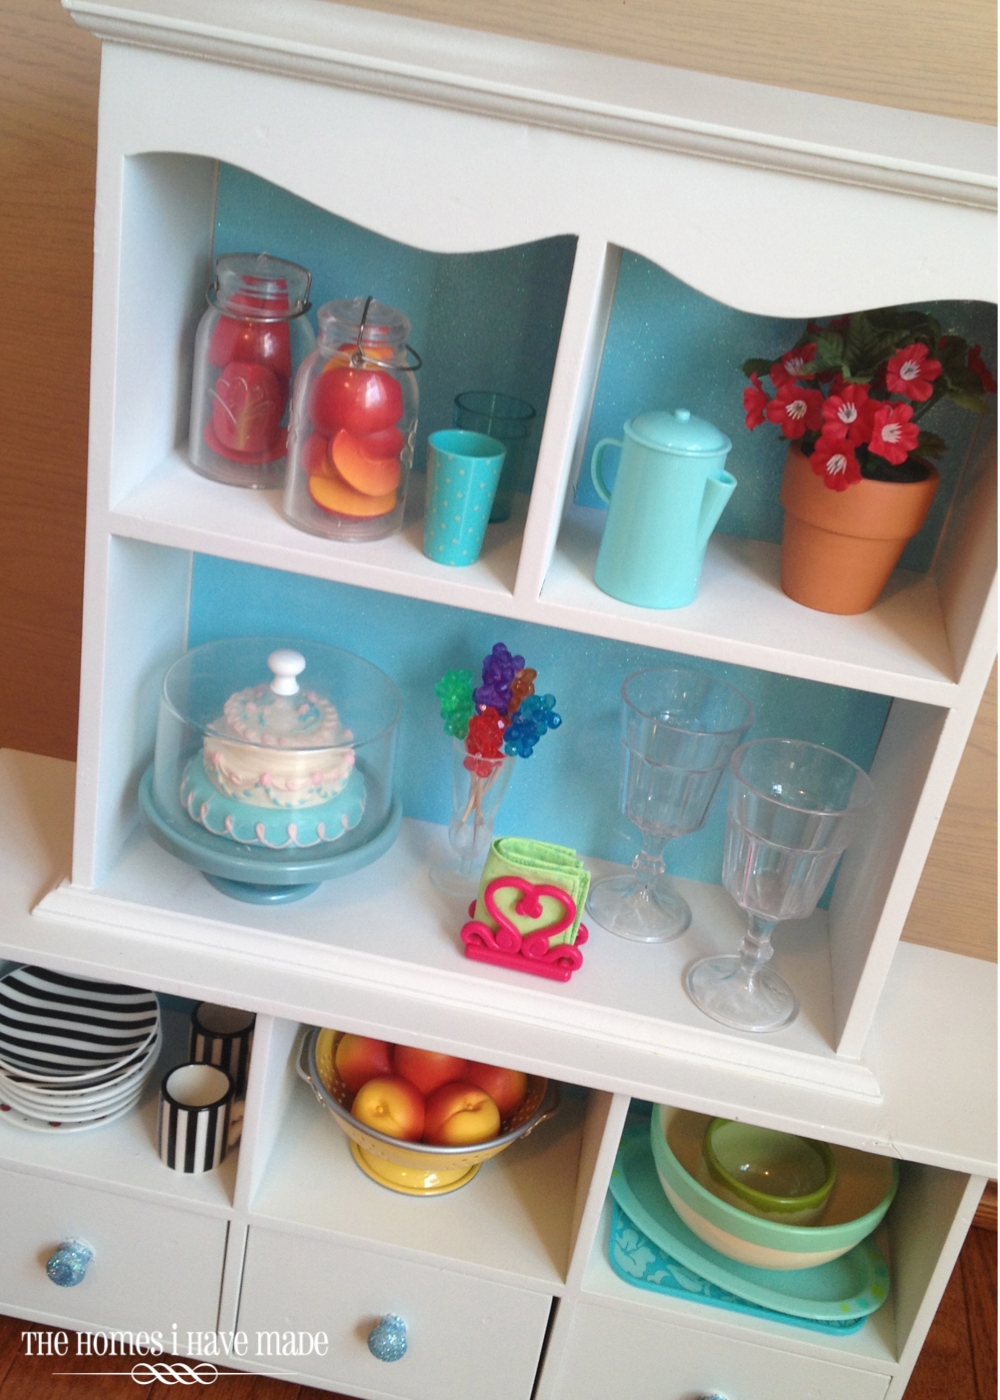
Oh friends, my niece has the.cutest.doll.stuff.ever! Look at those homemade rock candies!

Not only were these two random Ross finds the perfect price, but we couldn’t get over that they were also the perfect size. Not only height-wise, but all the cubbies and shelves held all the food, bowls, trays, cups, etc perfectly! It’s like it was meant to be a doll’s china hutch!

Here’s Ruthie with her new china hutch. Oh – and for those who are curious, my sister made the outfit using Liberty Jane Patterns!

I think Ruthie wants a piece of cake!

This was such a fun project to work on. Talk about a great find at a great price with a really adorable result! We had most of the supplies on hand, but including the paint, we estimate this little hutch cost us about $25.


I’m now home and back to being a busy little bee, pulling some projects for the Craft Room/Office together, as well as a few final things in our Master Bedroom. Lots of fun things coming up around here, so stay tuned!!

Megan

15 Comments on “A Doll-Sized China Hutch – A (Mini) Furniture Makeover!”
Very, very cute! Pinning to my AG group board. Hoping to pop by Ross and see if they have any of these pieces here. Thanks for the great idea.
KC
Adorable! You are so clever! 🙂
Absolutely adorable!! What a great find at Ross!! Love the glitter handles. So cute!! Pinning it!! I have lots of friends whose daughters have American Girl dolls. Love it!!
I love the hutch! It turned out adorable! And those shelves, I just love all the cute little things it displays! We are all about repurposing for dolls at our house!
The mini furniture is looking awesome. I too have planned to make such furniture design for my house. From this blog I got some more idea of making the furniture.
high end pool furniture
This is amazing! And all those little dishes are so precious. If you get a chance, please link this up to my linky party: http://suburbsmama.blogspot.com/2013/07/sunday-linky-16.html
Love it! Where do you get all the cute accessories?
Thank you so much!!! All the food and accessories were from my niece's AG collection. Sorry I can't help with specifics!
Thanks for sharing, so adorable.
What is the height from top to bottom please?
Hi Cheryl!
Thanks for writing. The total height of the Doll China Hutch is 20″. The bottom piece is just about 8″. Hope that helps!
Megan
where did u buy all the food and containers?
What are the measurements of each piece, before they were glued together?
Tooo CUTE! Where did u find the canning jars full of fruit and the colander with apples? Are they American Girl items?
Hi Arian,
Yes, the items are from American Girl, specifically Kit’s blue kitchen set.
Hope that helps!
Megan