An Organized Garage Work Space
Hello everyone! I hope you are all having a great start to your week. My month-of-craziness continues, but I wanted to pop in with the “after” photos of our newly organized garage work space!
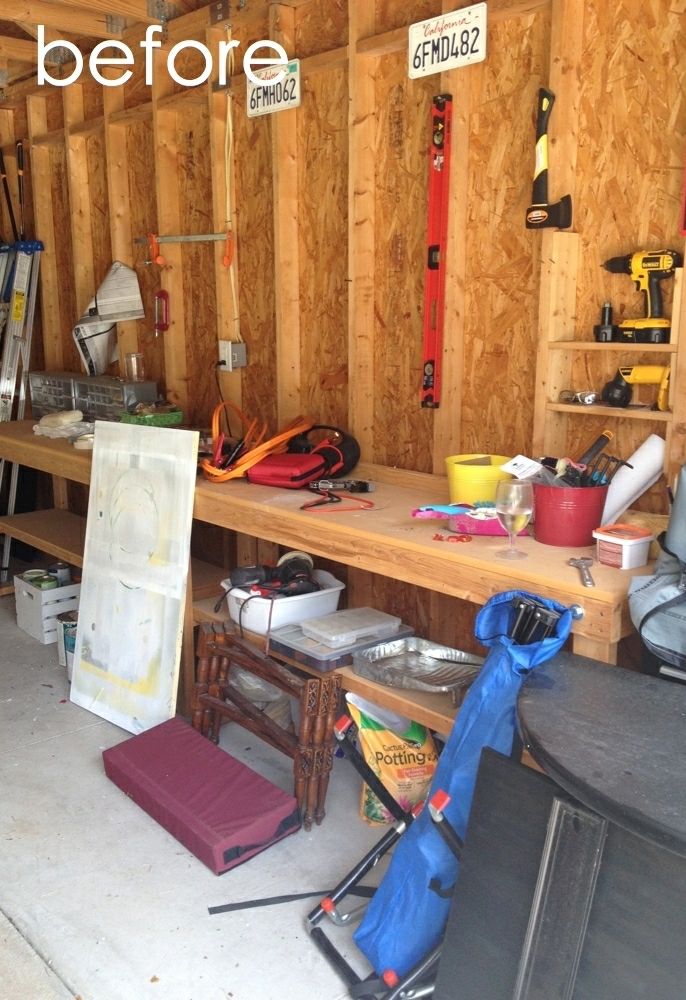
As I’ve mentioned throughout several posts, our garage has existed in pure and perpetual chaos for the full two years we’ve lived in this house. I’ve struggled time and time again to get (AND KEEP!) this space organized, functional, and clean! As I’ve been purging and organizing my way through every nook of our house, I ended up at our garage and decided to tackle this space once and for all!
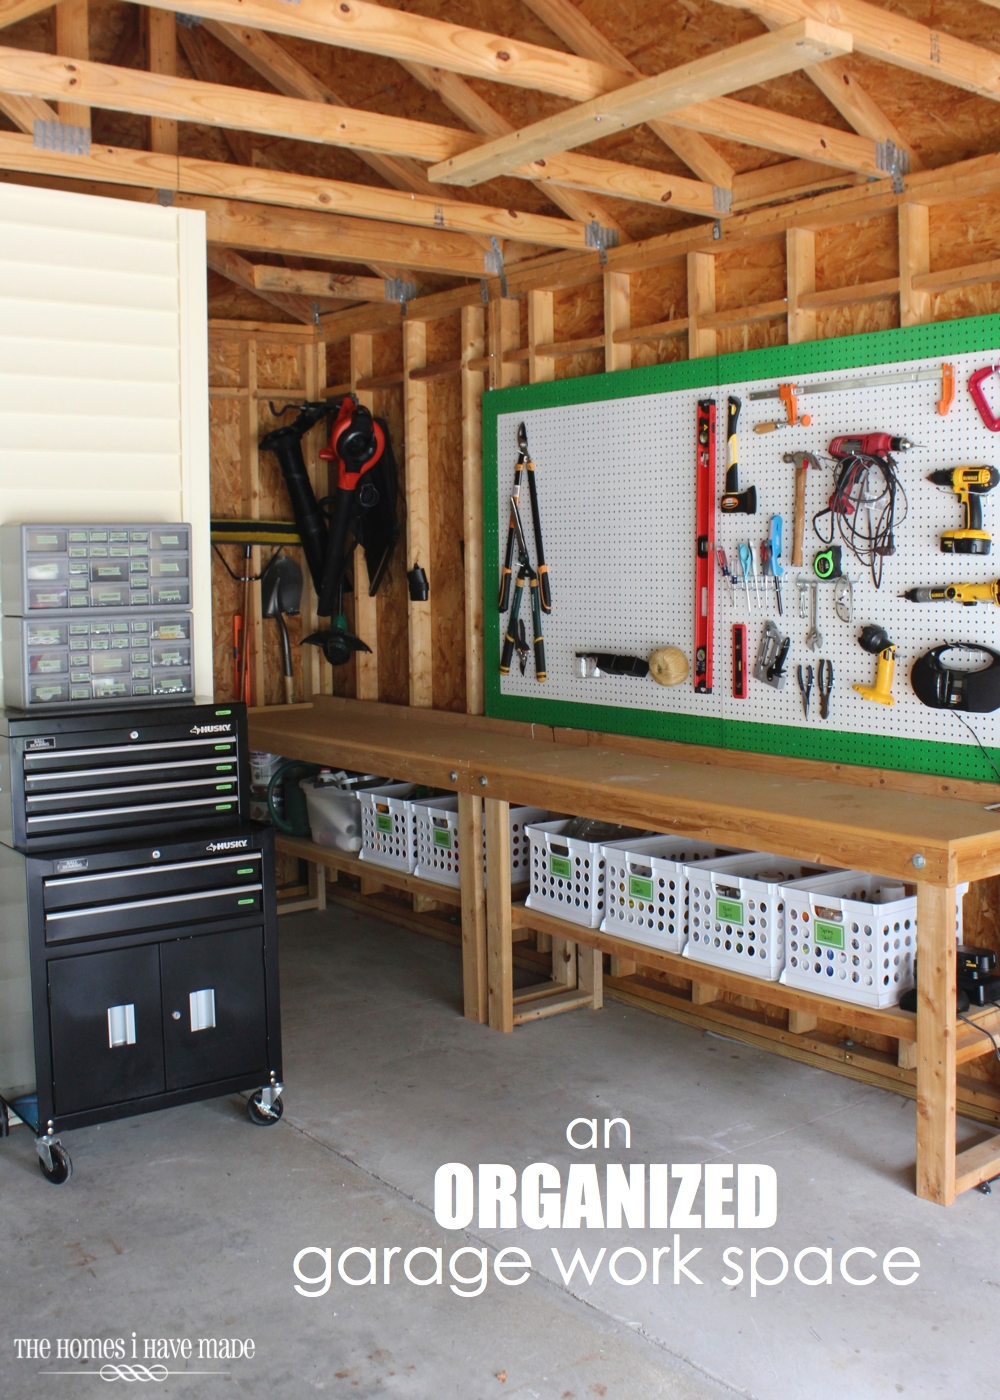
Our garage has four “sections”: toys, storage, fitness, and our work station. I’m still working away on finalizing the other sections of the garage, but our most unruly section (the work station) is all done! Here’s where I started:
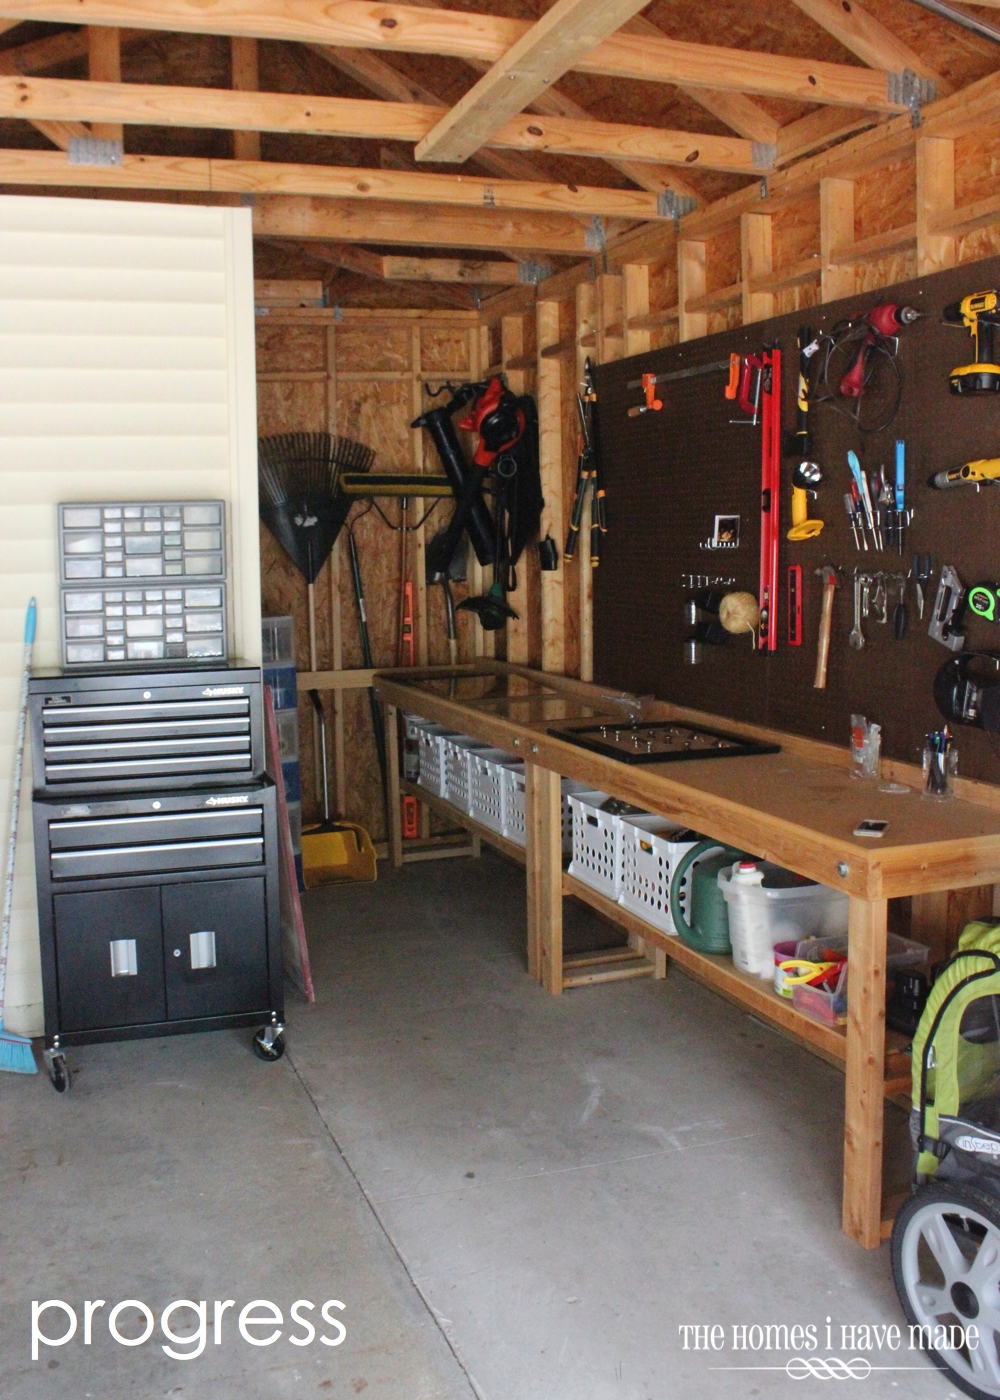
To get the space organized, I utilized some principals that I use throughout the inside of our house: wall storage and designated bins for anything and everything. Bins are my go-to solution for organizing pretty much everything! You can read more about my progress HERE:
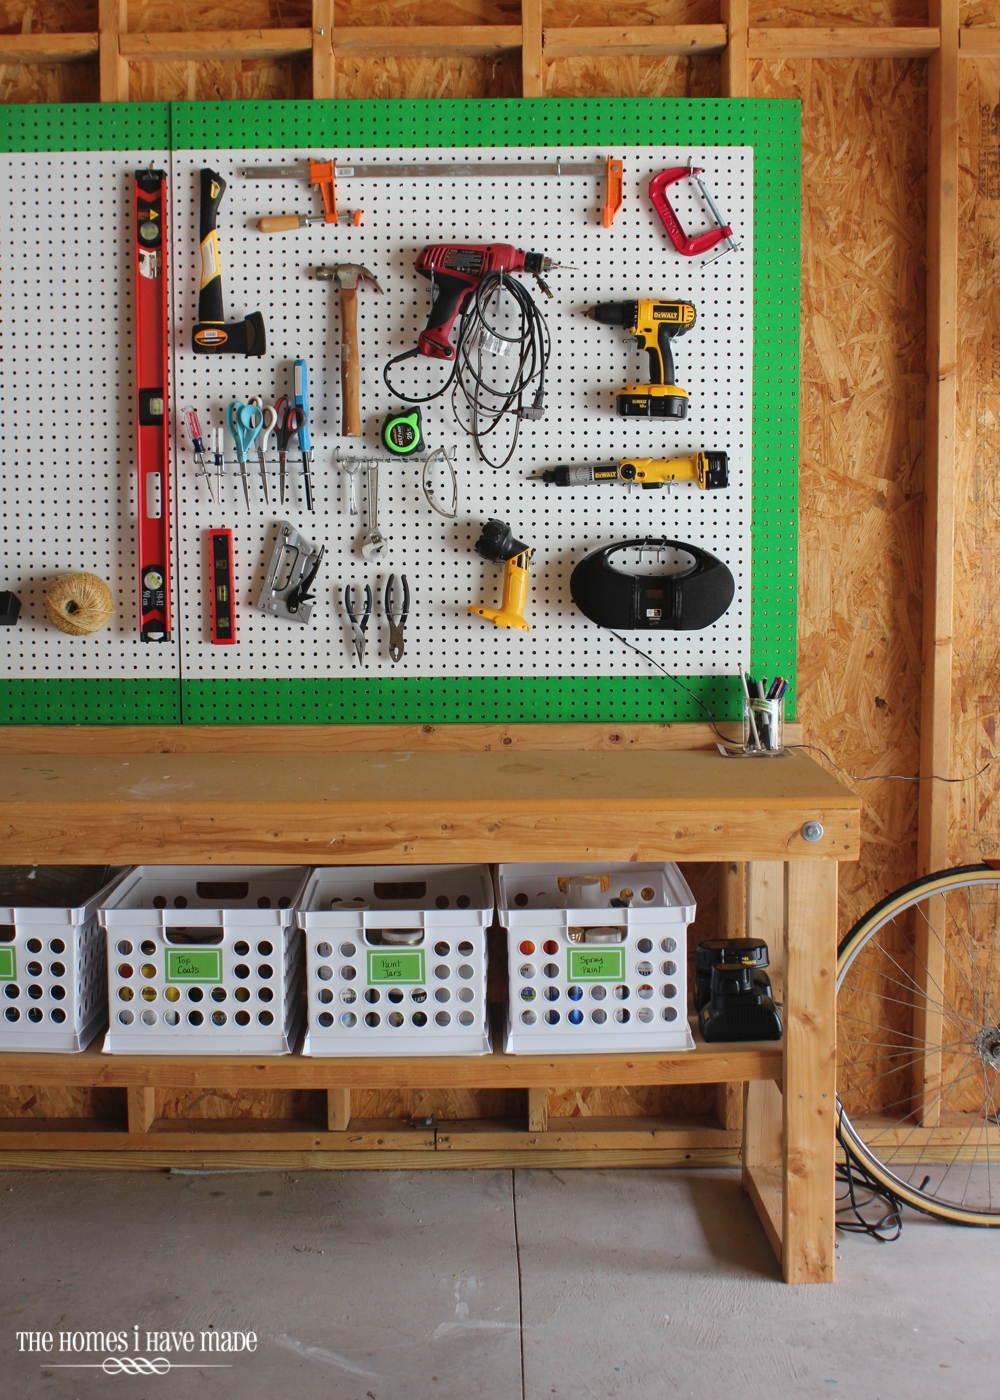
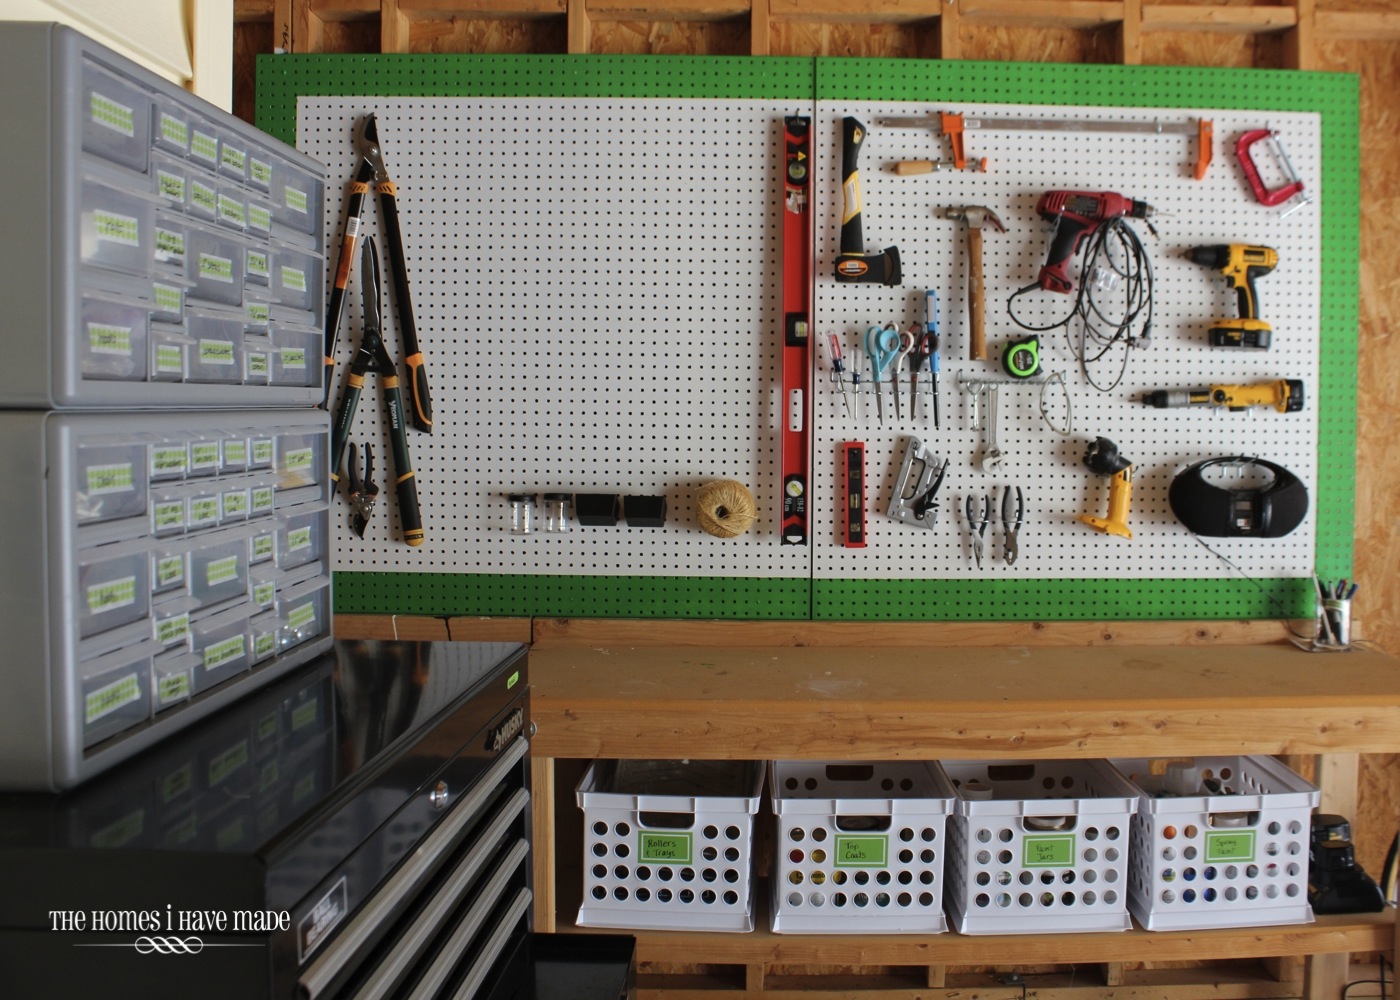
Once the space was organized, clean and functioning just as we need it to, I went about giving it some personality. I used some no-fuss labeling solutions (read about them HERE) so that we can find everything. After some on-hand paint from our stash on the pegboard, the space was feeling fresh, fun and clean. In this house, if it’s fun to look at, I’m more inclined to make the effort to keep it tidy! Want to see how it all came together?
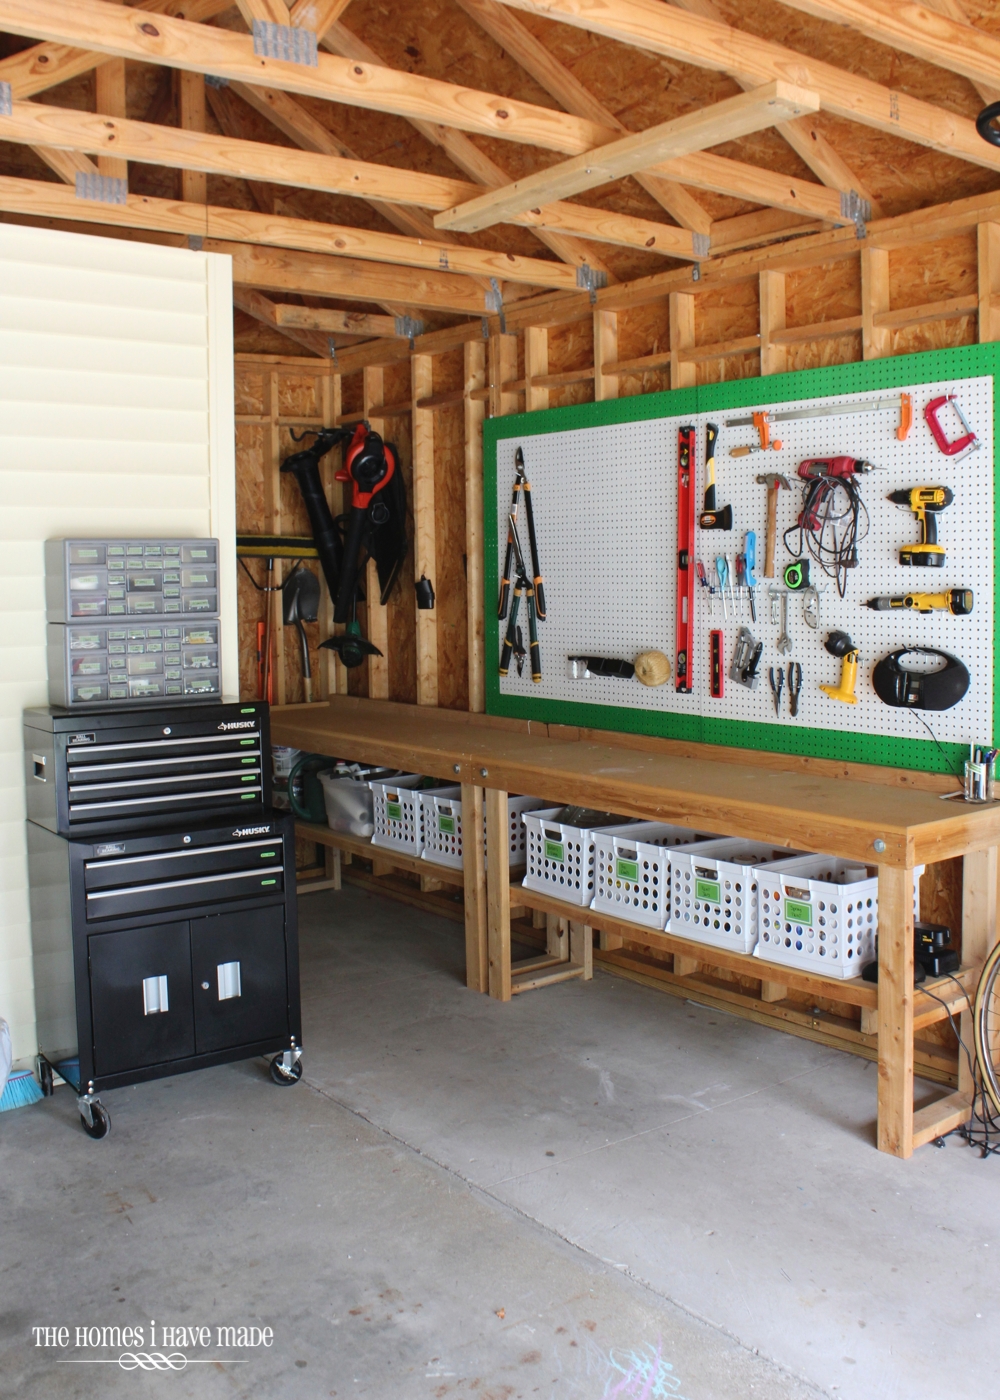
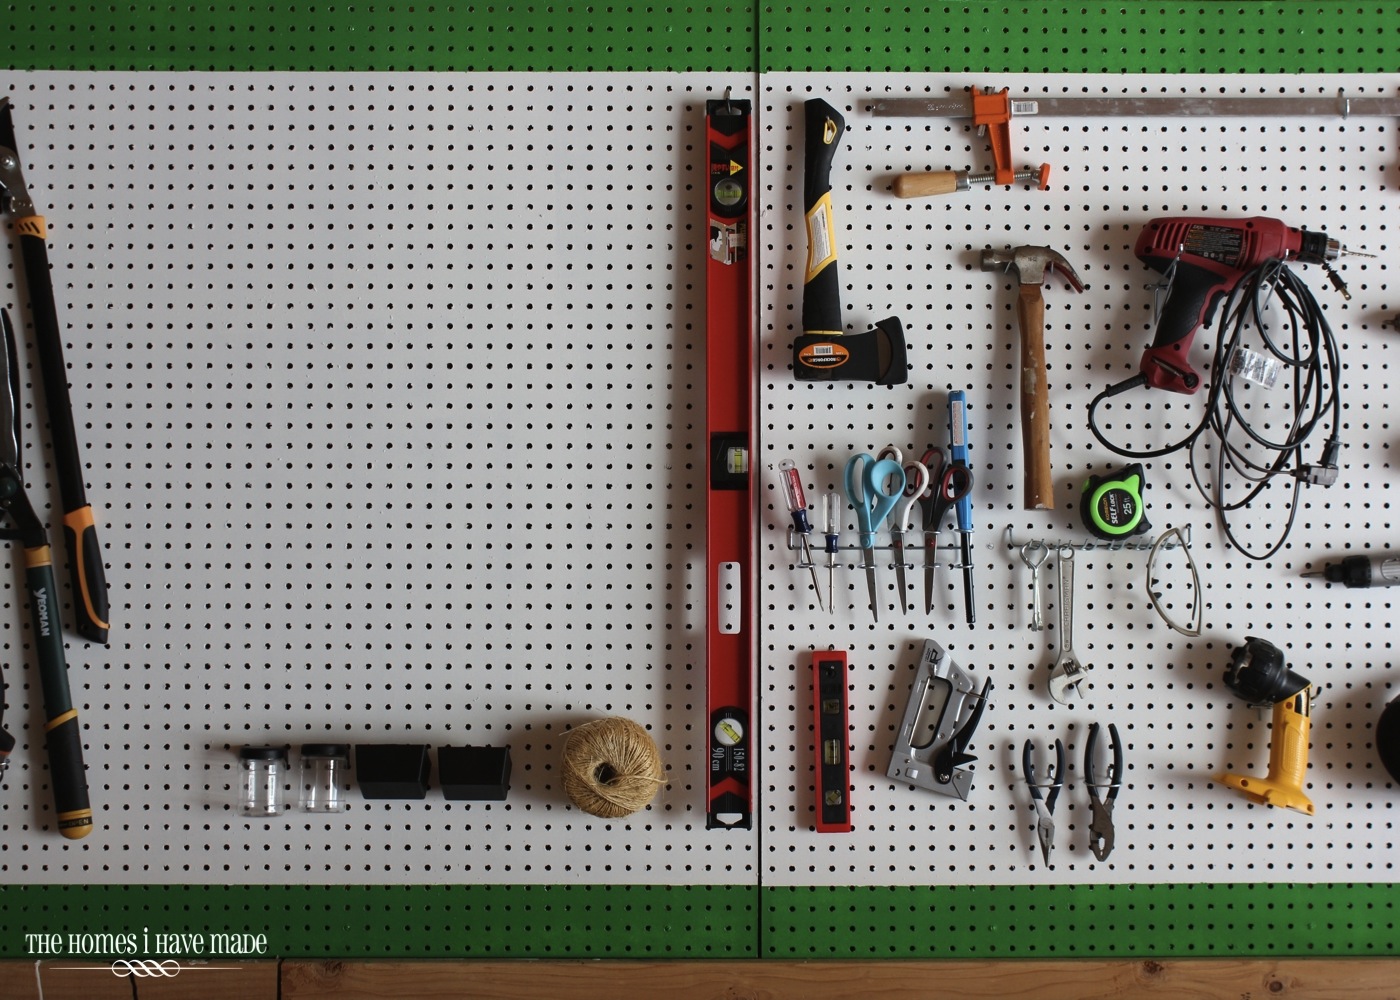
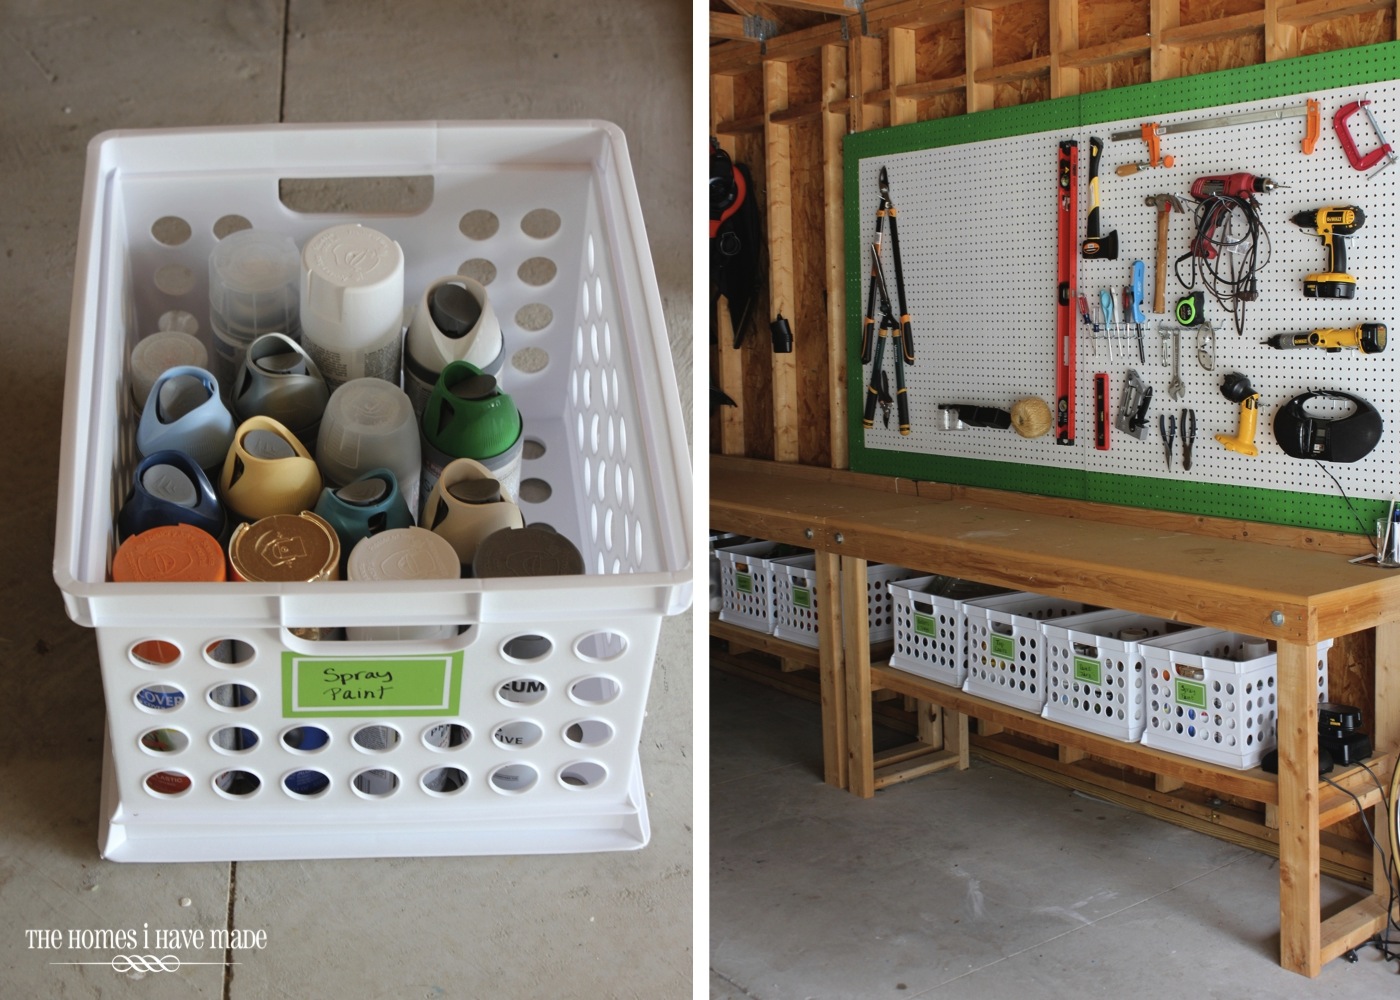
I really debated on how to paint the pegboard. I was tempted to do some fun pattern, but ultimately decided to keep it clean and simple. I love that it is fresh and bright (and that shamrock green is my major color crush right now!), but the tools are easy to see…and all together, it’s really easy on the eyes! I only put our most commonly used tools up on the pegboard…and I love that we have extra room to grow or add more as we need to!

On the shelf and floor under the workbench, I used to just pile, lean and stack things, which ultimately made a big ol’ mess. Implementing simple plastic crates (easy to hose out when they need a good cleaning!) was the “duh” solution that changed this whole space.

These baskets hold everything from spray paint, rollers, trays, garden supplies and more. I love that they can act like drawers, or I can remove the whole crate and take it to where I’m working!
Want to save this post?
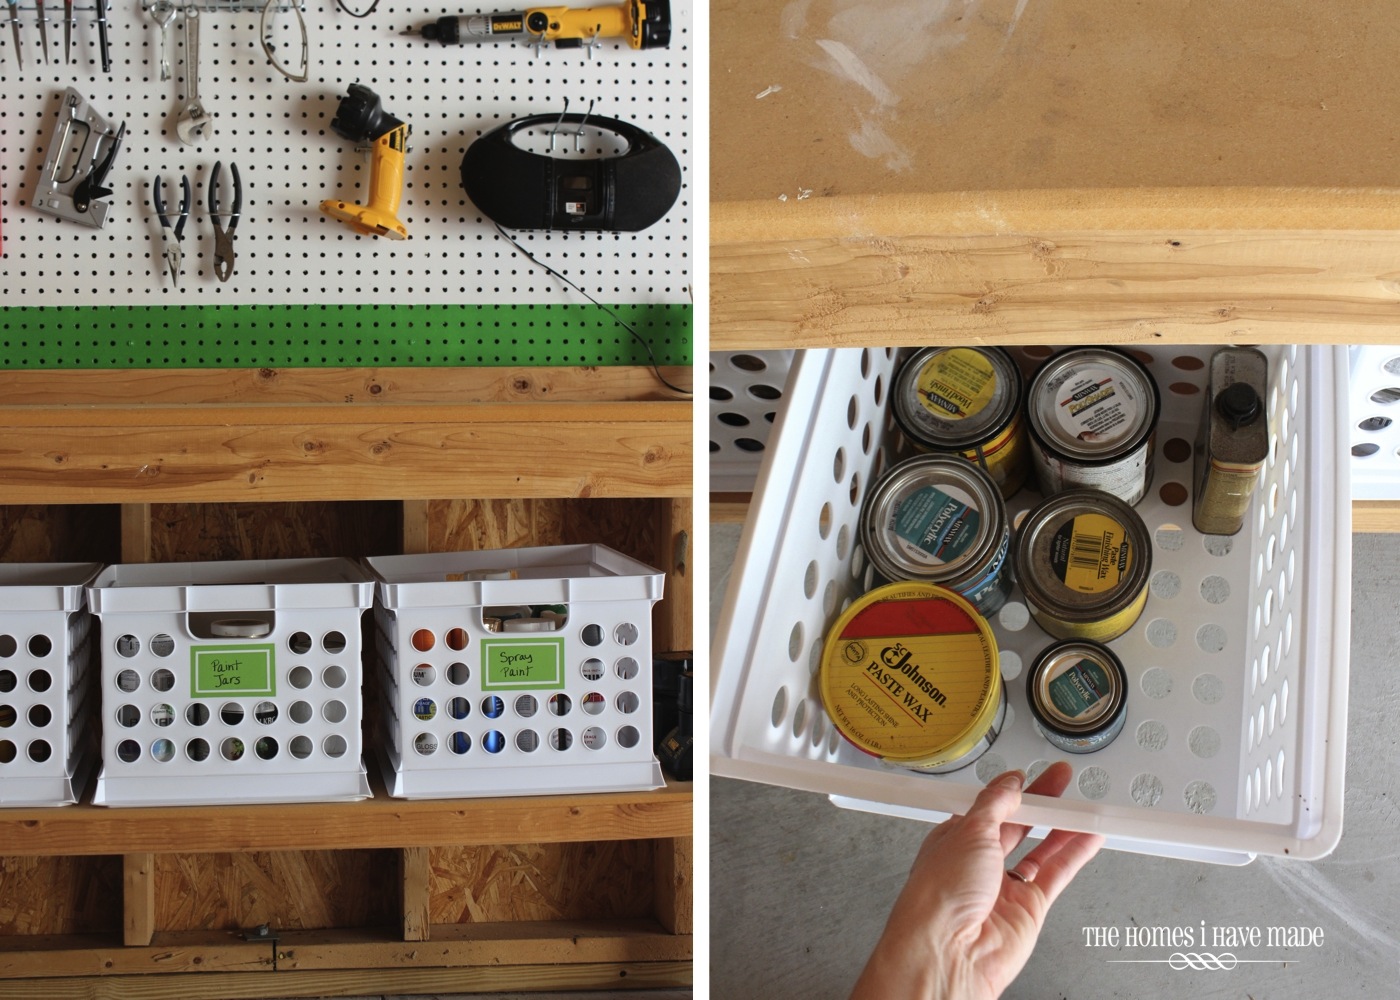
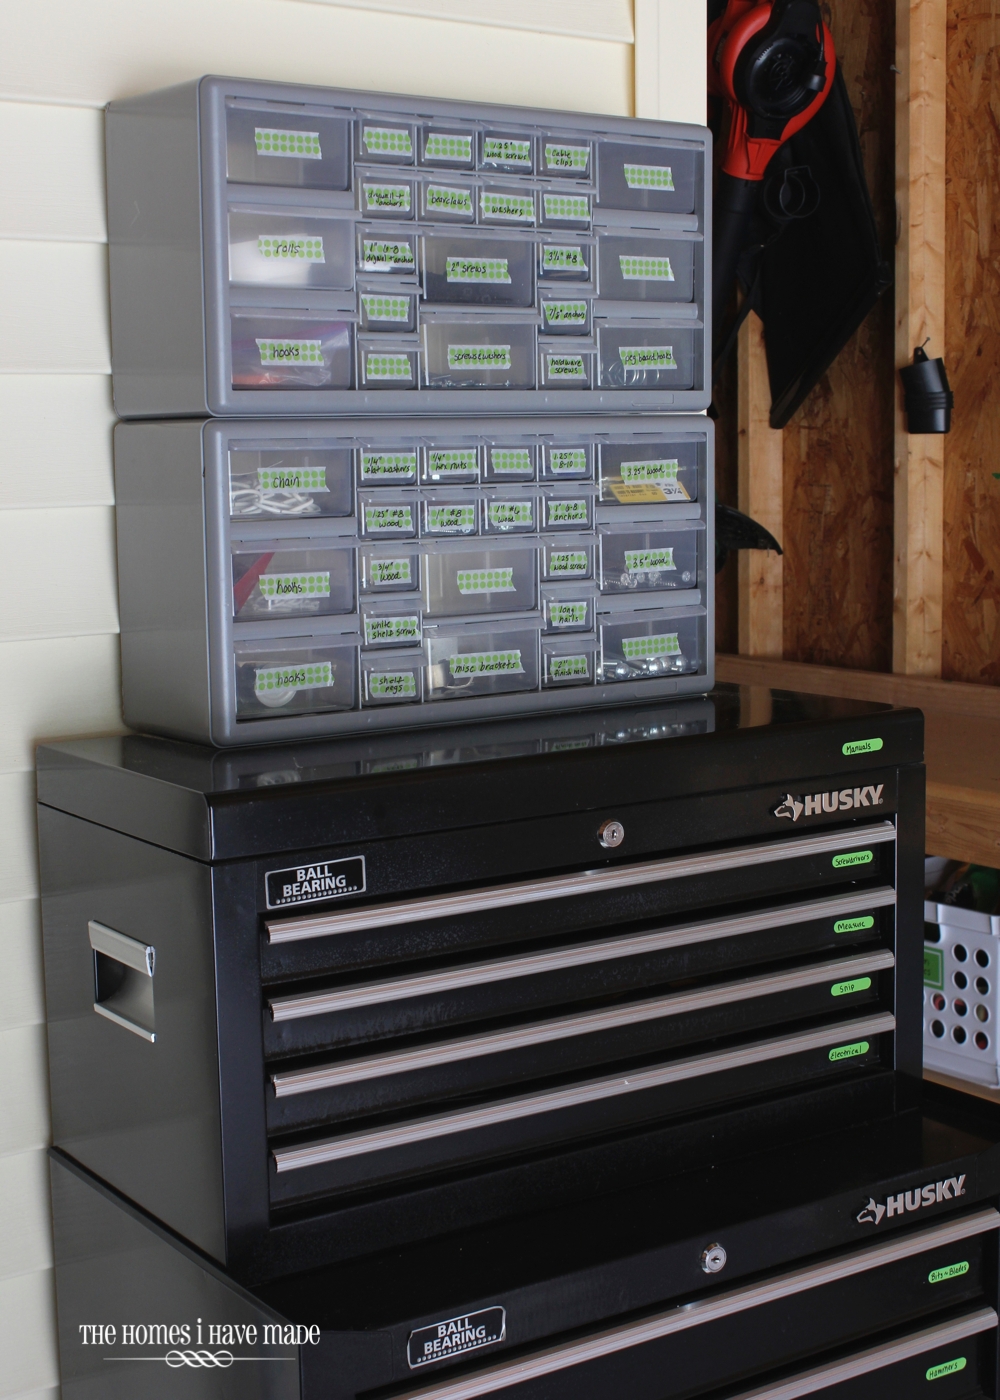
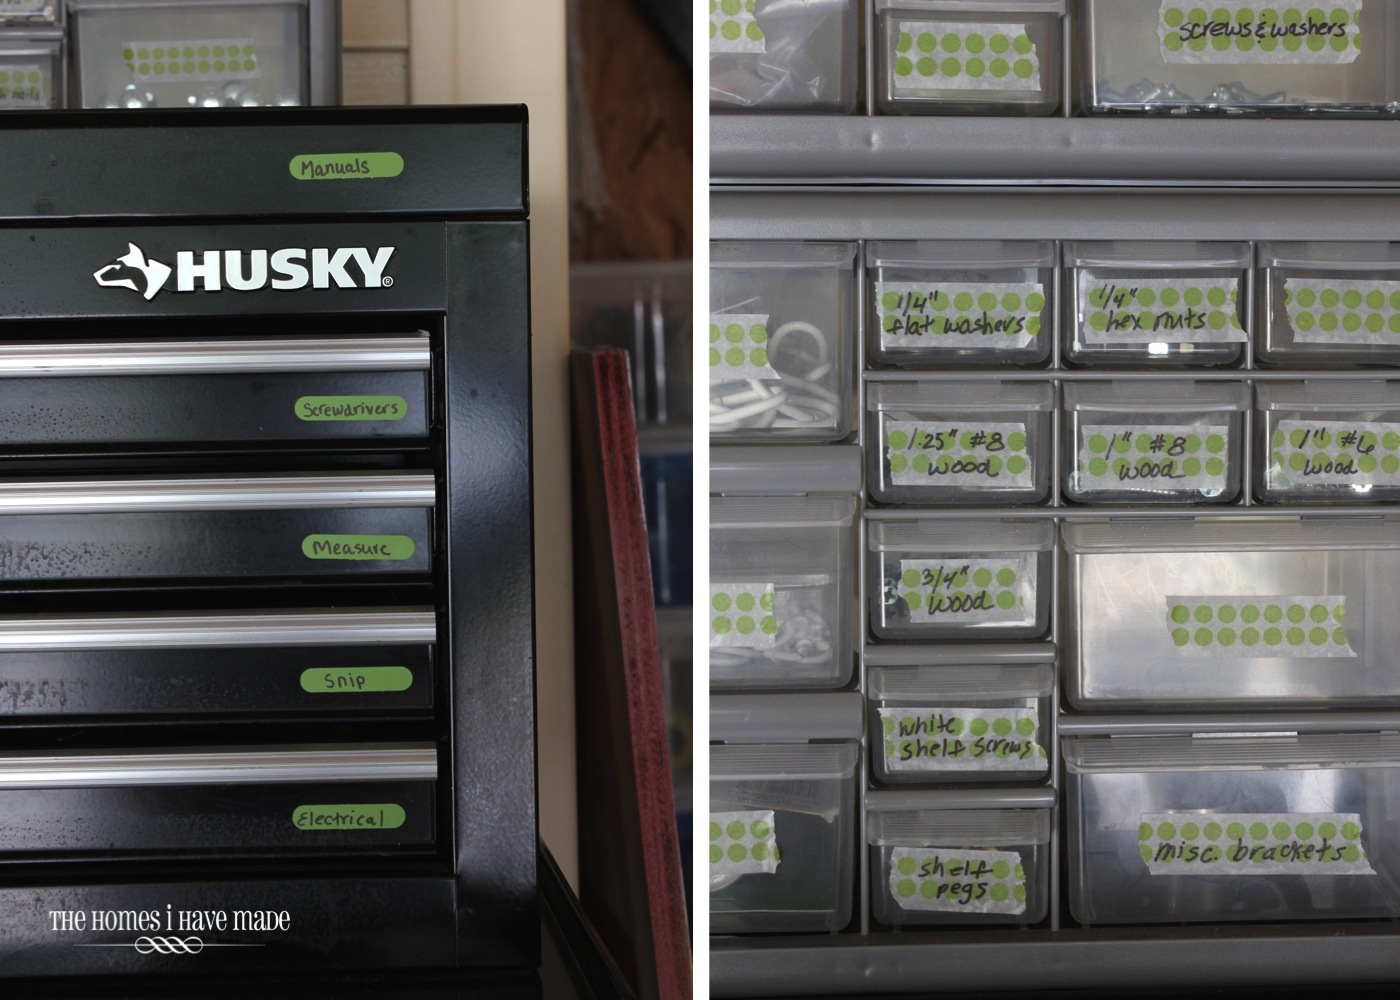
A large tool chest holds additional tools and supplies, organized by category. Nails, screws and other small items are organized into small, inexpensive (and stackable!) nail caddies. The washi tape labels make it easy to swap out labels once a particular screw or nail is all used up!
Nothing here was overly complicated, expensive or time consuming. We had the work benches and tool caddies already, so for just about $50 for the pegboard and crates and a few hours of hard work, this space is finally functional for the first time in forever!
I can’t even begin to tell you what a difference it makes to have this garage finally pulled together. Like every organization project, I so wish I had figured this all out sooner because the tidiness here is carrying over to other parts of the garage. I’ve been determined to get this garage in order, and I think I’m finally on my way!
A sweet reader asked if this nook was primarily used by myself or my husband. Admittedly, I work back here much more than he does! But I tried hard to make organizational and “decor” decisions that will work for both of us! Green is gender neutral in my book 🙂
Have a great week! Up next, a “review” that I’ve been promising for a while now! Be back as soon as I can!

Megan
One Comment on “An Organized Garage Work Space”
This is some awesome organization! I can't wait to have a nice put together garage space like this. Good work!