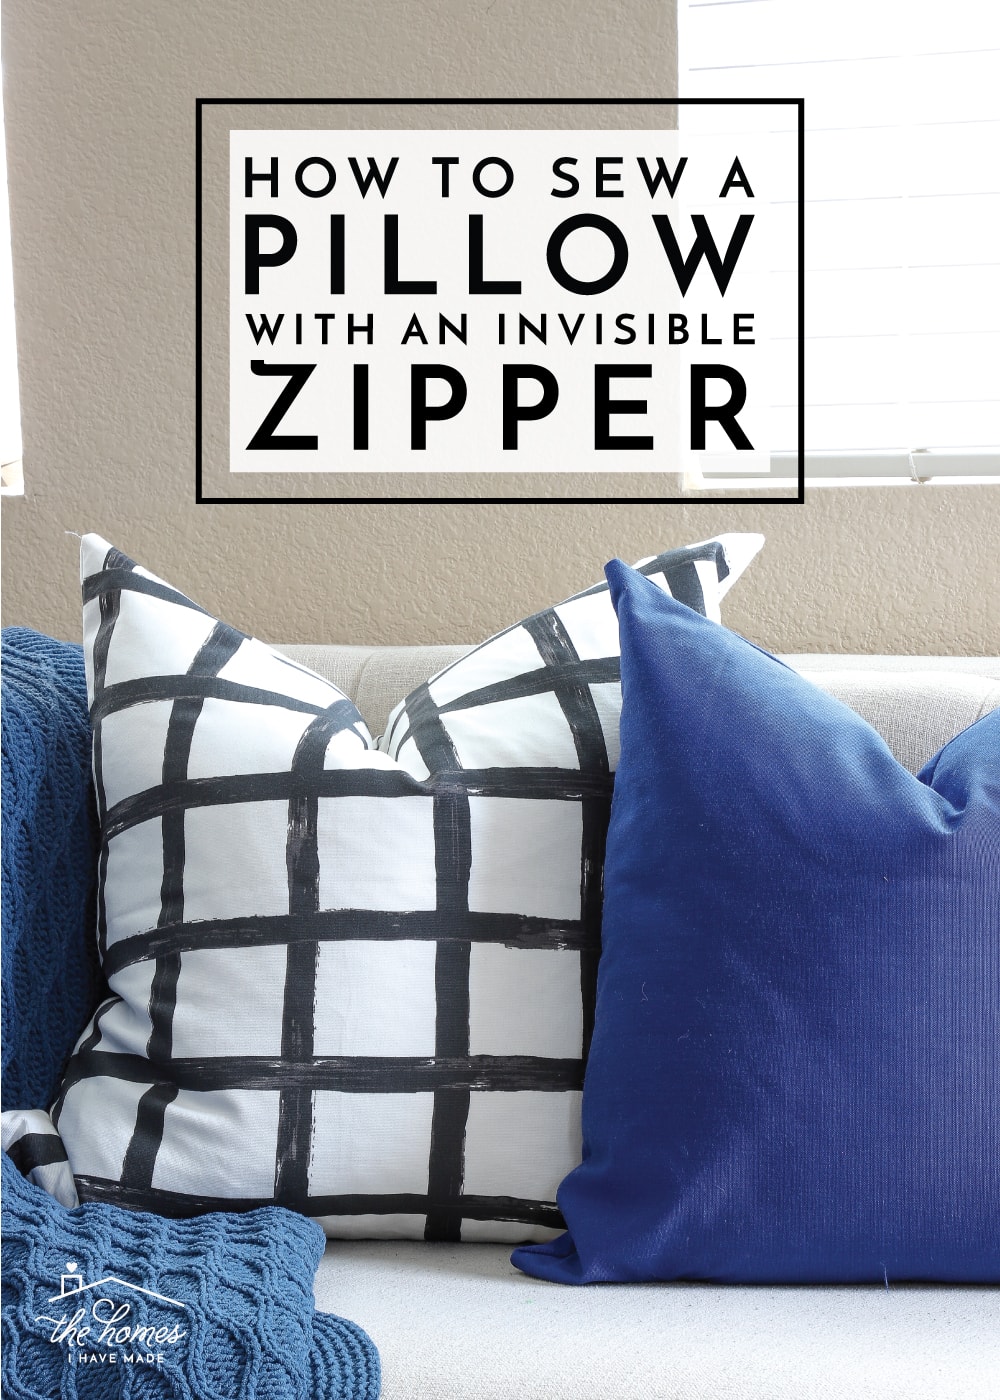
How to Sew a Pillow with an Invisible Zipper
I had one priority this last week: to finish sewing together the 6 pillows I’ve had cut and on my sewing table since October. Yep – you read that right. I brainstormed, measured and cut out these pillows over 4 months ago but never actually took the time to sew them together. Why? Because I really wanted to figure out how to properly sew a pillow with in an invisible zipper, yet I had somehow convinced myself the task would be harder and more work than it turned out to be!
In fact, after arming myself with the proper machine foot (more on that in a minute!), I discovered that adding an invisible zipper to a standard pillow cover couldn’t be easier and actually saves time in the long run (not to mention, they look so much better!) Today, I want to show you how to sew a pillow with an invisible zipper so you too can start whipping together snazzy-looking pillows for your own home!
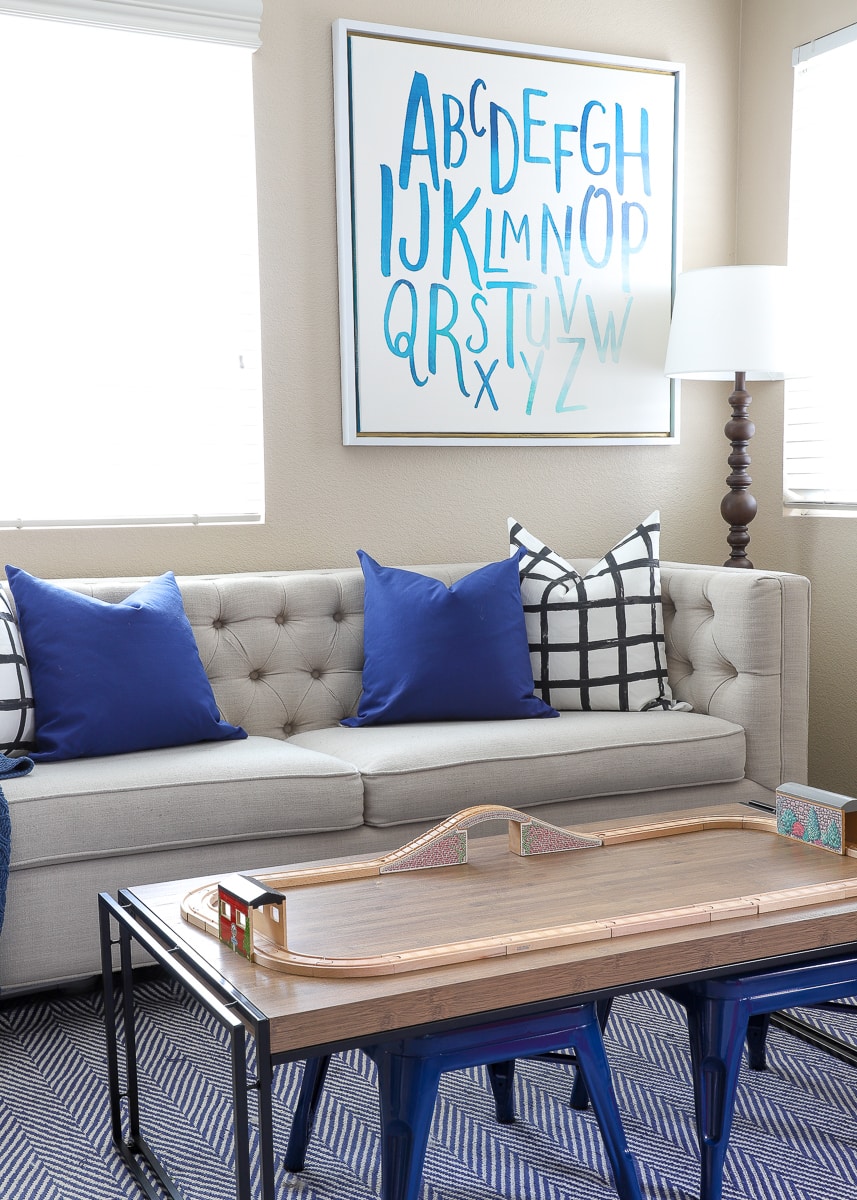
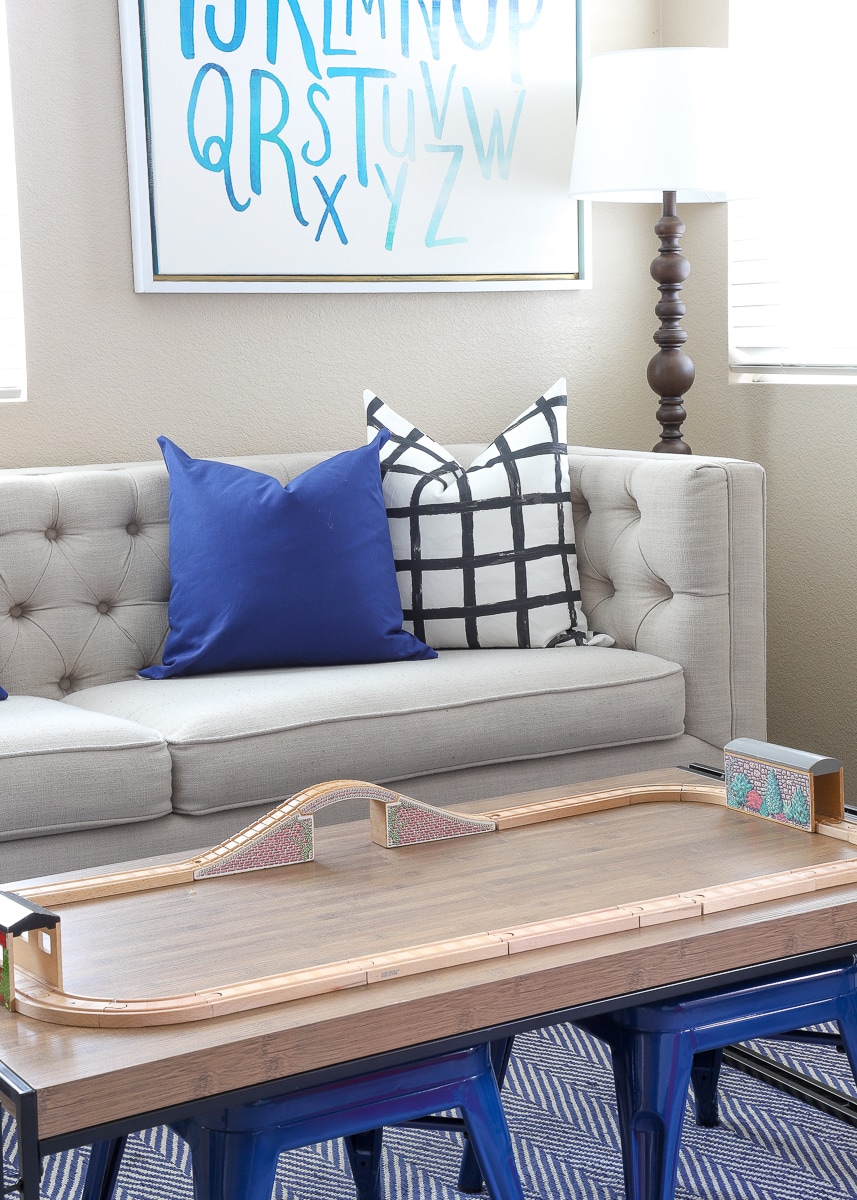
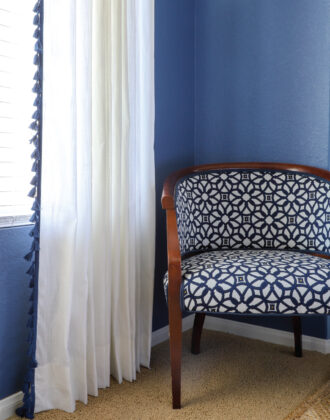
Our playroom has been thiiiiiis close to being done for months now…I just needed to sew new pillow covers to bring together the final details. Sure, I could have more simply sauntered off to HomeGoods or Target to find some finished pillows for the space, but I actually prefer to make pillow covers rather than buy them because it saves space and money! How? By keeping a set number of (different-sized) feather inserts on hand and making new covers to fit them when needed, I reduce the number of pillows (aka: bulk) we have sitting/stored around the house. Second, I find that buying fabric to make covers is much cheaper than buying brand new pillows. And third…fabric options are so much more extensive than pillow options, making it easier to find something just right for your space!
Making pillows is not difficult or even that time-consuming. Once you understand how they come together, you can actually sew a pillow, start-to-finish, pretty quickly…meaning you can refresh your space in a flash! I’ve been using this method for years now but only recently figured out how to properly put in an invisible zipper. I’m going to break it down step-by-step so you feel confident doing it too!
Supplies Needed
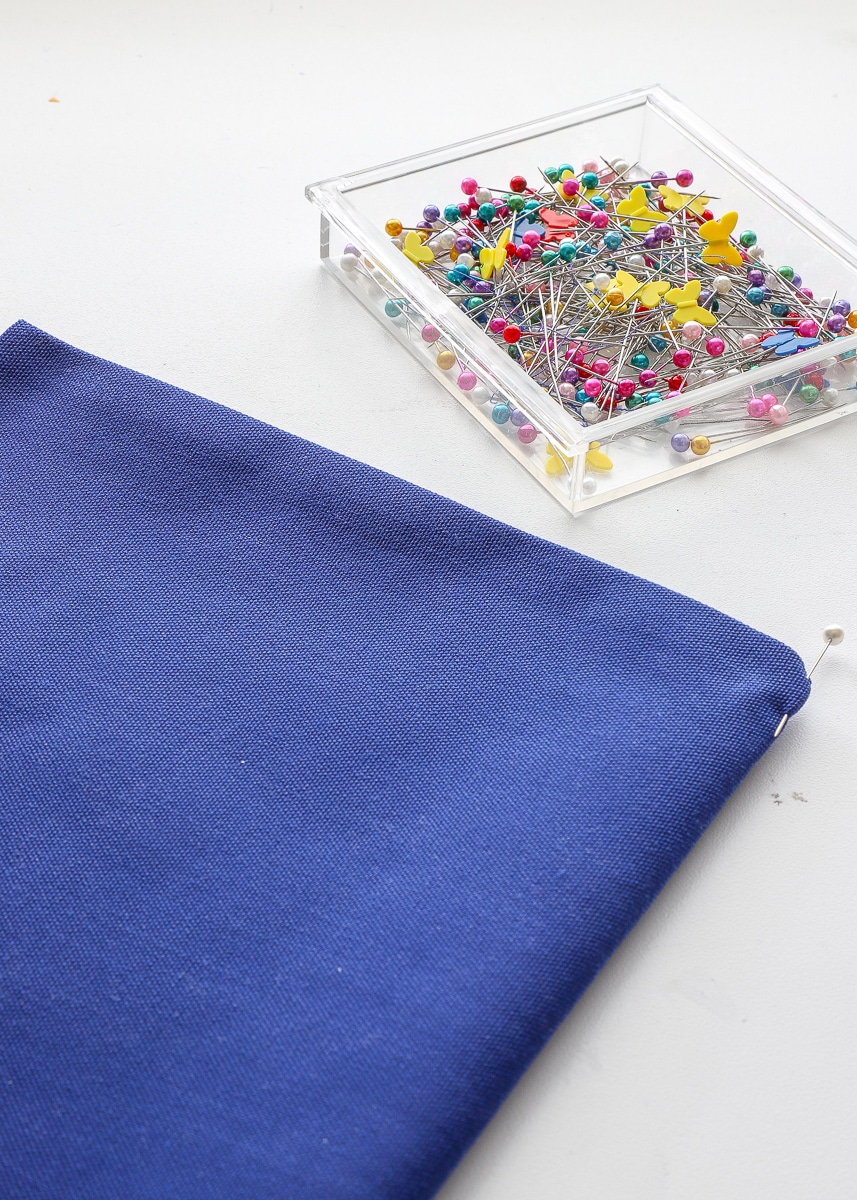
To make a pillow cover with an invisible zipper, you will need:
- Fabric – enough to cover the front and back of your pillow form + a few extra inches
- Coordinating thread
- Invisible zipper – ideally, the length of your pillow’s bottom edge – (minus) 3-6″
- Standard sewing machine foot
- Invisible zipper foot – more on this below
- Regular zipper foot – will usually come with your machine
- Sewing tools: sewing machine | pins | scissors | iron | ironing board | seam gauge | rotary cutter and ruler
All About the Invisible Zipper Foot
As mentioned above, you will need three different feet for your sewing machine to complete this project: a regular foot and a regular zipper foot (both of which probably came with your machine), as well as an invisible zipper foot. Whoa!
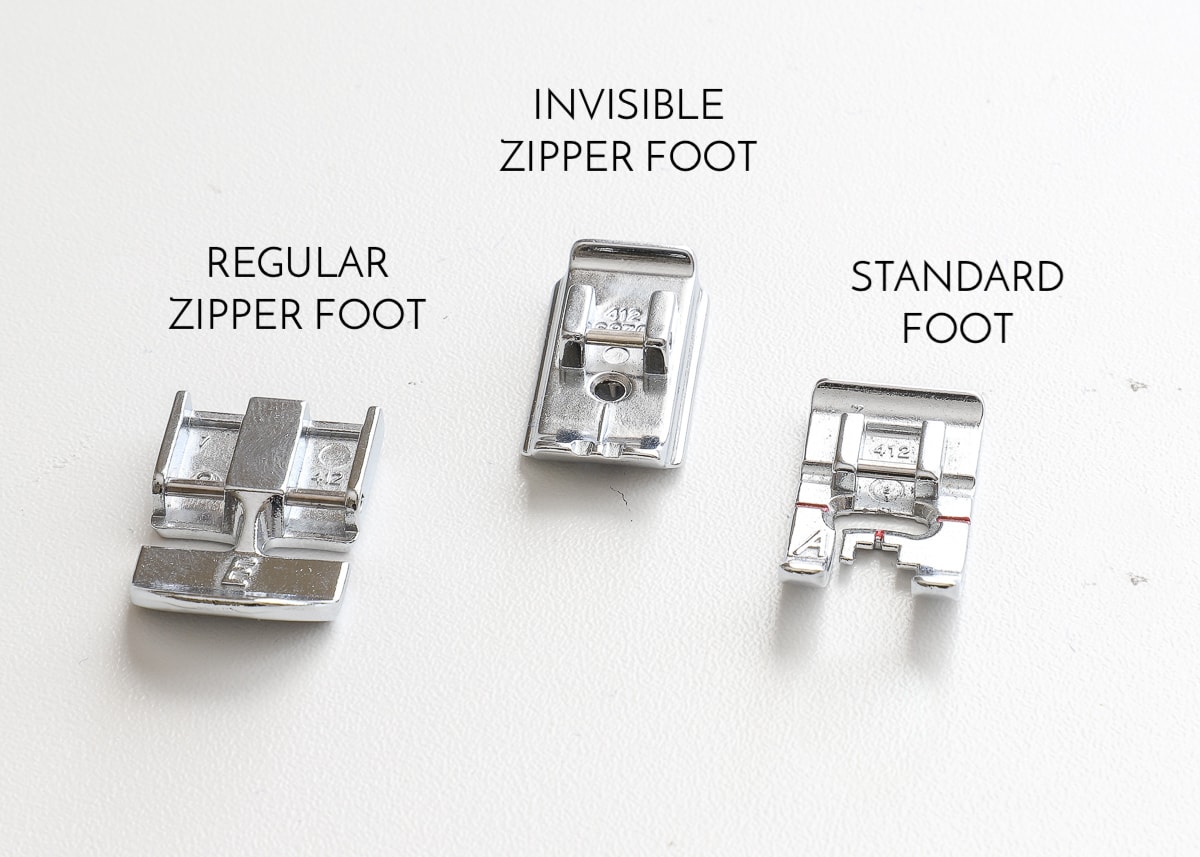
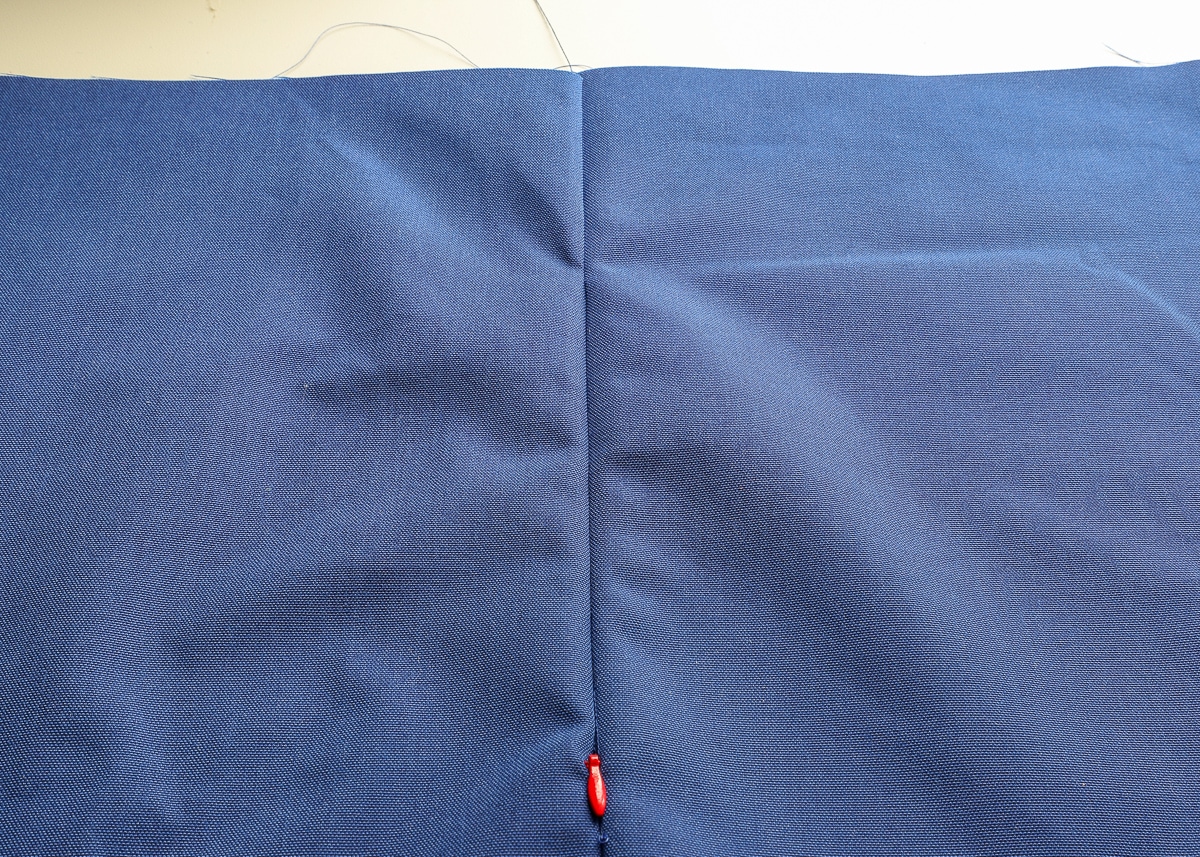
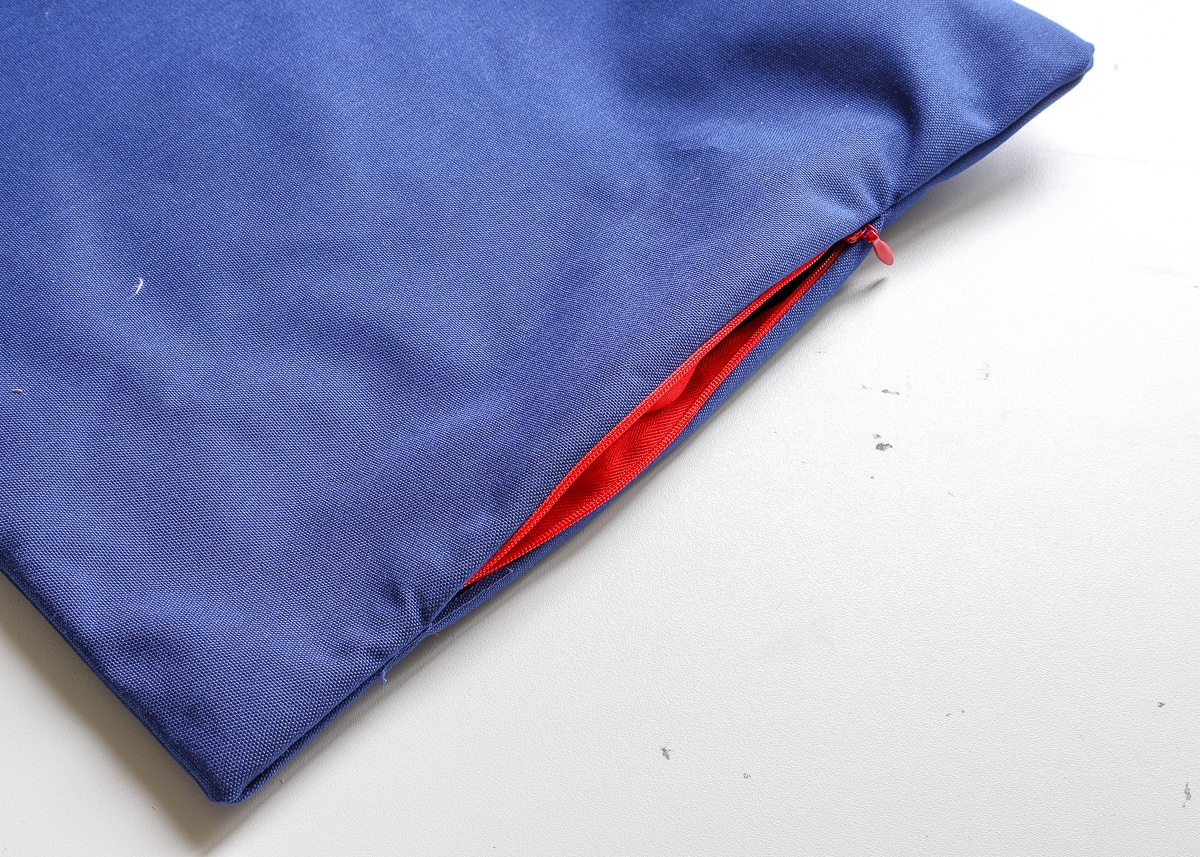
I’ve been sewing pillows together for many years using the method I will share today, but my invisible zippers were always…um…showing! Confident in my technique, I set out to figure out what was going wrong (keep in mind, I’m 100% self-taught!). Lo and behold, my process was spot on, but my equipment wasn’t. I always used a regular zipper foot to insert my invisible zippers, not even realizing there were feet designed specifically for invisible zippers. Check out the difference below:

Invisible zippers were sewn into both of the pillows above; but it’s clearly evident that in order to make your zipper truly invisible, you need to use an invisible zipper foot!
Although invisible zipper feet may vary a bit based on what kind of machine you have, my guess is that most will feature this double groove along the bottom. It’s into these grooves that the coils of the invisible zipper will slide.
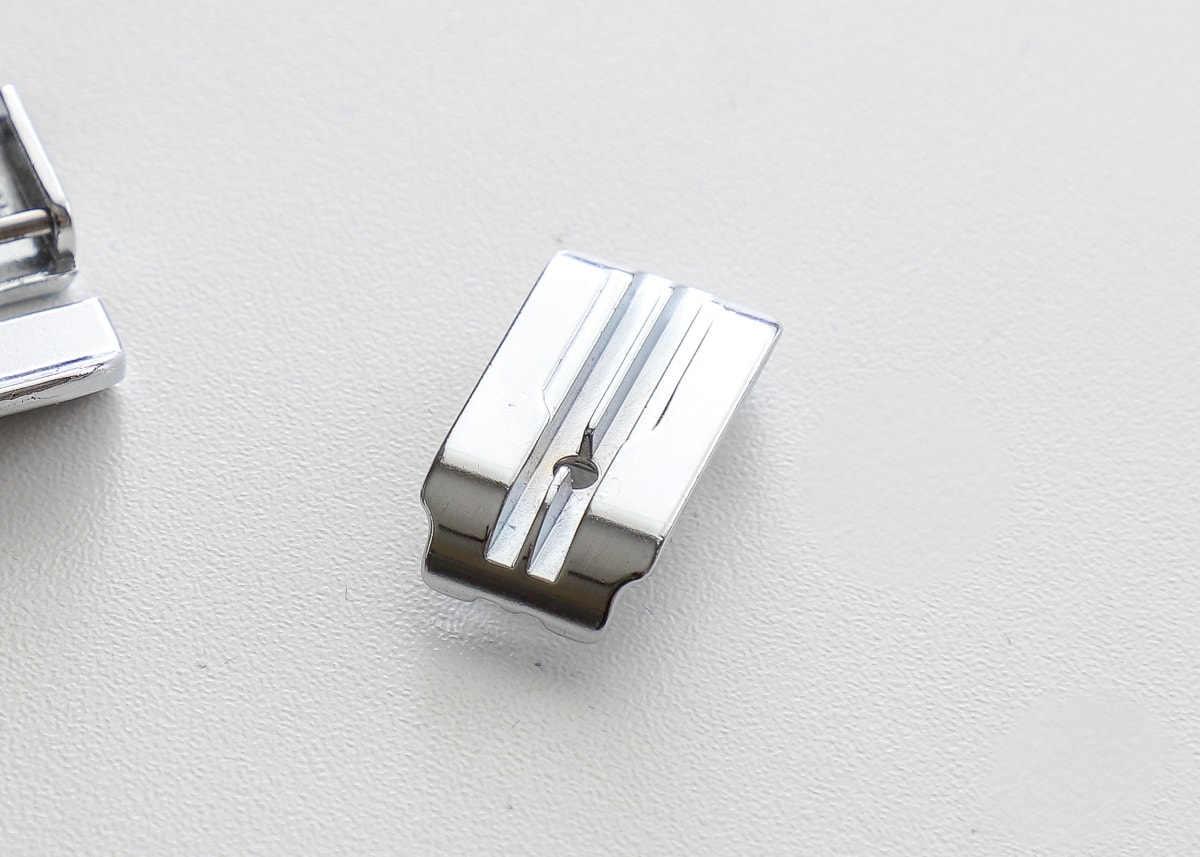
As you sew with this foot, the coils of the invisible zipper are actually rolled back, so your line of stitching goes right underneath them.
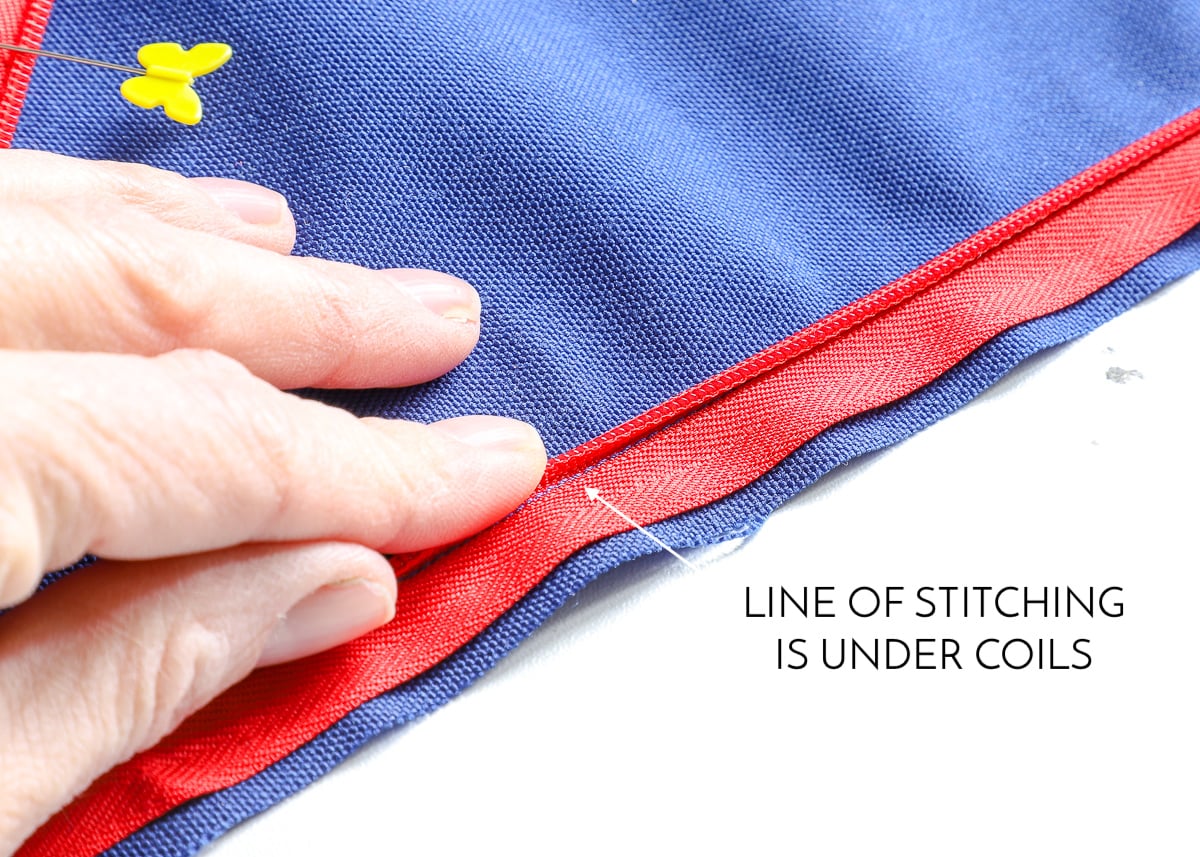
This means that when you zip your invisible zipper together, those coils roll back inward, bringing the seam of your fabric with it and thereby making your zipper disappear!
So…do you need to hunt down an invisible zipper foot for your machine? Yes. Yes, you do 🙂
Prepping Your Pillow Cover
With your fabric, notions and tools assembled, let’s get started sewing a pillow!
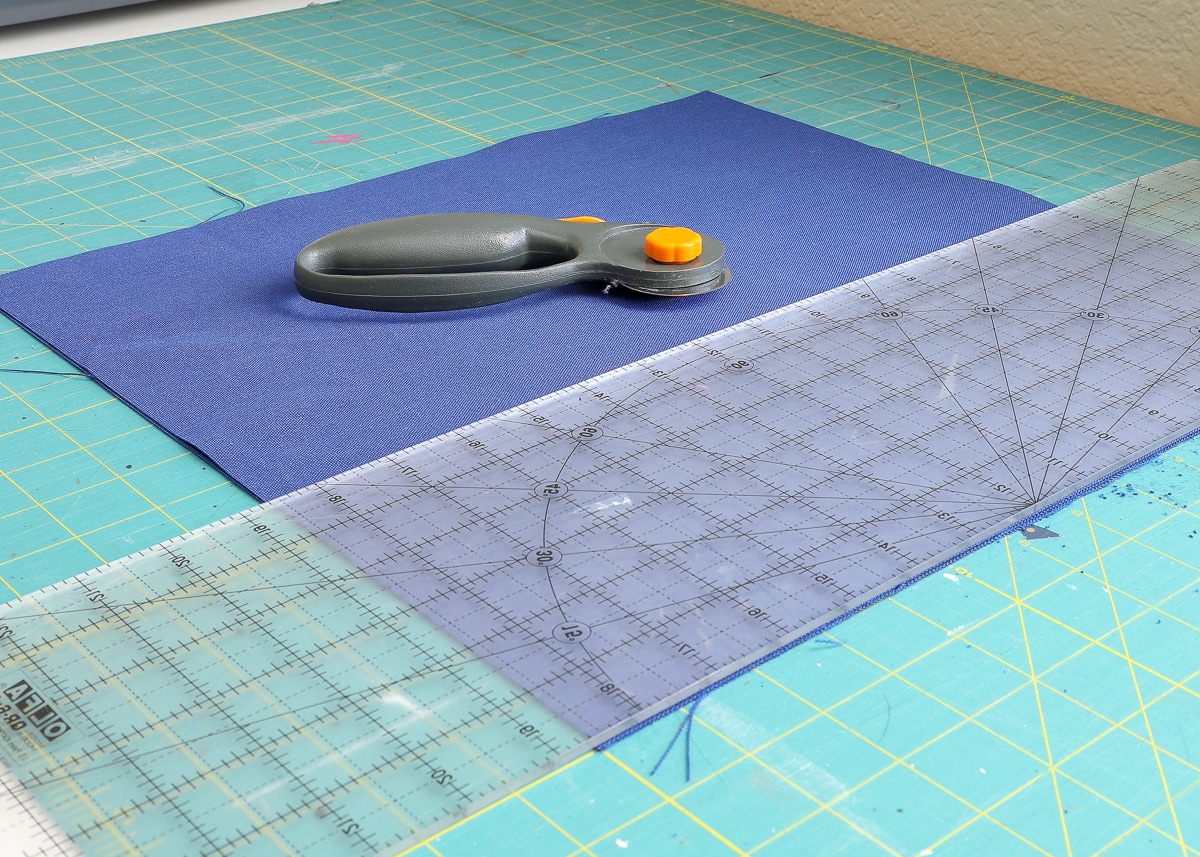
First, cut out your pillow cover fabric. I like my pillow covers to fit snug so the pillows look nice and full. As such, I always cut my fabric to the exact same dimensions as my insert. If my pillow insert measures 18×18″, I cut my fabric 18×18″. For a pillow insert measuring 12×20″, I cut my fabric 12×20″. If you like some extra wiggle room, add 1″ in both directions. A rotary cutter and ruler make getting accurate measurements easy; and don’t forget, you need to cut two squares/rectangles for every pillow you make (one for the front, one for the back!).
NOTE: I cut down both my squares together, so in the photo below, 2 squares are stacked on top of each other.
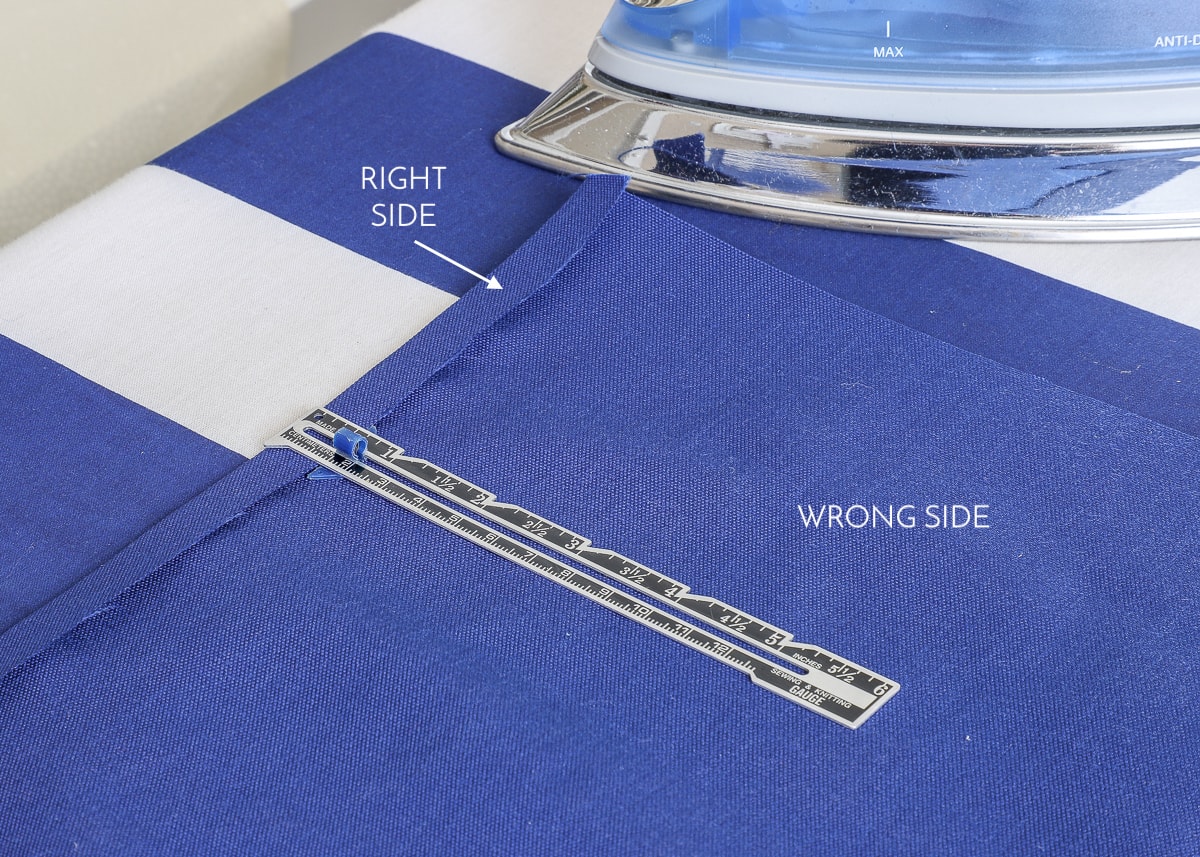
NOTE: This next ironing step is optional, and I tend to skip it #lazy. But if you’re just getting started, it really does help to lay out and line everything up just right!
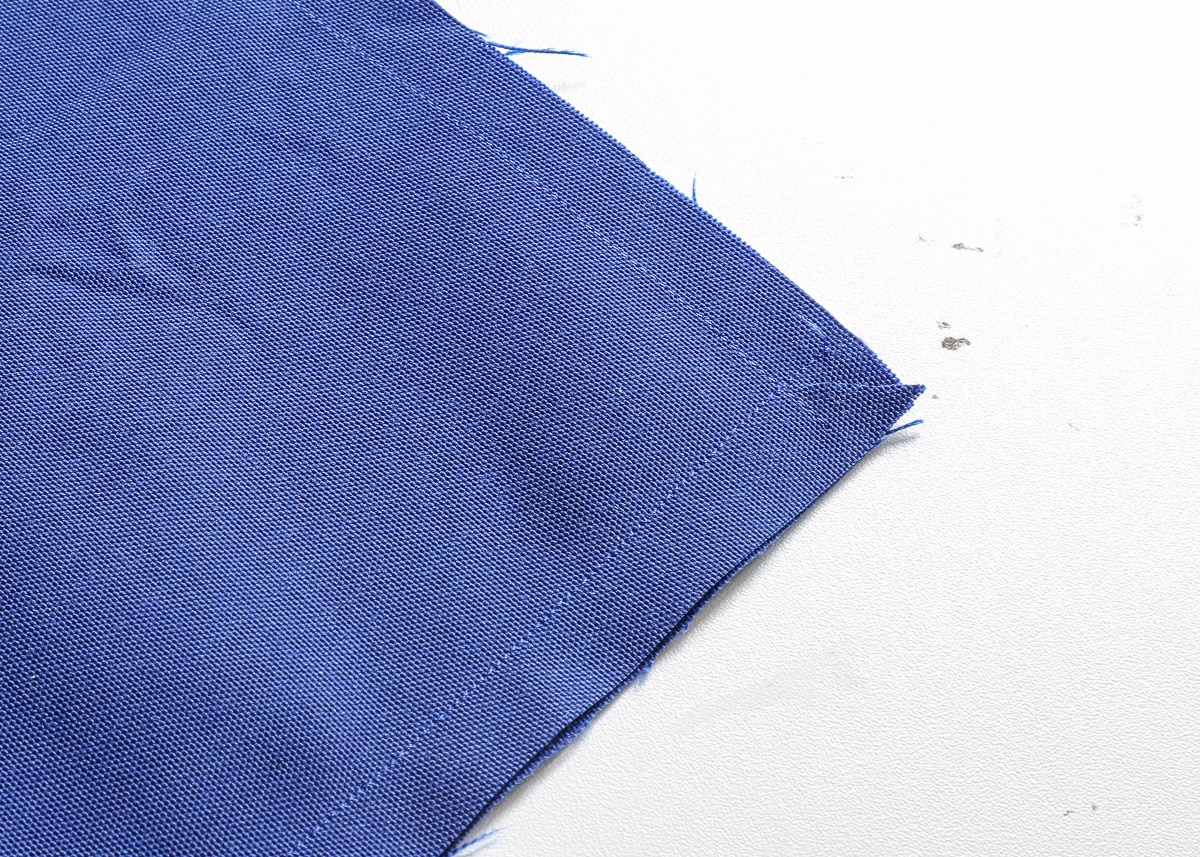
Next, place the RIGHT side of your fabric DOWN onto an iron-safe surface. Fold over one edge 1/2″ toward the WRONG side of the fabric and iron in place. Repeat with both of your fabric squares. Once cool, open the folds; your goal here is simply to create crease lines to help you place your zipper.
Installing the Invisible Zipper
TIP! The only tricky thing about this zipper installation is figuring out which way to face the fabric and zipper so that it closes up properly. I find it helpful to keep repeating “RIGHT SIDES TOGETHER” loud and often so that I am constantly double-checking that everything is facing the right way!
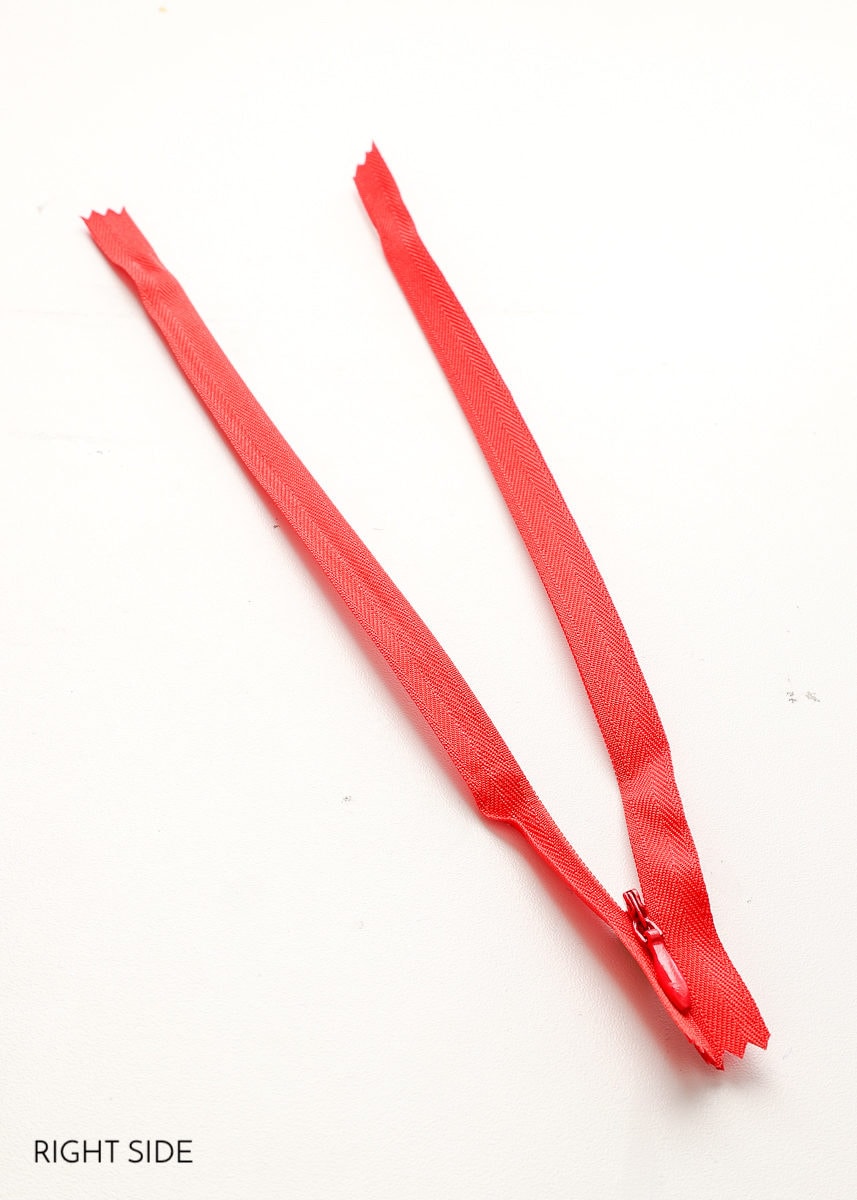
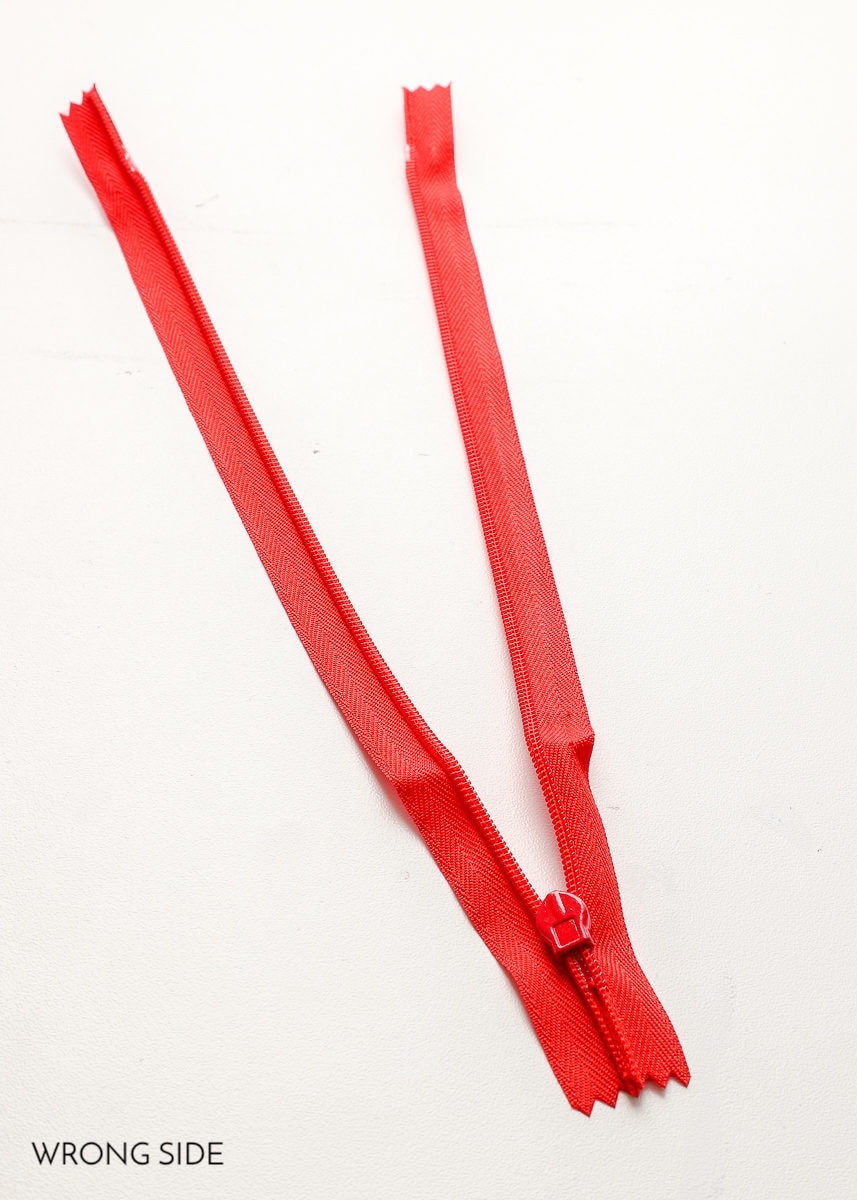
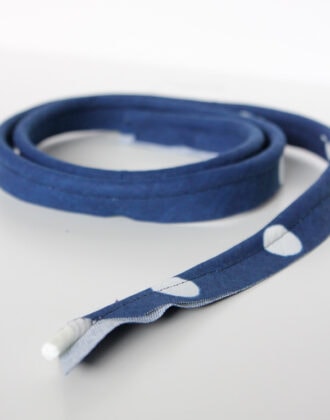
Next, orient yourself with your invisible zipper. The side with no coils and the pull (below left), is the RIGHT side of the zipper, and the side with coils and no pull (below right) is the WRONG side of the zipper.
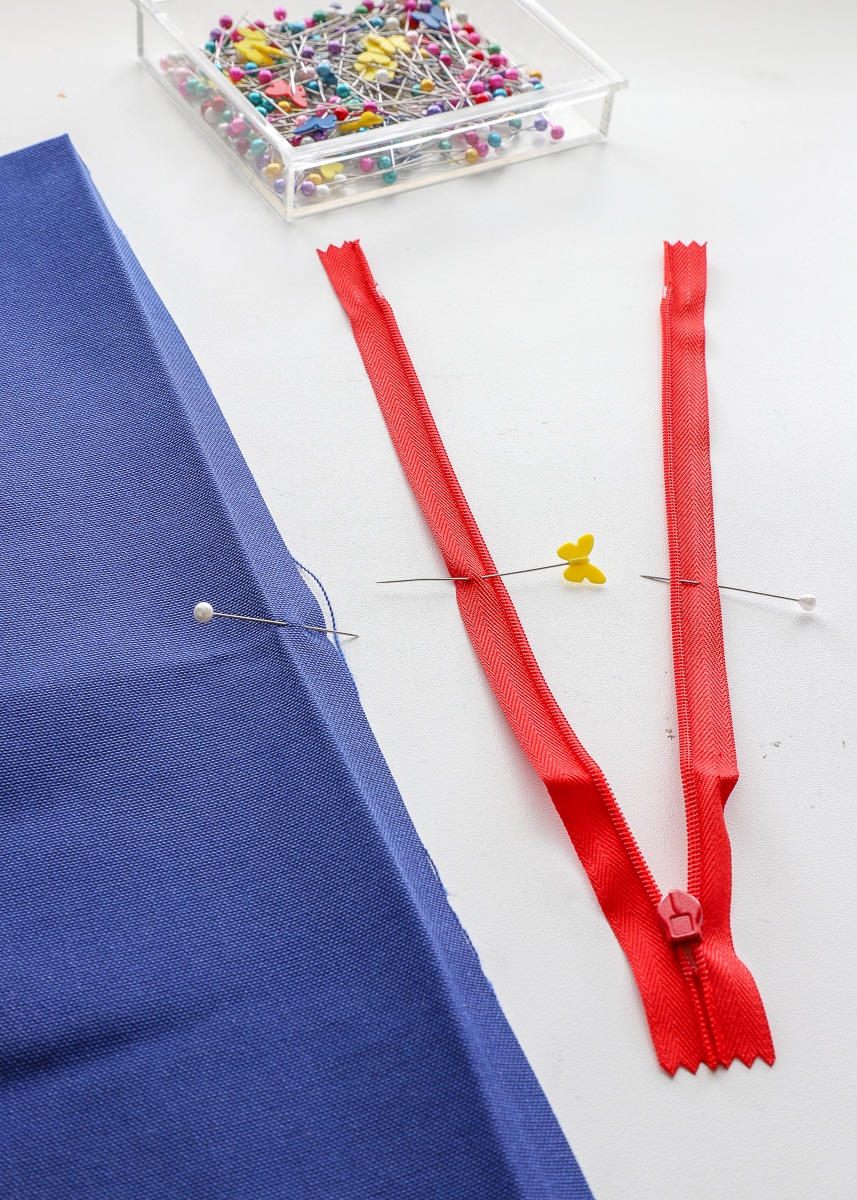
Next, you will find the center both covers and the zipper. I find it easiest to fold the fabric/zipper in half and mark the fold with a pin, as shown below. Once you open the fabric/zipper back up, the pin will be right in the center!
Go ahead and mark the center of both pillow covers (just one edge on each fabric square) and both sides of the zipper before moving on.
Place your first pillow cover RIGHT side UP on your work surface; if you haven’t yet, unfold that 1/2″ fold so that the entire square is laying flat. Next, turn the invisible zipper over so that the coils are facing you (WRONG side UP). Unzip the zipper as far as you can.
Remember, keep checking: RIGHT SIDES TOGETHER!
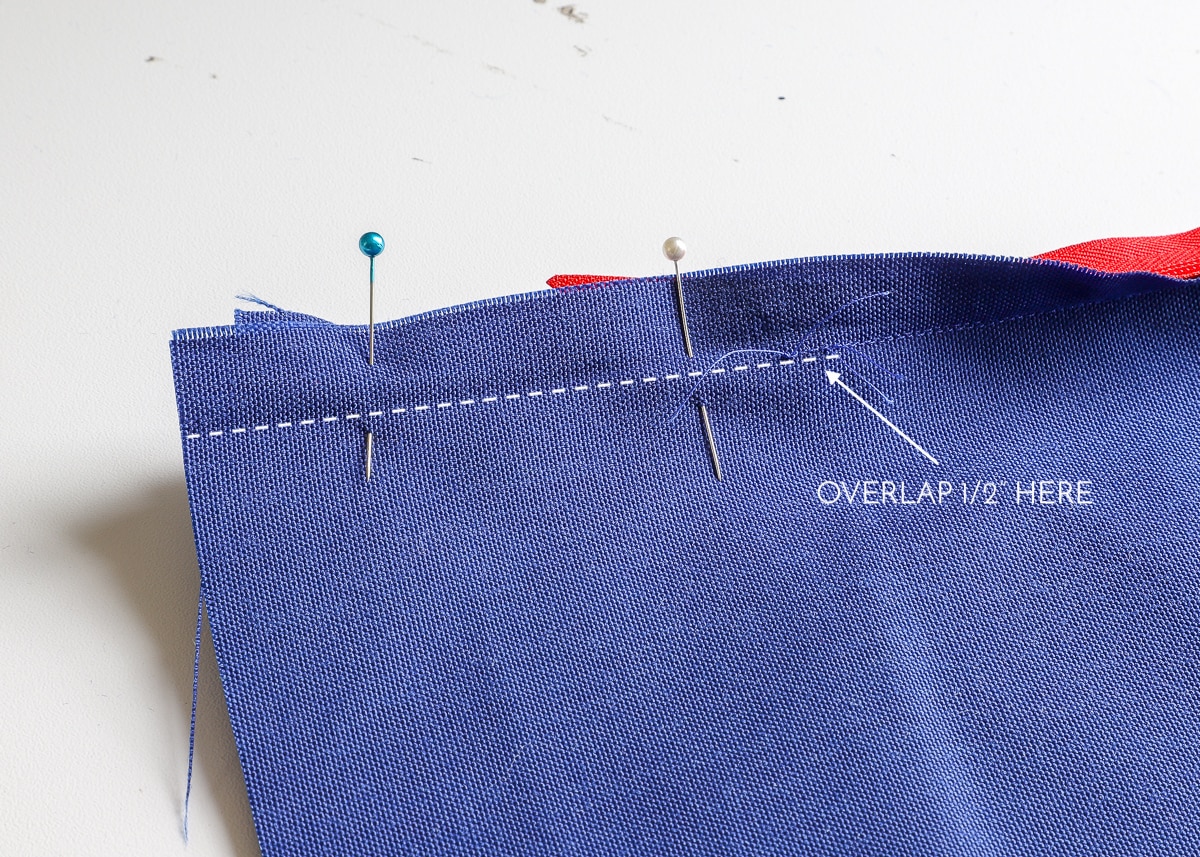
Take the right-hand side of the zipper and place it along the edge of your first pillow cover. Line up the center pin on the cover with the center pin on the zipper (this will ensure your zipper is centered on the pillow’s edge), and then line up the coils with your ironed crease line.
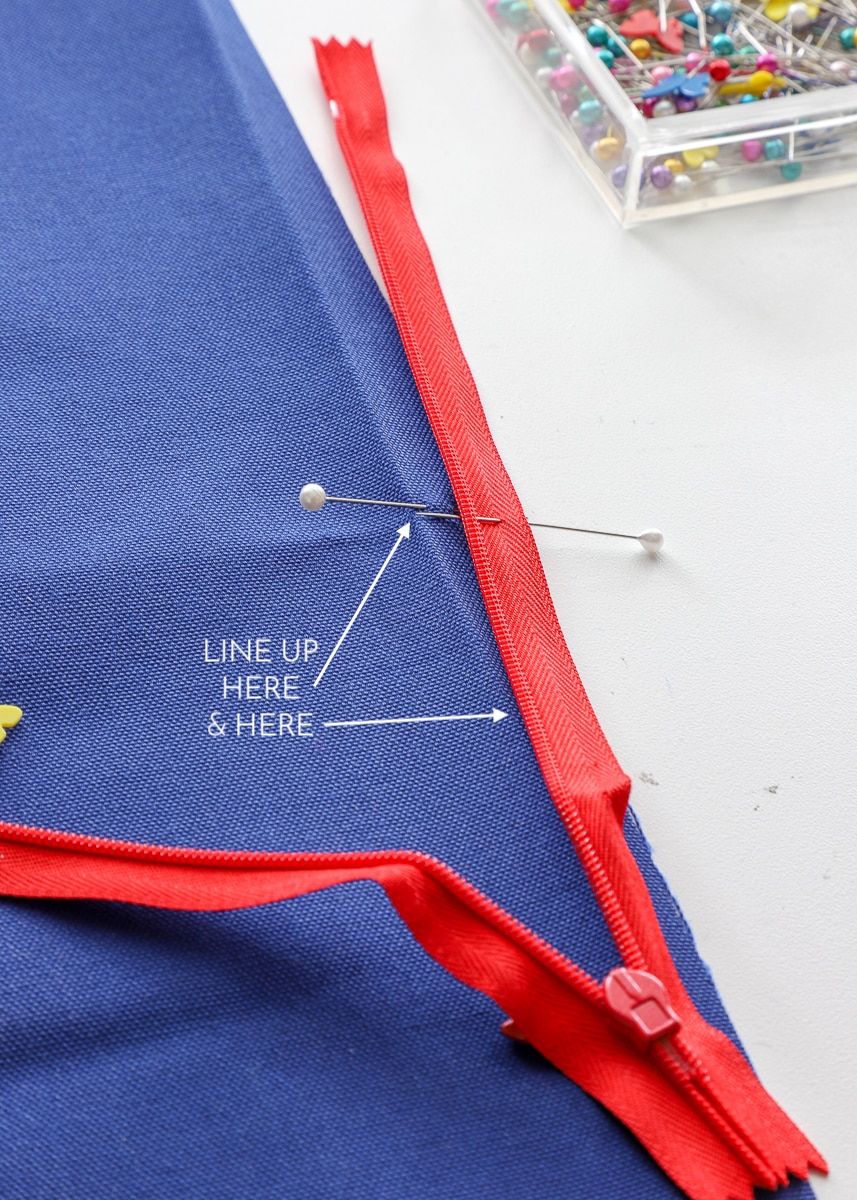
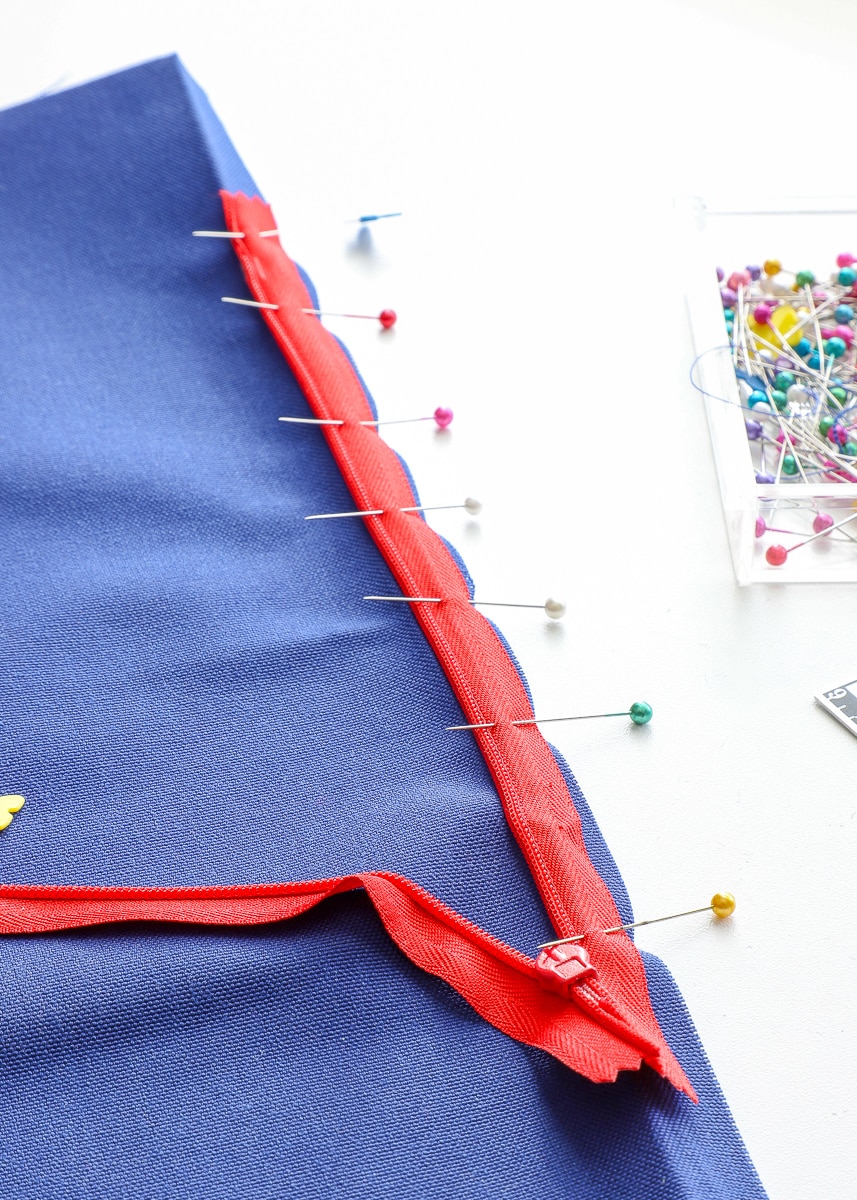
Pin the zipper in place all the way down the length of the zipper, ensuring the coils stay along that crease line.
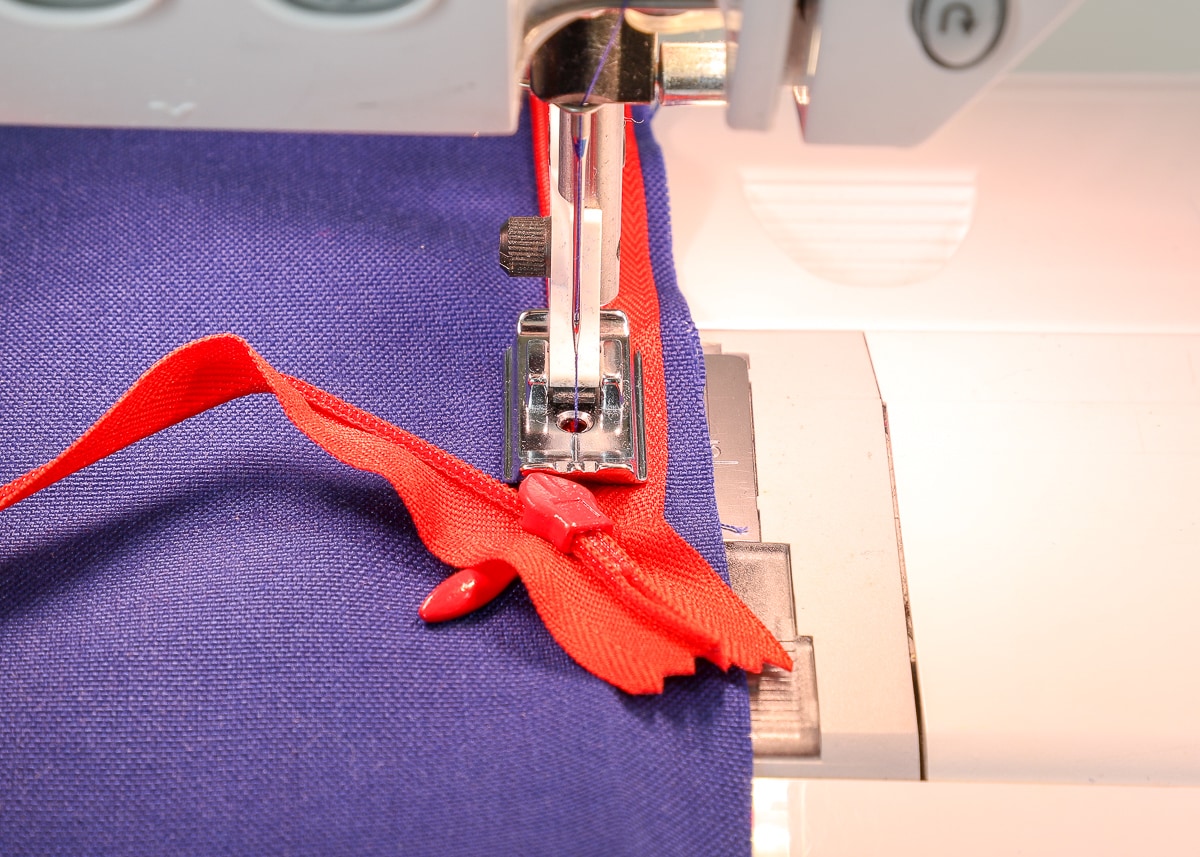
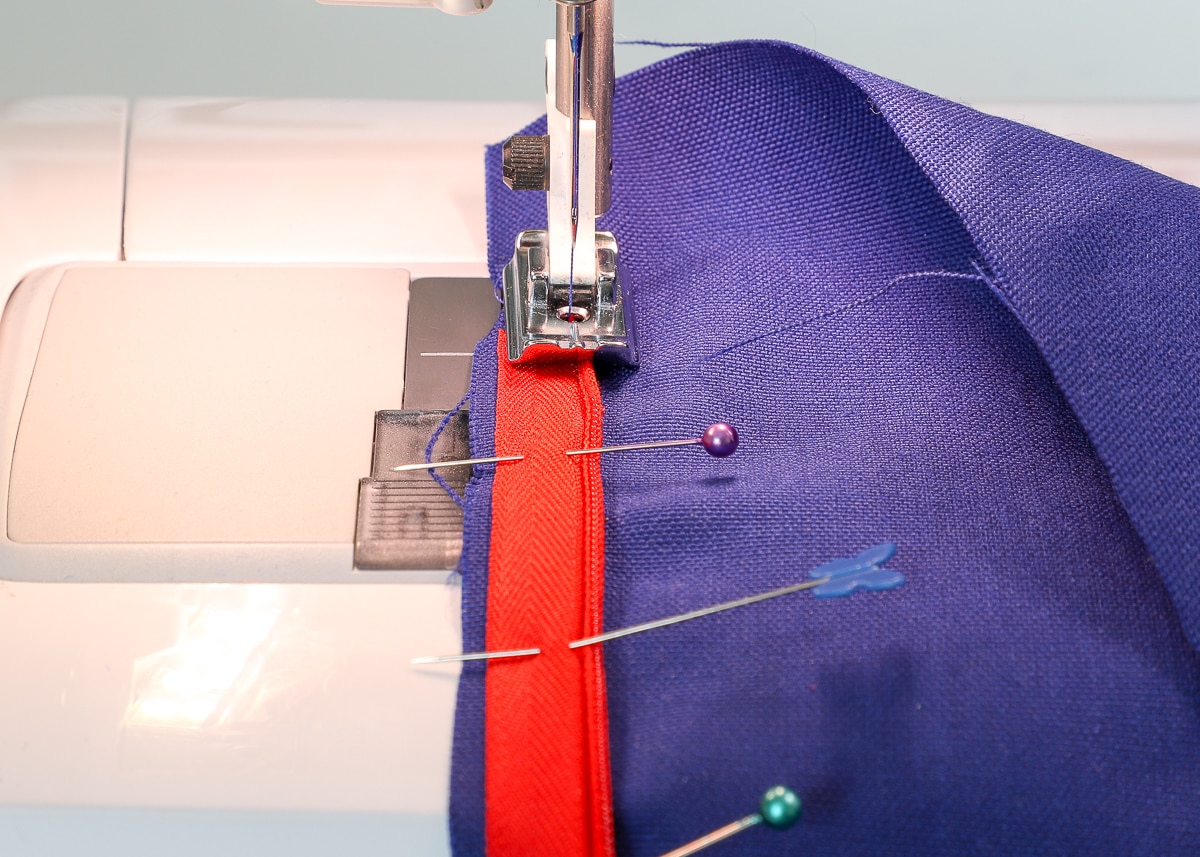
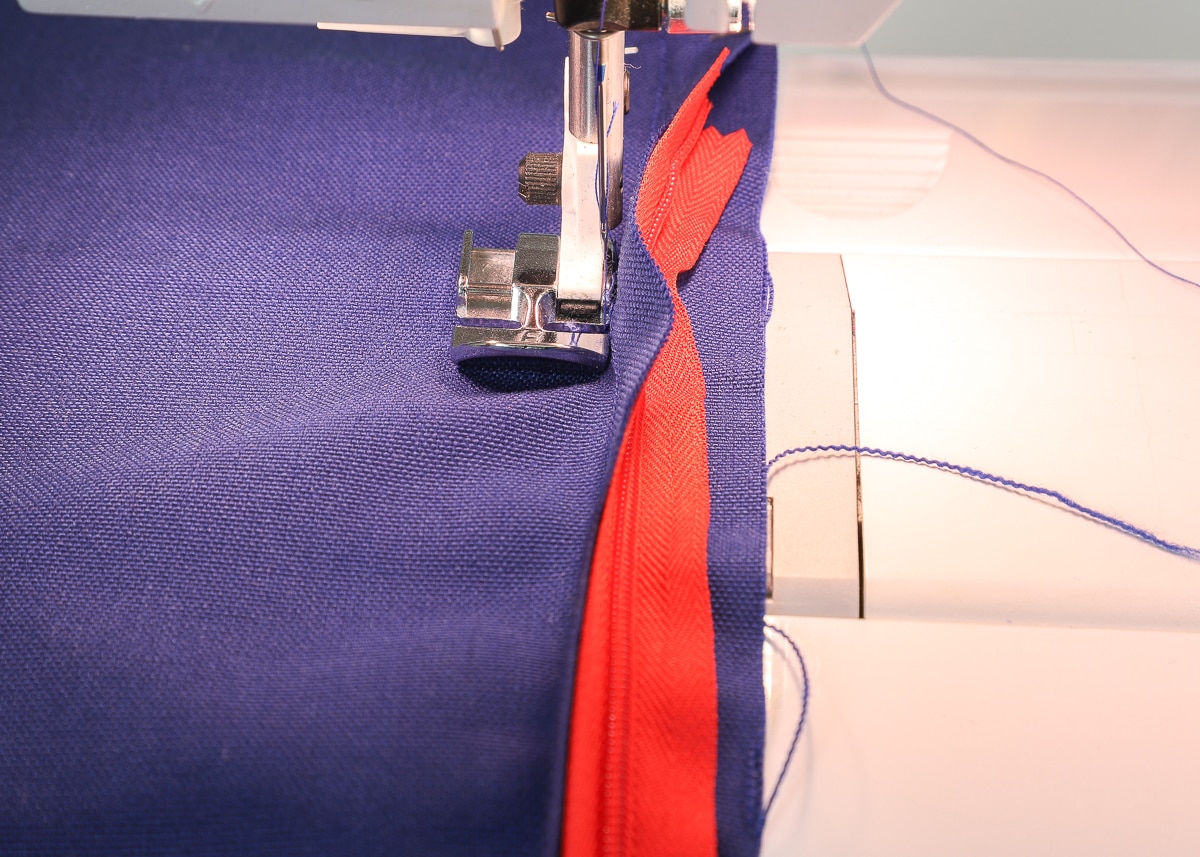
Place your invisible zipper foot onto your machine, and then place the coils under the LEFT-SIDE groove.
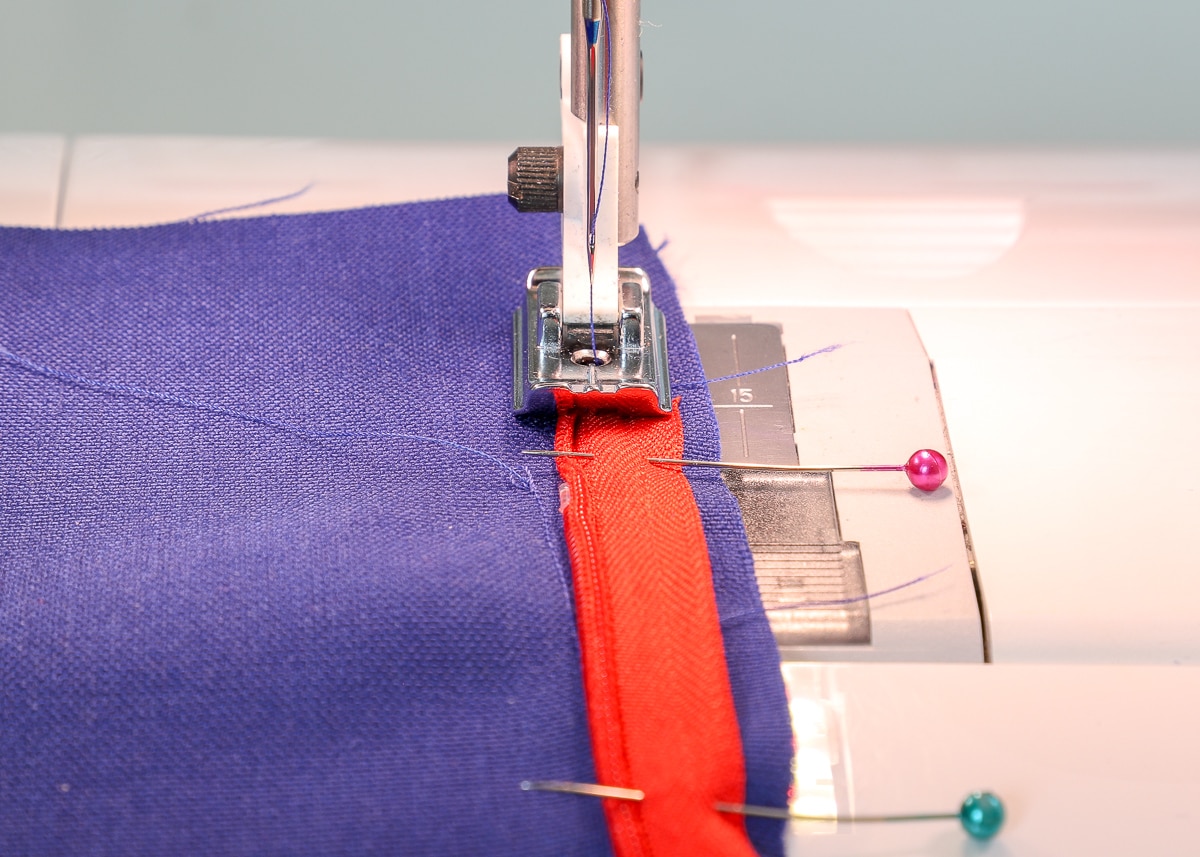
With a normal stitch length, stitch down the length of your zipper. Notice that the invisible zipper foot will pull the coils open (slightly) and the stitch line will go just to the right of the coils!
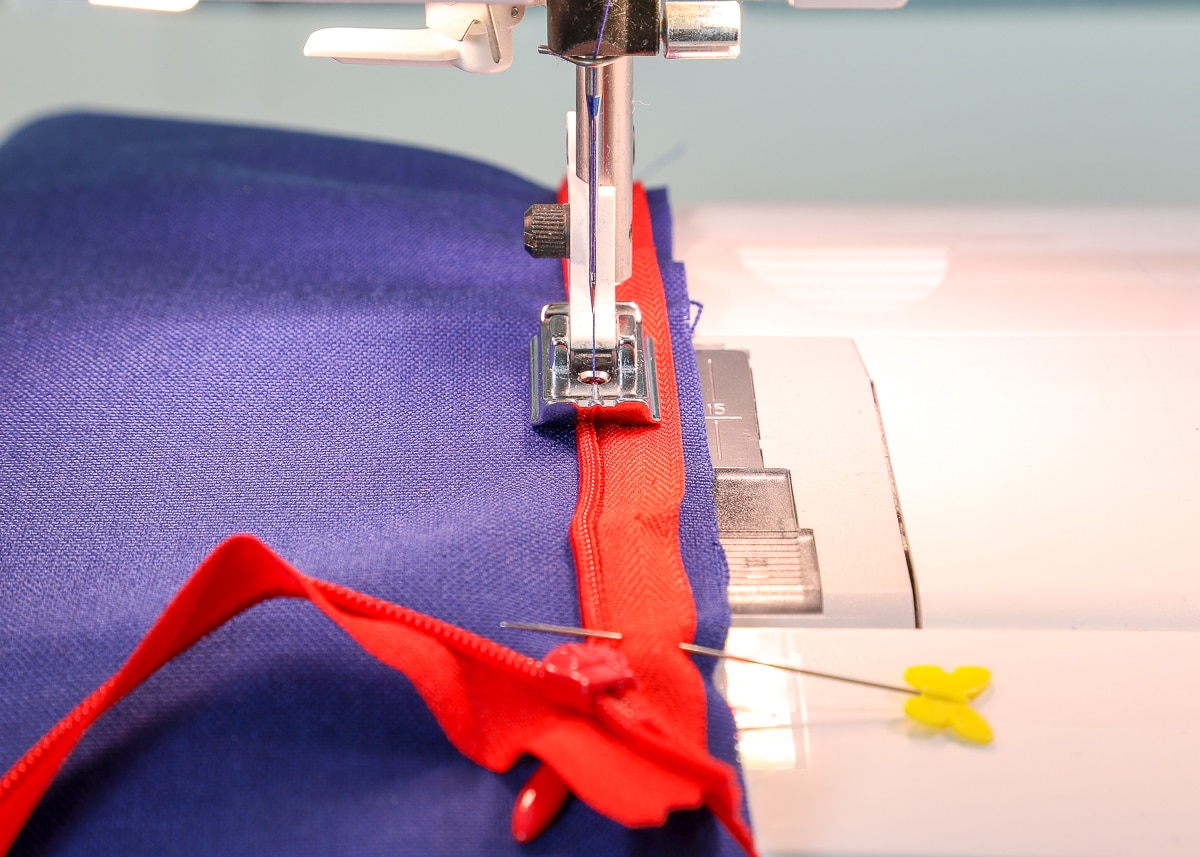
Keep stitching until you reach the zipper pull at the bottom. Backstitch a few times in place and then remove your project from your machine.
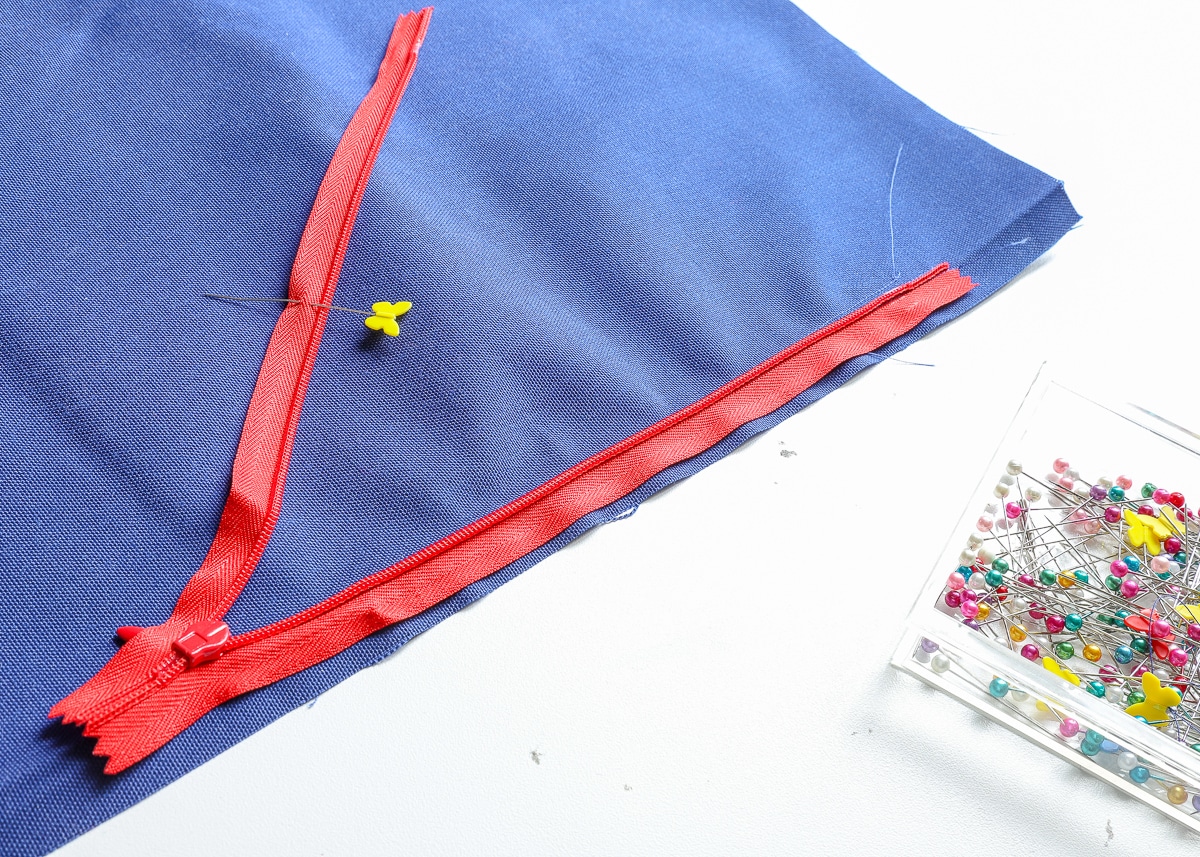
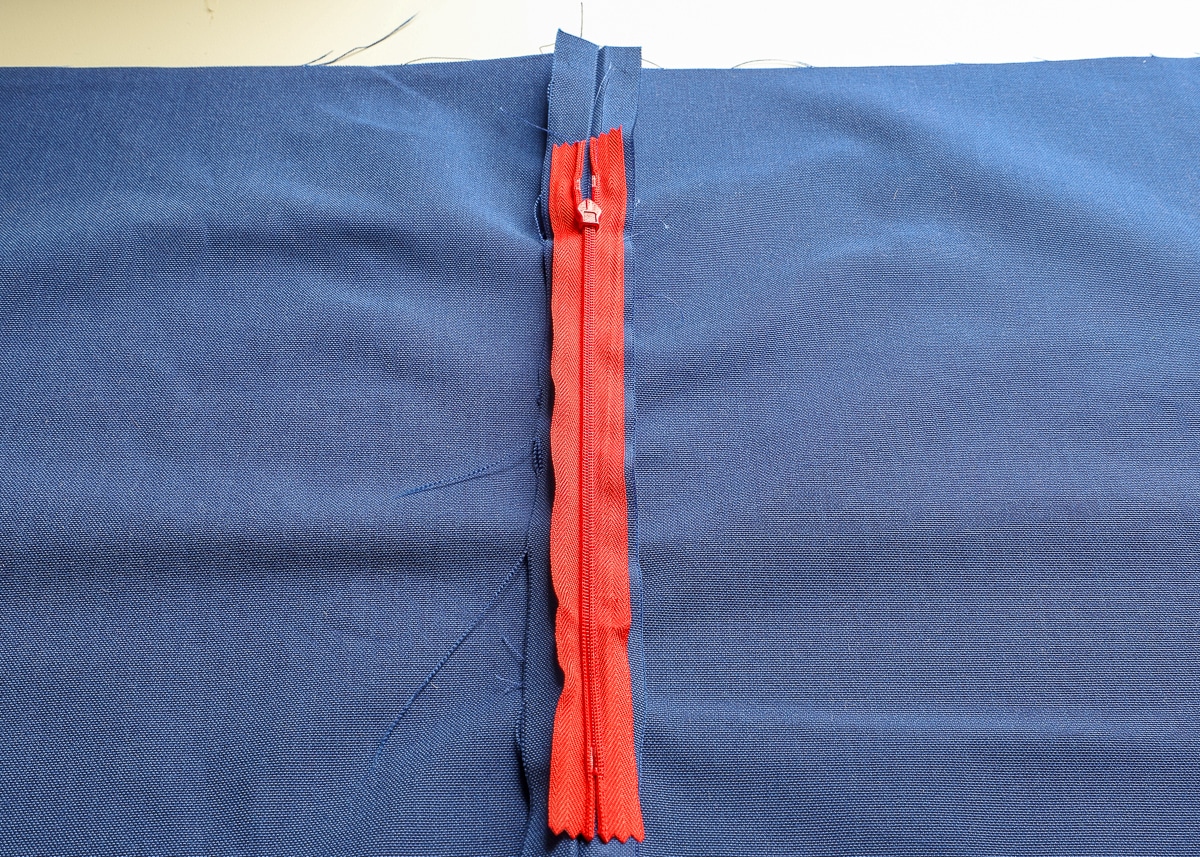
Once you remove your pins, you should now have the first side of your zipper sewn to one side of your pillow cover.
NOTE: In the image below, the RIGHT side of my fabric is facing up.
Now, repeat the exact same steps on the other half of your pillow cover.
Remember, keep saying to yourself: RIGHT SIDES TOGETHER!
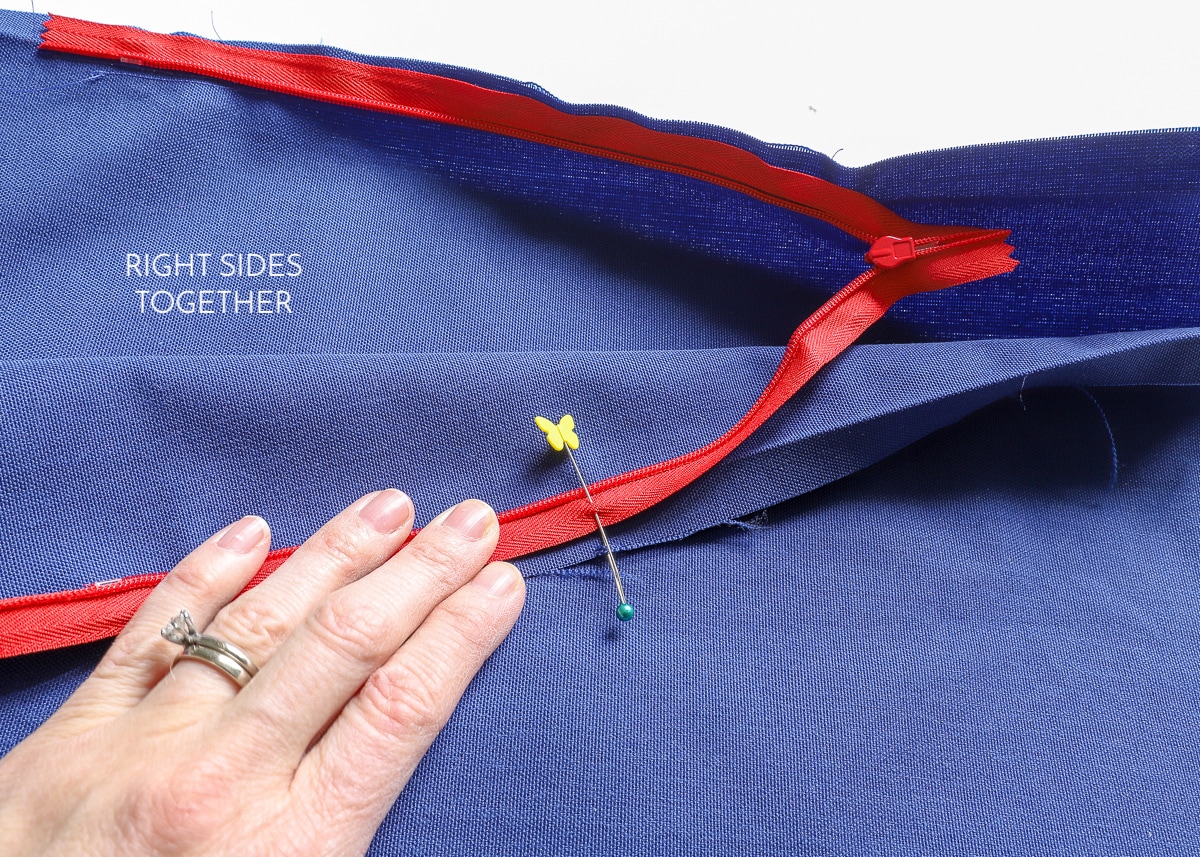
To do the second side, start by placing your second pillow cover RIGHT side DOWN onto the RIGHT side of the first pillow cover. Pull back the top of the pillow cover to reveal the creased edge and center pin. Line up the center pin with the zipper pin, and again, line up the zipper coils along the ironed crease line.
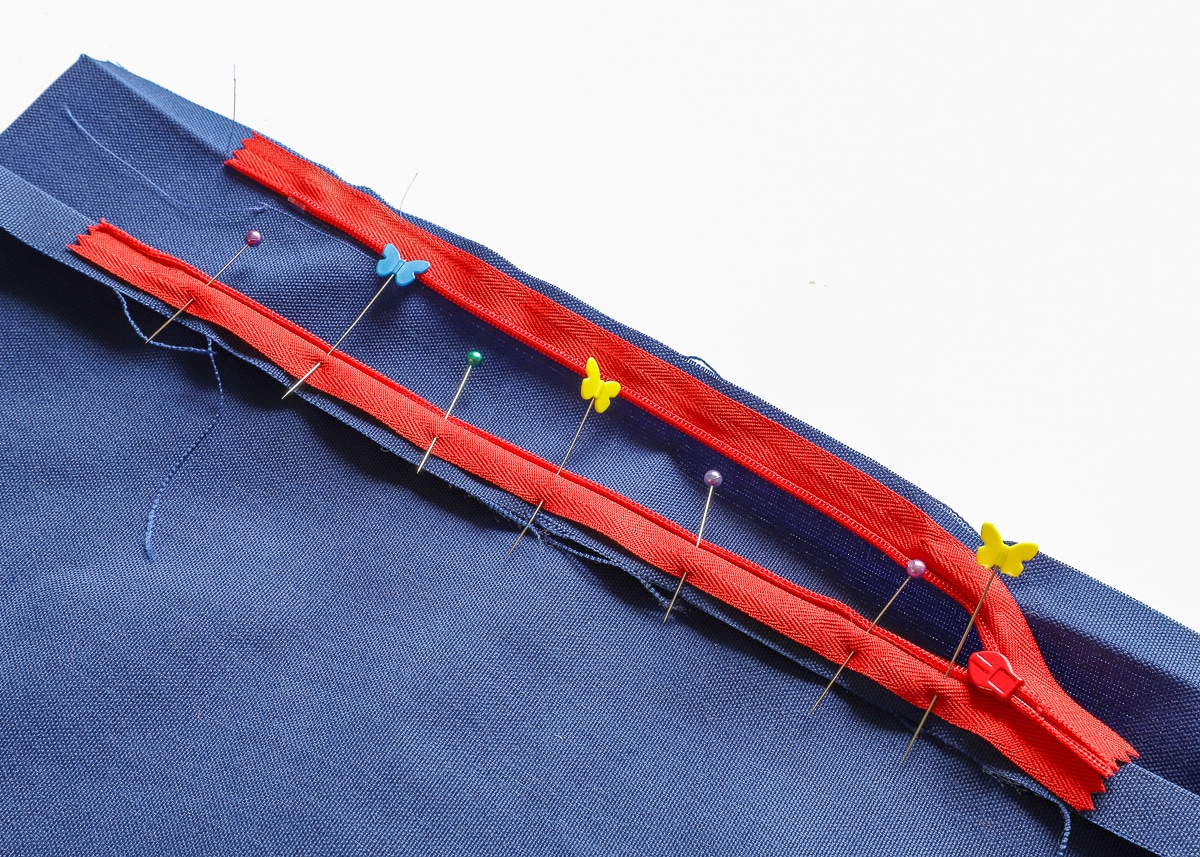
Pin the left side of the zipper in place.
NOTE: The picture below can be a little tricky to sort out visually. My RIGHT sides are together and the zipper is pinned to the inside edge of each pillow cover. The top layer (left side of the zipper) is pulled back/open along that ironed crease.
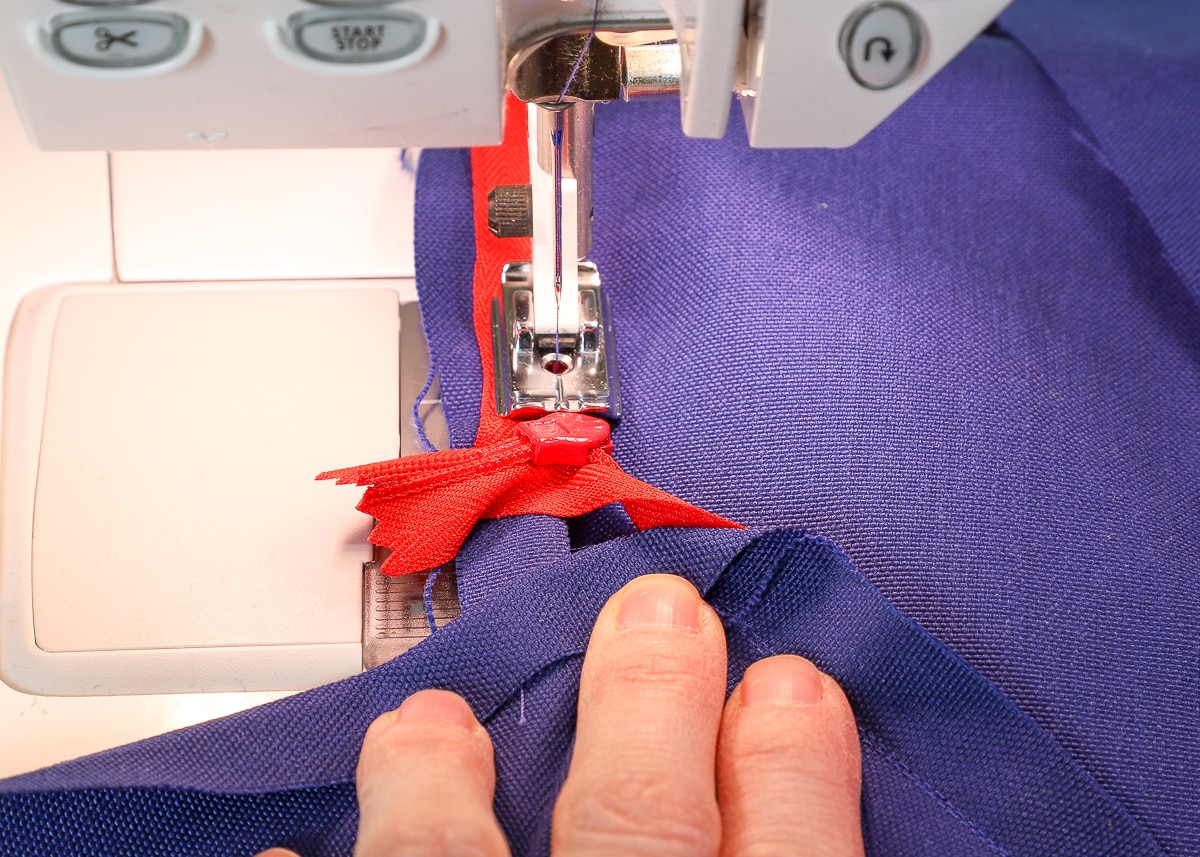
This time, place the coils under the RIGHT side of the zipper foot and sew down the length of the zipper.
Again…stop at the pull and backstitch at the bottom of the zipper.
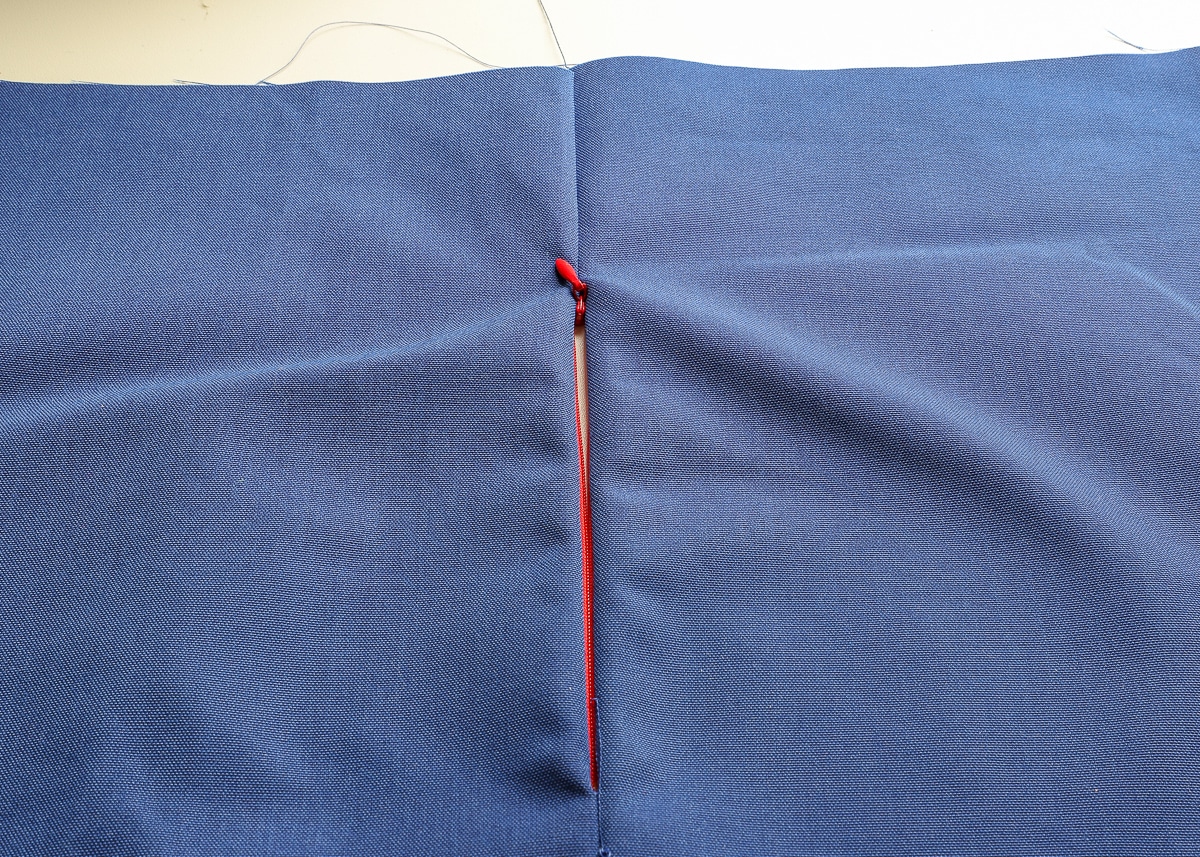
Now…when you lay your two pillow covers side by side RIGHT sides UP and the zipper between them…
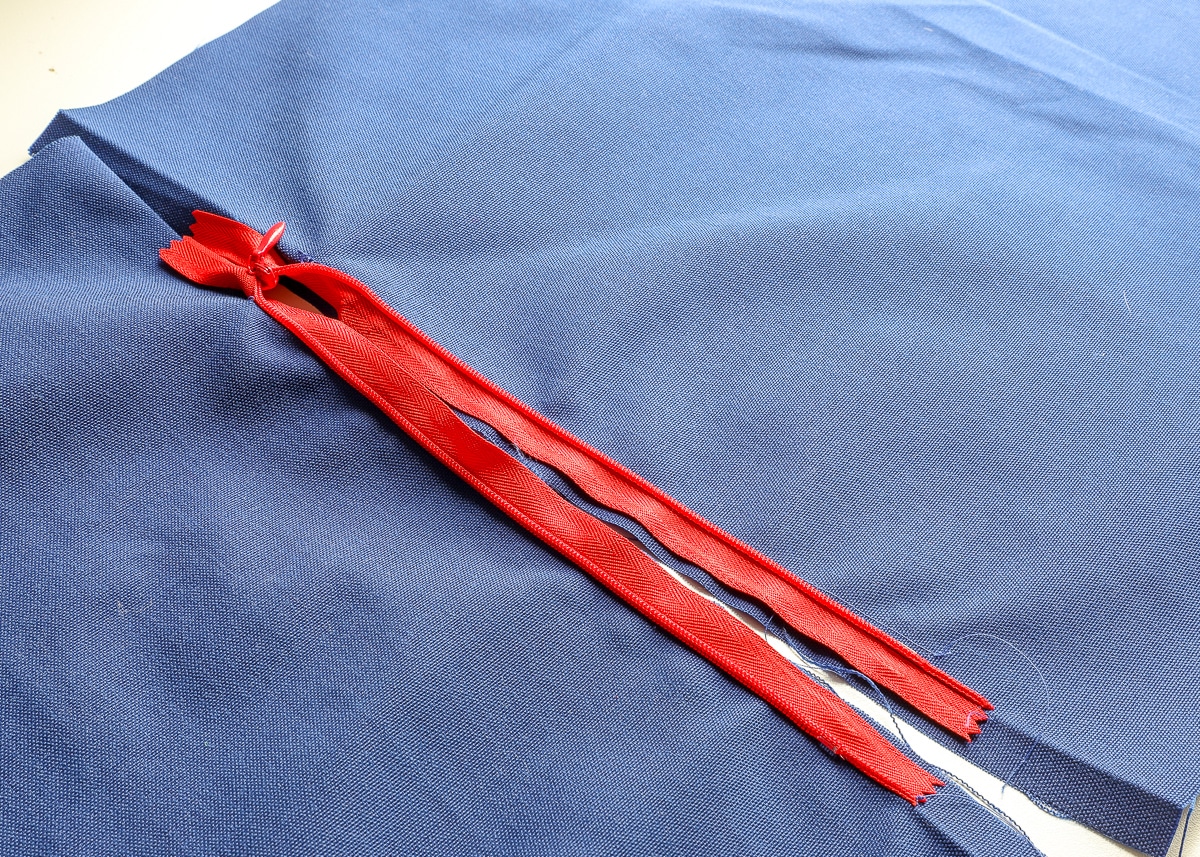
…you will be able to pull the zipper closed to join the two sides together and conceal the zipper!
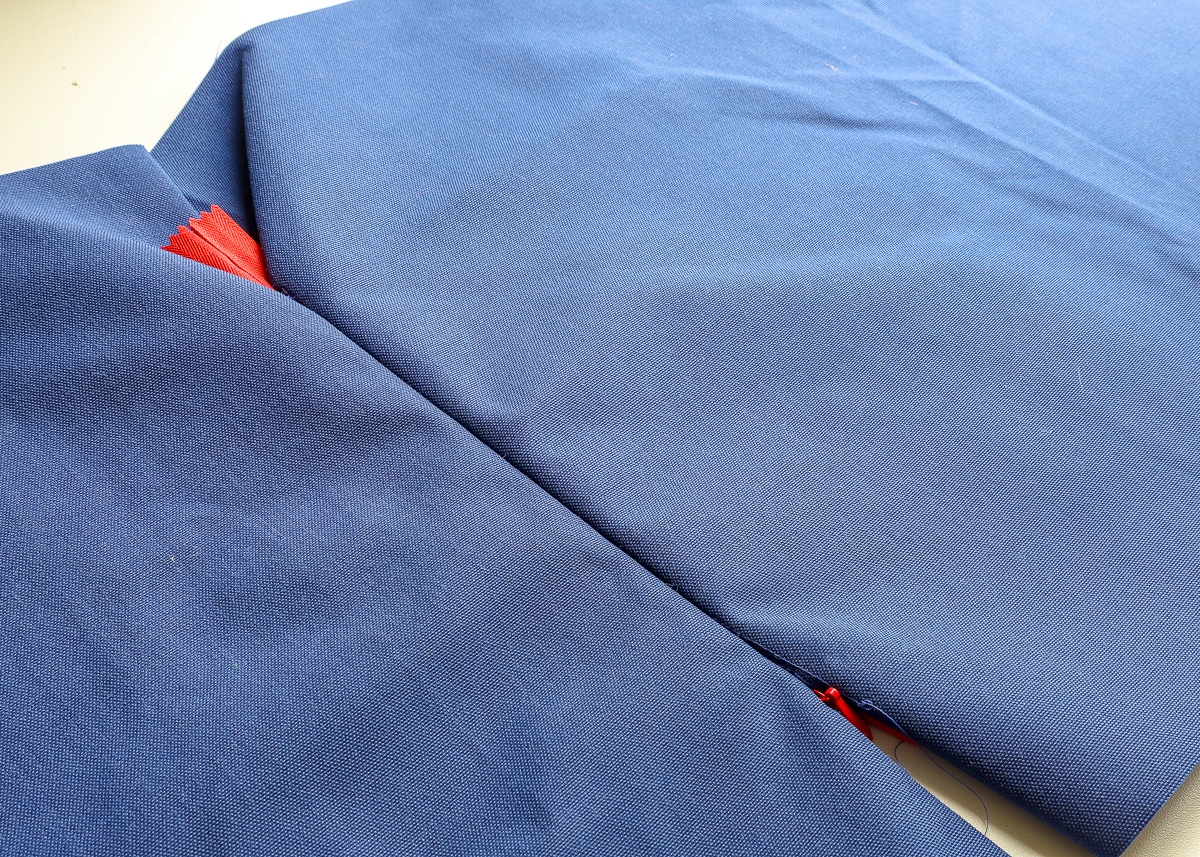
Finishing Off the Zipper Side
Although the pillow cover has the zipper sewn to both sides, you’ll likely notice in the photo above (and on your own project) that the far left and far right sides are open (above and below the zipper). We will need to close those two sides up to finish off the zipper installation!

With the zipper closed up, place your two pillow covers RIGHT sides together, lining up the corners. The zipper should theoretically fold in half between the two layers. You are essentially going to sew from the edge of the pillow cover to just about where the zipper stitching starts…along that original crease line! Note the stitch line on the image below:
In order to get this stitch line nice and straight and to line up with the invisible zipper’s stitch line already in place, you will need to use a regular zipper foot on your machine with your needle moved all the way over to the right. Start at the edge of the pillow covers and sew until you just pass the start of the invisible zipper stitch line.
After you repeat this quick step on the other side/corner, you will now have one solid edge of your pillow cover sewn, edge-to-edge, with an invisible zipper neatly inserted in the middle!
Finishing the Pillow Cover
Alright! You are almost done learning how to sew a pillow with an invisible zipper! The tricky part is behind you (and really, it wasn’t that tricky, was it?!?!) and now you have to sew three straight lines to finish your pillow! Start by opening the zipper. Seriously. Don’t skip this part.
Place your RIGHT sides back together one last time, and sew the remaining three edges together with a 1/2″ seam allowance, as shown below. These are plain, straight-line stitches done with your regular ol’ machine foot!

All sides of your pillow are now fully sewn shut. Before flipping it right-side-out, snip each corner as shown below. (This will reduce bulk and bunching at your corners.)
Then reach into the open zipper (see, I told you you wanted it open!) and turn your pillow right-side out!
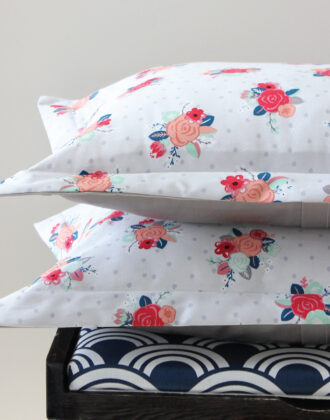
This time, you can say “Taaaa Daaaa!”
The final step couldn’t be any easier: stuff your pillow inside, zip it shut, and add it to your space!
I realize there are A LOT of steps in this post. But if you settle in and follow along, you will see that these pillow covers really do come together quickly. And once you get the hang of pinning the right edges of the zippers to the right edges of the pillow covers, you’ll be churning these out assembly-line style! Admittedly, mine were pre-cut when I sat down to sew. But all 6 pillows took me about 90 minutes total (and that was with a 2-year-old underfoot!) I PROMISE this is something you can do, and before long, you’ll be swapping your pillows out with the seasons!
With the completion of this pillow project, I can now say that I am done with not just one, but two rooms! I’ll be back with that full playroom reveal next week. Then I’ll have our family room reveal for you next month or so! Have a great weekend, my friends!
Megan

37 Comments on “How to Sew a Pillow with an Invisible Zipper”
Please tell me about that coffee table in photo 2.
Hi Gretchen!
It’s this table from Target. We are really happy with the size, height and design of it (especially for a playroom table), but the “wood” top is pretty cheap. I figured it would be based on the price, but just wanted to let you know that it’s definitely not wood, or even good faux wood. The table goes on sale fairly regularly, so maybe watch the price a bit!
Hope that helps!
Megan
Megan… this is an amazing tutorial. I’ve always been afraid to do an invisible zipper, but now I’m not! Thanks for sharing! Don’t know if you join in on any link parties, but the new one on the block is Homestyle Gathering. We would love to have you come and link-up!
This was SO helpful! I have been making pillow covers for quite some time but have always just done an envelope back because zippers are scary! LOL! I will try this out for sure! Thank you!!!!
Ooh, nice coffee table and I love the cushion fabric combo. The black and white checks would be just right in my house, I’ll have to go hunting. I have a Husqvarna too and I’d forgotten what that foot was for so thanks for the reminder!
Love this post and the beautiful presser foot organization. 🙂
First of all, I never write comments…. Ever! But your post was so amazing that I had to make sure you know how much you have helped me! I’m terrified of zippers and after reading all your steps, I feel confident that I can conquer my pillows! Thank you for being SO detailed. I loved that you had visuals each step of the way. Thank you so much! Great post!
Hi Julia,
Thanks for leaving such a great comment – I am thrilled to hear you found my tutorial helpful!
Good luck with your sewing!
Megan
dumb question, but is there any reason why I cant cut one piece instead of two, and thereby join with three seams instead of 4?
Hi Molly,
Yes, you can certainly do it that way, but there are a few things to keep in mind:You will need to adjust your measurements since one side won’t have seam allowances.If you’re doing a small pillows, it could be tricky to get the two sides to reach to the zipper – you increase your chances of sewing over the middle of your pillow by accident. (hard to explain in words).You will have seams on 3 sides and not one on your finished project – not a huge deal but something to be aware of Hope that helps and good luck!Megan
I found this during an internet search for sewing invisible zippers. This is the best and most thorough explanation. I sew pillows with zippers all the time, but this method was the most efficient and enjoyable. I stayed up late last night to make 5 pillow covers and feel very satisfied this morning. Thank you!
Wow, Bonnie!
Thanks so much for taking the time to circle back and leave such a kind comment. I am far from an expert sewist, so I am often reluctant to put sewing tutorials out there. I am thrilled to hear this method meets the mustard for others, especially since it’s my favorite way to do it too!
Congrats on your new pillows!Megan
I DID GREAT UP TO THE POINT WHERE I ACTUALLY INSTALLED THE INVISIBLE ZIPPER. The zipper showed on each side of the crease and I had a gap at both ends of the zipper. It definitely was not invisible. This is of course my first attempt at it. I was hoping for a much better project since I am giving them as a wedding gift. Oh well, maybe the second one will turn out better.
Hi Mary,
I am sorry your pillow didn’t turn out as you were expecting. I can’t say what went wrong for you without seeing the project, but here are some things to consider:As far as the gaps on either side of the zipper, are you using an Invisible Zipper foot? It makes a huge difference compared to a standard zipper foot.The gaps on the ends of each zipper can be closed off by sewing the sides of your pillow shut further into the pillow center.Hope you kept at it!Megan
Thank you this was a life saver on a last minute project!!
You are so welcome! Glad my instructions helped!
Have a nice day!Megan
This is the best tutorial I have seen on invisible zippers! I’m getting my fabric out! Thank you so much!
I have an invisible zipper foot. I have tried it on several tutorials and it does not sew close enough to the zipper.It still shows some of the zipper tape no matter what I do. I have to use the end of my seam ripper to hold against a regular zipper foot to get close enough to stitch in the proper place! Am I the only one. I have been sewing for 40 years and know what I am doing.
HI Tracy!
Hmmm…I am certainly not an expert sewist, so I’m not sure I have any tips you likely haven’t already tried. My only other thought would be if you need to move your needle (right or left) closer to the zipper?
Have you tried researching your particular machine or foot to see if there is a trick?
Sorry I don’t have a better answer here! Please keep me posted if you figure it out!Megan
Amazing tutorial. Thank you so much for sharing.
You are most welcome! I hope you give this project a try!
Have a great day!Megan
Megan – You are an amazing lady! How you achieve all this fantastic stuff with constantly moving and bringing up three children is beyond me!
Your tutorial on the Invisible Zipper is first class. Like most people, I have an aversion to putting in zips. I have done a few (always with instructions by my side) but have never tried an invisible one. I need to check all my machine feet to see if I have one. Great job.
I also follow everything you post on the Cricut Maker. I am still very much a beginner and need to spend more time mastering this machine.
Kind regards,
Frances, Melbourne, Australia.
Hi Frances!
Thank you for such a kind comment – I am so thrilled to hear you find what I post helpful and useful! Don’t ever hesitate to reach out with questions as you try some of my projects!
Thanks!!Megan
Beautiful tutorial! I want to make a 20″ square finished size pillow. And I like a well stuffed pillow so I have 22″ down filled pillow inserts to use. What size would you suggest I cut the fabric, using 1/2″ seam allowances? Thanks. (I was thinking cutting the fabric 21″ or 21 1/2″ for a little more ease.)
Thank you!! When I asked my knitting circle about whether I should try making a pillow cover with a zipper, they said, “NO, take it to a tailor, it’s way too hard!” I don’t make clothing or read patterns but I am decently confident with my circa 1957 sewing machine.
Your really helpful tutorial helped me make two pillow covers that look really neat and tidy. I don’t have the special feet but I was still able to make a seam that was close enough for me. Thanks for the great directions that gave me the confidence to try and succeed. 🙂
Hi Anna!
I am so sorry I am just now getting to your comment, but I just wanted to say that I’m so thrilled to hear this tutorial worked well for you! Every time I make pillows, I pull it up and use the exact same steps with great results every time! I love it worked for you too!
Enjoy your new pillows!
I’m a visual learner and I’ve never used my invisible zipper foot. I always struggle with my regular zipper foot. This tutorial is spot on! Thanks!
– Danielle K.
Mountain House, CA
Hi Danielle!
I am so glad you found this tutorial helpful! Even now, whenever I go to make new pillows, I always pull up this post since the pictures help me orient everything correctly!
~Megan
Oh my gosh, this looks like something I can totally do! Have to go buy an invisible zipper. Your directions were wonderfully simple and easy to follow. Thank you for making this post.
A sua explicação é simplesmente maravilhoooooosa! Muito obrigada.
You are most welcome!
~Megan
Perfect tutorial with clear and detail instructions; including photos with descriptions. Very happy to have stumbled onto your website.
Thanks 🙂
Megan,
Thank you for the excellent tutorial! Your instructions are very clear and the pictures so helpful. Despite your clear directions, I managed to make a few mistakes (I seem to have some kind of spatial dyslexia when it comes to sewing). But in the end I triumphed and have a beautiful new pillow to match my remodeled living room. I wish I could upload I picture!
Purchasing the invisible zipper foot was key!
Thanks for your help!
This was so well done! I appreciate the help a lot!
Hi, When you mention you cut your cover the same size as the insert to be sung… does that mean this includes your 1/2″ SA? There for it’s about 1″ in each direction smaller so that it fits snug with the insert?
Thank you for this tutorial! And bless you for writing out the steps and including pictures, instead of just doing a video.
This was incredibly helpful!!
Megan, I loved your tutorial about invisible zippers for a pillow cover application. I also appreciate the color of fabric you used for the demonstration. So many use patterned fabric and the matching zipper making it very difficult to see. Thanks so much. I am very excited to make my first pillow cover.